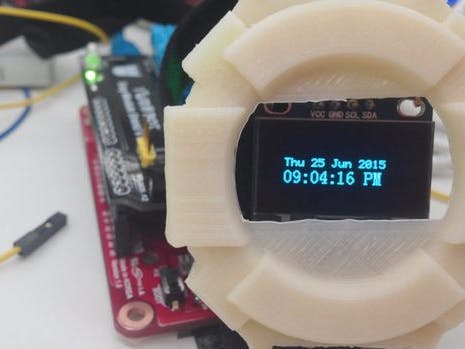
A smart watch becomes the most significant item in a wearable device category.
I did use the mbed web complier. I wish you use the mbed web complier.
Step 1: Parts
- WIZwiki-W7500 at WIZnet : WIZwiki-W7500
- OLED 128x64(SSD1306/i2c) at Adafruit :http://www.adafruit.com/products/326
- Easy module Shield at YWRobot(only china site) : YWRobot
- Jumper cable : connect OLED and easy module Shield
Libraries
- SSD1306 Driver
- Ethernet library (made in WIZnet)
Apps
- mbed web complier : LINK
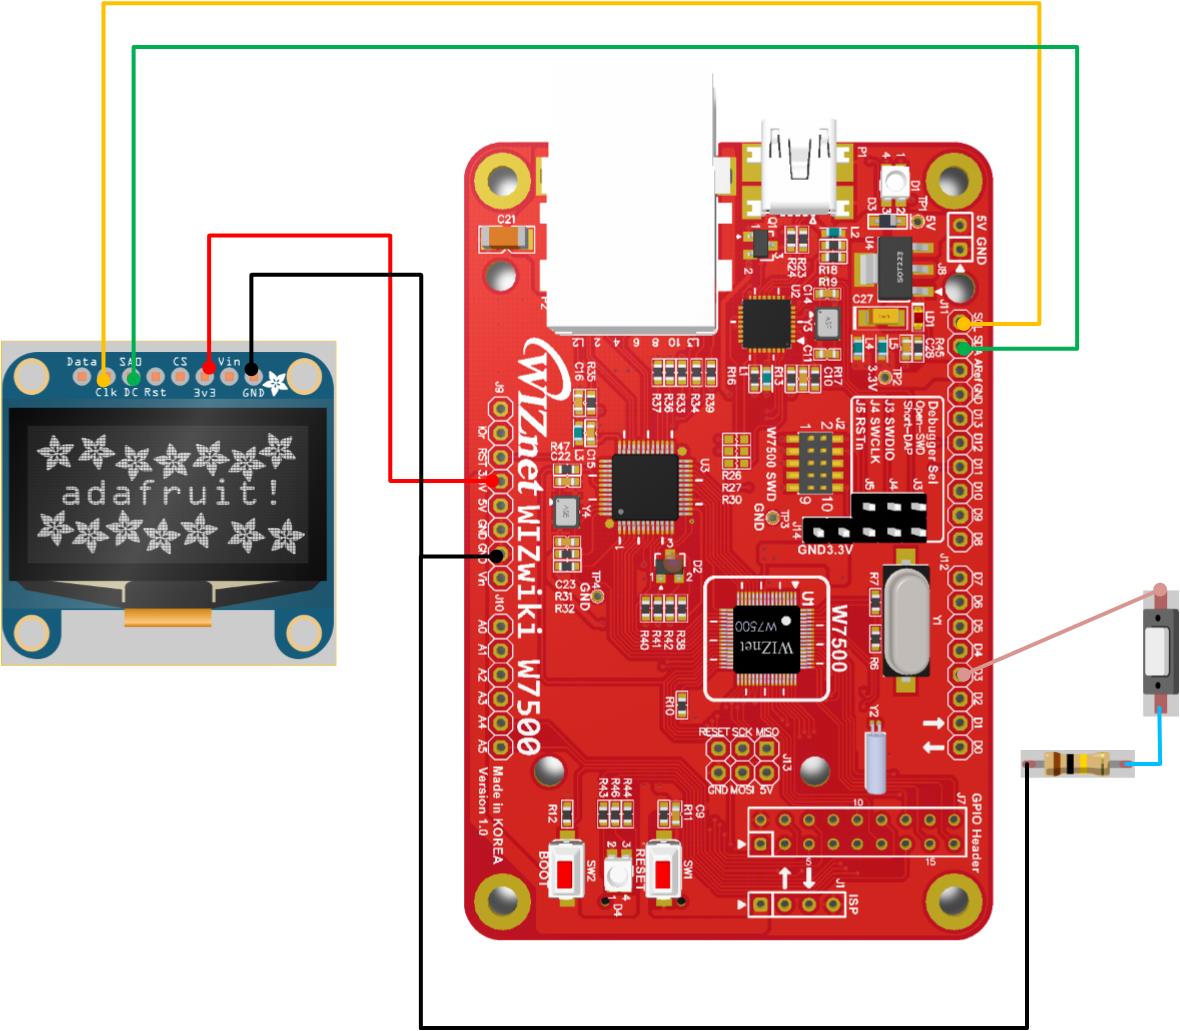
Step 2: Hardware
WIZwiki-W7500 OLED
SCL PA_9 SCL
SDA PA_10 SDA
GND GND GND
VCC VCC VCC
WIZwiki-W7500
Button PC_0
Step 3: Realize the smart clock
1. The Network time obtain from NTP Server using SNTP Protocol
2. The initial value of RTC write the bring data.
3. The Clock count using setting value.
Step 4: Mbed web complier and CMSIS-DAP
You can download the firmware using the mbed web complie.
1. When you connect the USB cable to the WIZwiki-W7500, PC recognized as a removable disk. Removable disk name is MBED.2. You “drag and drop” or copy the firmware to the removable disk, the firmware writing progress has completed.
3. After completing the firmware writing, open to check the removable disk.
4. If “fail.txt” file is exists in the removable disk, it means writing the firmware has failed.
5. After pressing the Reset button (SW1) of WIZwiki- W7500, please repeat the steps from 2.
Step 5: Design the case of clock
3D print : LINK
Step 6: Confirm the operation
Step 7: Source code and reference site
- smart watch source code : LINK
- ethernet source code : LINK
- 3D print : LINK


Comments
Please log in or sign up to comment.