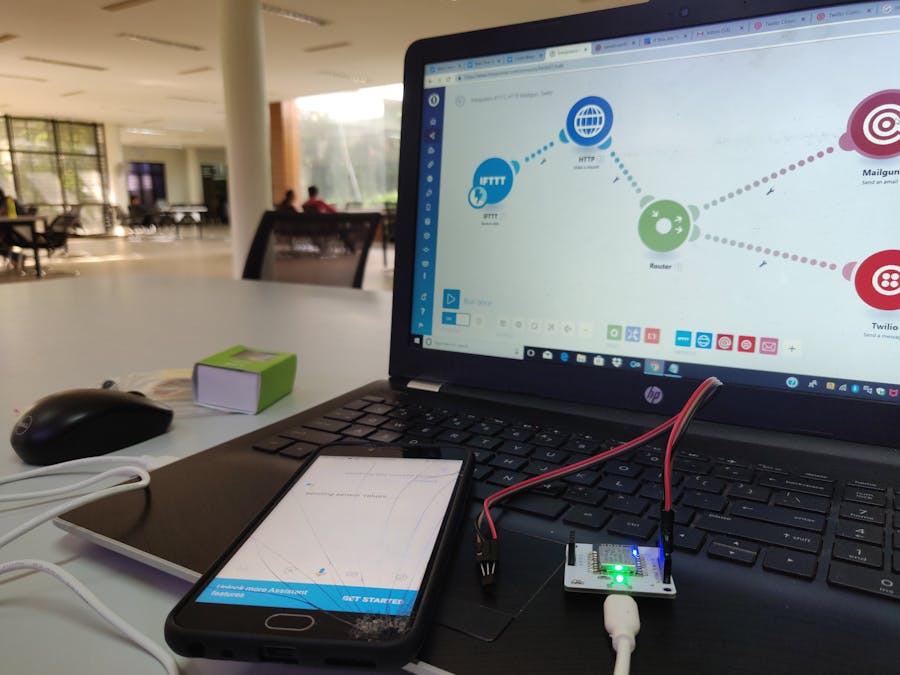
Imagine a scenario where you own a pharmaceutical industry in which you have to monitor the temperature according to the government laws....If you are far away from your industry and you need your sensor values you have to login to your bolt cloud which takes time and if you want to check your sensor values periodically logging in your cloud account everytime becomes tedious.With the help of BOLT IOT we can get the current sensor values immediately through google assistant!!!
Let's get into the project:-)
1.HARDWARE CONNECTIONS:
NOTE: Make sure your device is offline.
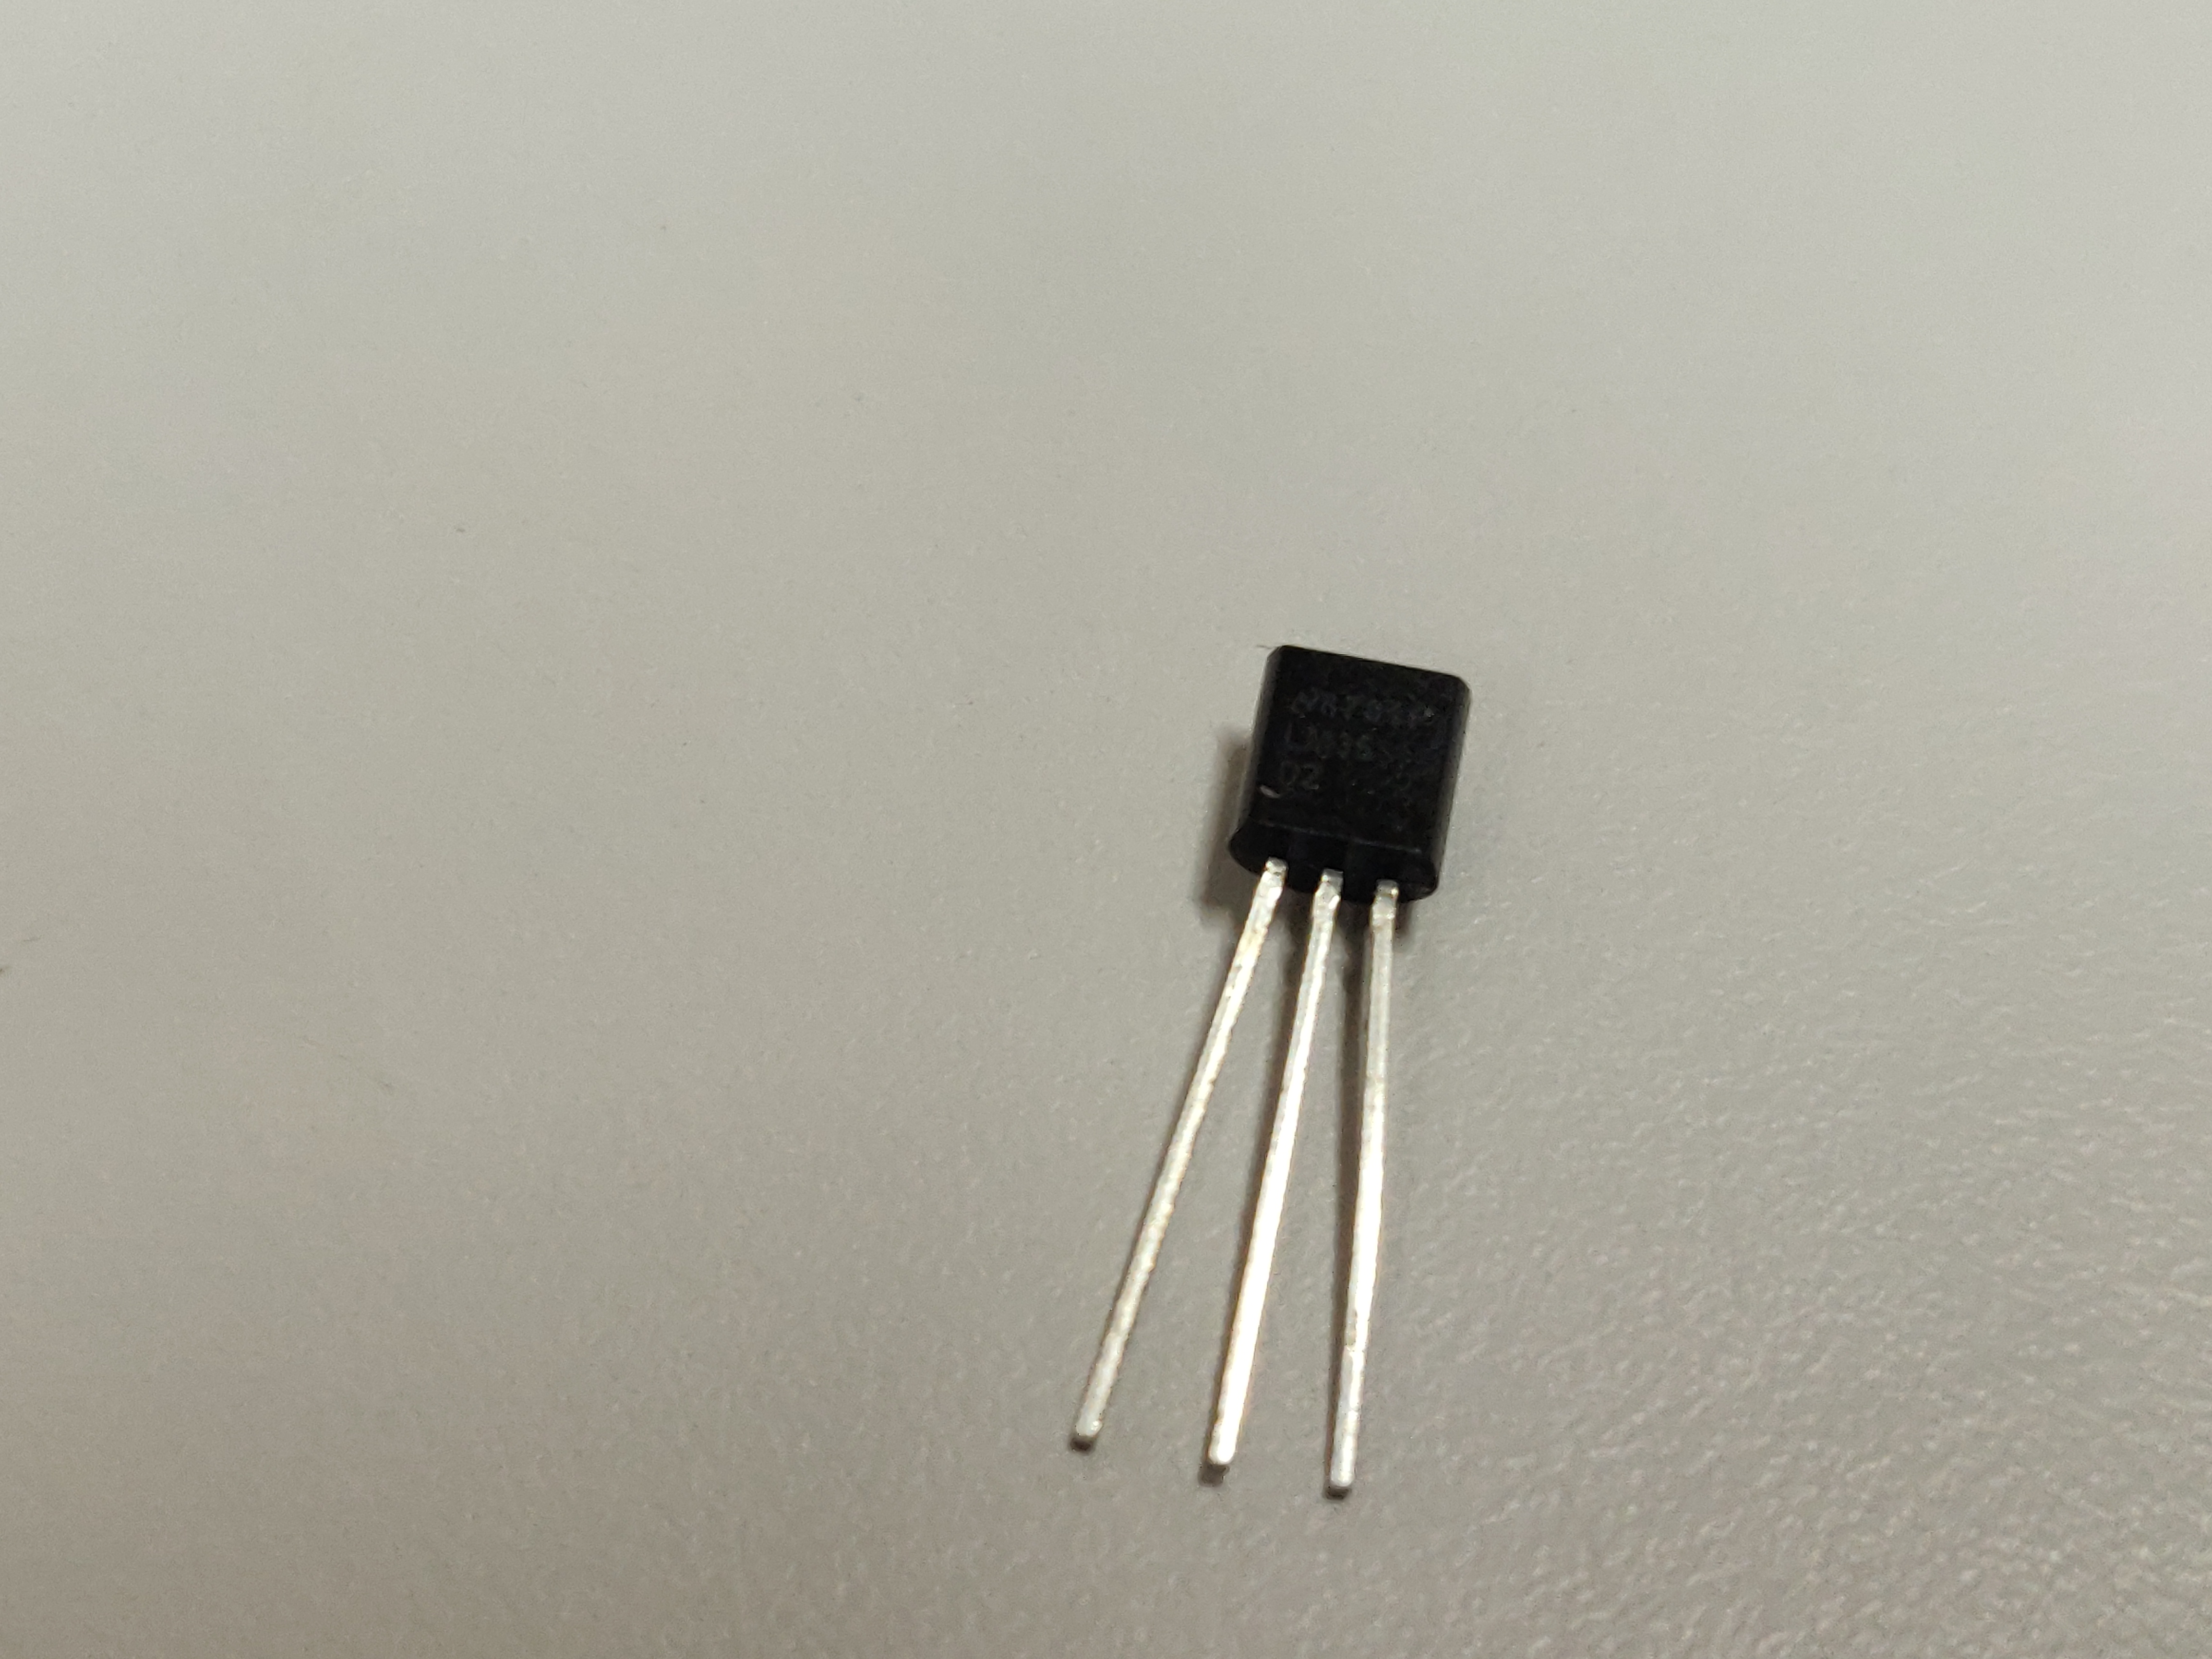
Step 1: Hold the LM35 sensor such that you can read the LM35 on it.In this
position,
- first pin indicates VCC(5V supply)
- second pin indicates output(A0-analog pin)
- third pin indicates ground(gnd).
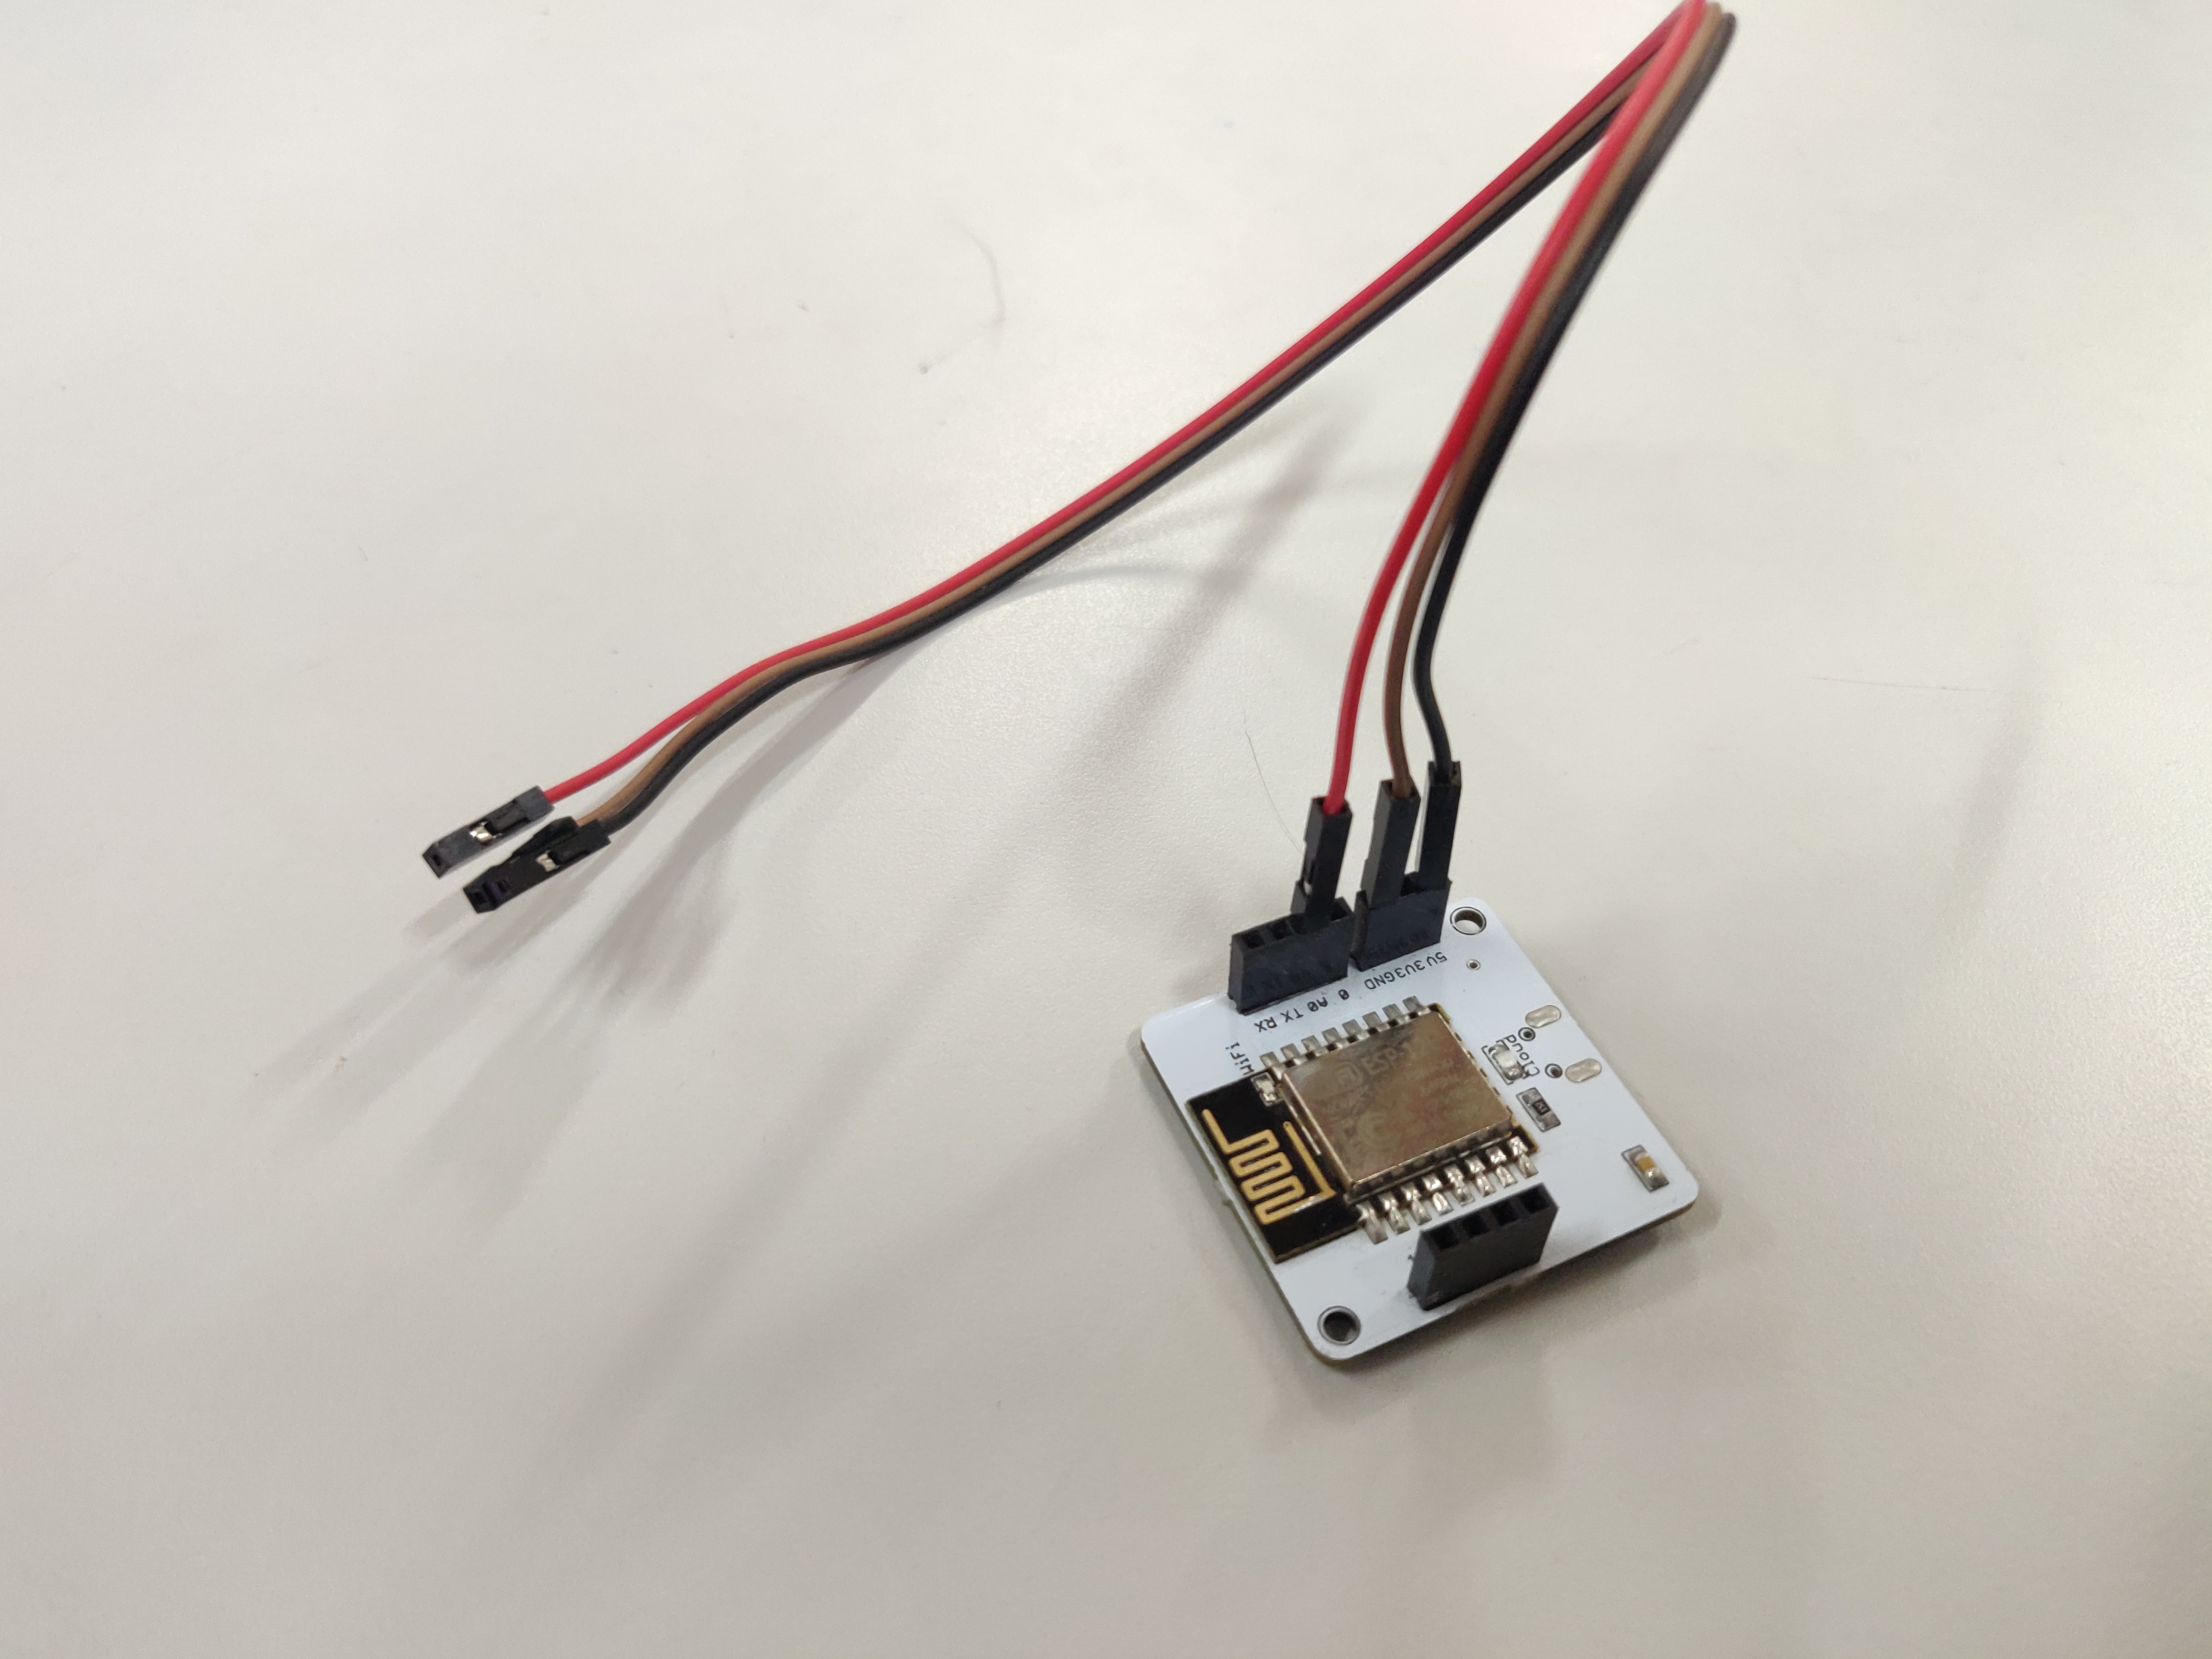
Step 2: Take the male-female connecting wires and connect the male wires to the
5V supply, gnd and A0 pin in the bolt wifi module.
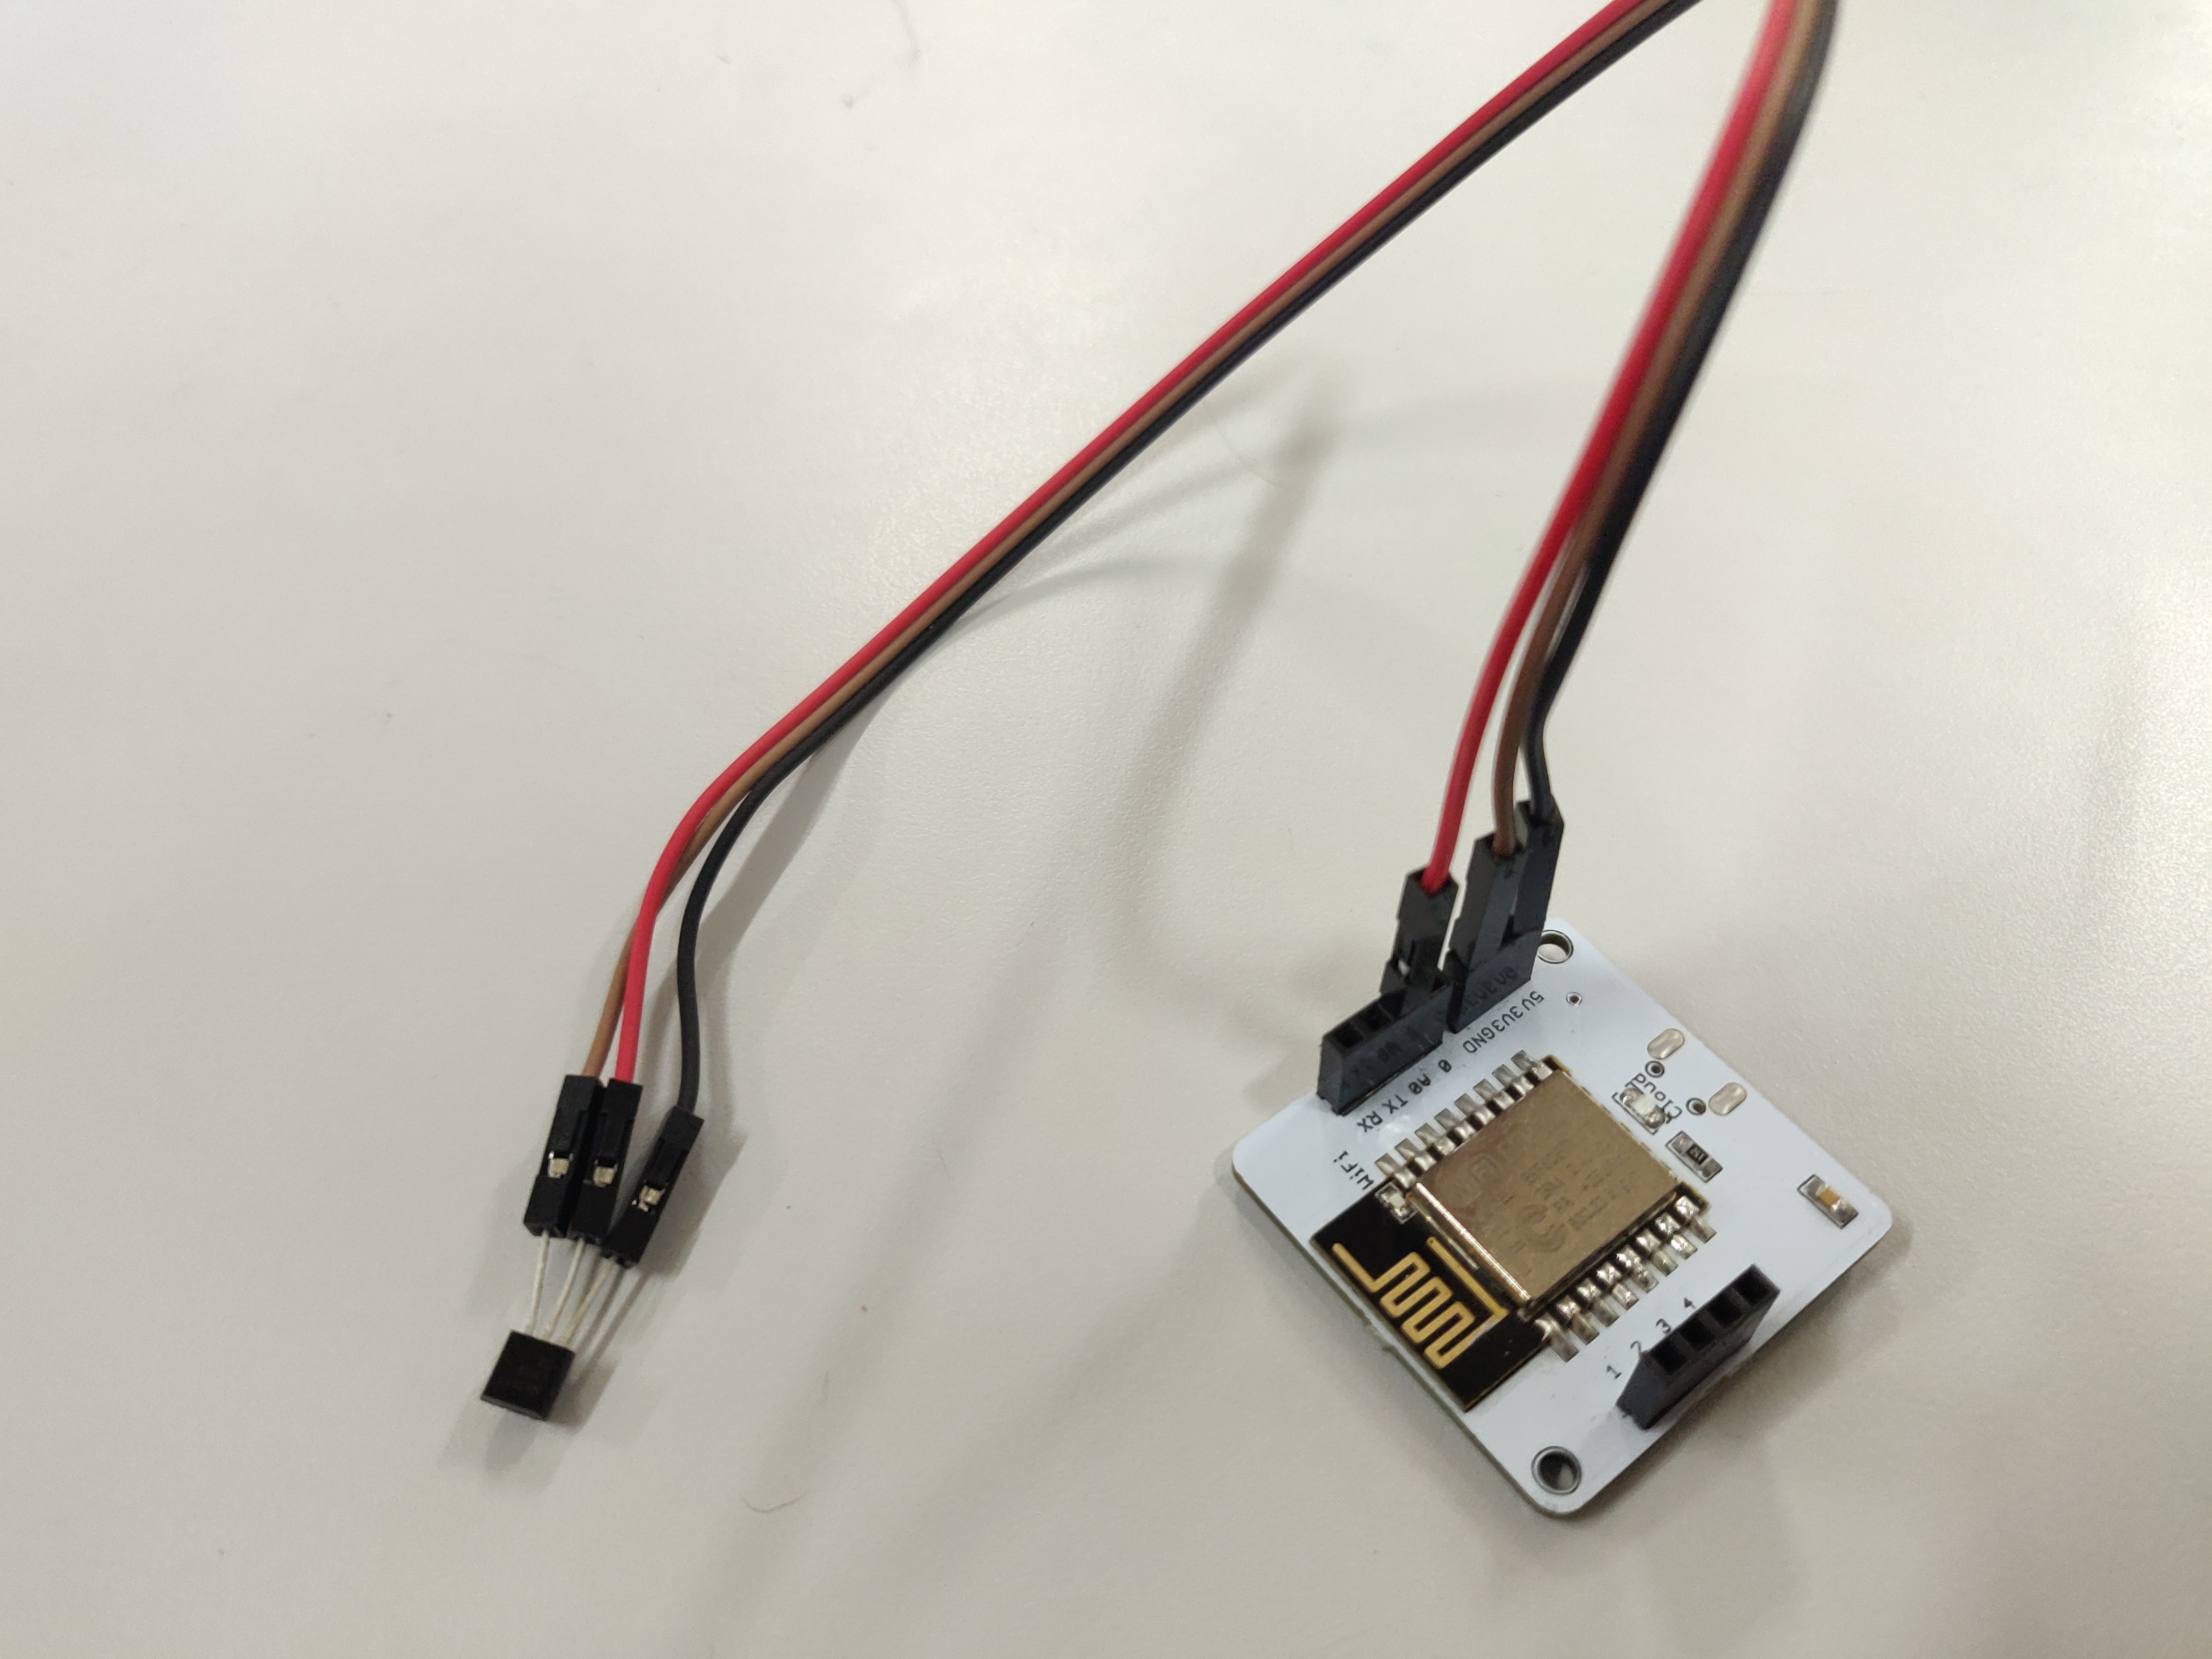
Step 3:
- Connect the 5V pin from the bolt wifi module to the supply pin of the
sensor(i.e.First pin of the sensor)
- Connect the A0 pin from the bolt wifi module to the output pin of the
sensor(i.e.Second pin of the sensor)
- Connect the gnd pin from the bolt wifi module to the ground pin of the
sensor(i.e.Third pin of the sensor)
Step 4: Finally connect the USB cable to the bolt wifi module and make sure
your device is online.
2.GETTING THE DOCUMENTATIONS:
2.1. BOLT CREDENTIALS:Step 1: Click the link below to login to your bolt cloud.
https://cloud.boltiot.com/login?next=%2F
Step 2: After login make sure your device is online.This page contains the device
id.Make a note of it.
Step 3: In the dashboard go to the API section.Your api key will be visible on this
page.Make a note of it.If you have not generated the api key yet select the
enable radio button click on "Generate new api key" button.
NOTE: Dont share your api key with anyone.
2.2.MAILGUN CREDENTIALS:
Step 1: Create a mailgun account.If you have not created your account click the
link below to create your account.
After login your page should look like this.
Step 2: In the mailgun dashboard, go to settings section.
In the settings drop down box, click on "API security" option.
The private api security key will be available in this page.Click on the view button
and make a note of it.
Step 3: In the mailgun dashboard, go to "Sending" option.
In the sending drop down box, click on "domains" option.
Make a note of the domain name which is visible on this page.
NOTE: Dont share your api key and domain name with anyone.
2.3.TWILIO CREDENTIALS:
- Create an account in TWILIO.If you have not created an account click on
the link below to create an account.
After login your page should look like this.
- Make a note of your TRIAL NUMBER, ACCOUNT SID visible on the dashboard section in the login page.
- Your AUTH TOKEN will not be visible.Click on the "Show" button and make a note of it.
3.INTEGROMAT:
3.1.Creating an account on Integromat:
Step 1: Create an account on Integromat.If you have not created an account
create your account by clicking the link below.
https://www.integromat.com/en/
After login your page should look like this.
Step 2: Click on "Create a new scenario" on the top right corner.
Step 3: Search for IFTTT, HTTP, Mailgun, Twilio in the screen and select them.
Step 4: Finally, click continue on the top right corner.After clicking continue your
page should look like this.
3.2.IFTTT MODULE:
Step 1: Click on the question mark enclosed within the white circle and click on
the IFTTT module.
Step 2: After clicking on IFTTT module select "Receive data" option.
Step 3: Give a suitable webhook name of your choice by clicking on the add
button.Click on the save button to save that name.
Step 4: Your webhook URL will be generated below the name.Click on
"copy address to clipboard" option to save the URL for future purpose.
After copying the URL click on OK button.
You have successfully created your IFTTT module!!!!!!
3.3.HTTP MODULE:
Step 1: After creating IFTTT module click on "add another module" which will pop
when you place the cursor on IFTTT module.
Step 2: Now click on "HTTP" module.
Step 3: After selecting HTTP module click on "make a request" option.
Step 4: In the URL section copy and place the URL below and replace it with your
respective credentials.
https://cloud.boltiot.com/remote/api-key/analogRead?pin=A0&deviceName=BOLTXXXXXXX.
The above link fetches sensor values from LM35 temperature sensor.
Credentials to be replaced:
know how to access your bolt api key.
Credentials to know how to access your device id.
Step 5: By default the method will be "Get".If it is not selected then select the
"Get" method.
3.4.ADDING ROUTER TO HTTP MODULE:
Step 1: After selecting the HTTP module, select "add another module" which will
pop when you place the cursor on the HTTP module.
Step 2: Search for "flow control" and select it.
Step 3: After selecting flow control click on the "Router" option.
Router module will be created successfully.
3.5.MAILGUN MODULE:
IMPORTANT NOTE: FOLLOW THIS STEP ONLY WHEN YOU HAVE AN ACCOUNT
IN MAILGUN.OTHERWISE SKIP THIS STEP AND GO TO
3.6.EMAIL MODULE.
Step 1: After creating router module two question marks enclosed within white
circles will be displayed.Select the first question mark and click on
mailgun option.
Step 2: After clicking mailgun option click on "send an email".
Step 3: After clicking on "Send an email" the mailgun dialog box appears.Click on
"ADD" button to add a connection to the mailgun.Give a suitable
connection name of your choice.Enter the "private api key" in the api key
box.Steps to access the private key was explained before in
2.2.Mailgun Credentials
Step 4: By default domain name will be automatically generated.In case if it is not
generated enter the domain name.Steps to access the domain
name was explained before in 2.2.Mailgun Credentials.Select the type of
recipient to "Specific email addresses".
Step 5: Click on the "add a recipient" in the To section.Enter your email address
to which the current temperature has to be sent.
NOTE: The email address should be the same as the address you have specified
for your mailgun account.
Step 6: In the sender box, enter your mailgun domain name prefixed by test@
For example, if your domain name is
sandboxd45f29f243c047da820cec367cbc929e.mailgun.org
you should enter it as
test@sandboxd45f29f243c047da820cec367cbc929e.mailgun.org
in the sender box.
Step 7: Enter a suitable "sender name" and "subject" for the E-mail of your choice.
Select the format to "Send as text message".
Step 8: In the content box, enter the message which you want to get as an email.
A dialog box with a combination of functions appears while you type the
message.Go to "A" section in the dialog box.
Step 9: In the "A" section click on substring.
After clicking substring, your content section will look like this.
- Add a open parenthesis in front of substring.
- Add a close parenthesis in front of the last close parenthesis.
- Click on the "star" option in the blue color dialog box and then place the cursor after the second open parenthesis and click on the data option.
- Type "11" after the first semicolon.
- Type "14" after the second semicolon.
- The content should be always in temperature value not in sensor value.
- To convert the sensor value to temperature value we need to divide it by 10.24.
- Select the x^2 option in the blue color dialog box while placing the cursor after the first close parenthesis click on divide option.
- After clicking the divide option, add 10.24 after it.
The final content box should look like this.
At last, click on OK button.
3.6.EMAIL MODULE:
IMPORTANTNOTE: THIS STEP SHOULD BE FOLLOWED ONLY IF YOU HAVE
SKIPPED THE 3.5.MAILGUN MODULE.(I.E.IF YOU DONT
HAVE A MAILGUN ACCOUNT).
Step 1: After creating router module two question marks enclosed within white
circles will be displayed.Select the first question mark and search for
EMAIL option and click on it.
Step 2: After selecting email option, click on "Send me an email" option.An Email
module will be created.
Step 3: Give a suitable subject of your choice for your email.
Step 4: For the content section, refer Step 8, Step 9 and Step 10 of
3.5.MAILGUN MODULE.
Step 5: After entering the details, click on OK button.
Your final Email dialog box should look like this.
3.7.TWILIO MODULE:
Step 1: Click on the another question mark enclosed within white circle connected
to the router module.
Step 2: Search for Twilio module and click on it.
Step 3: After selecting the Twilio module, click on "Send a message" option.
Step 4: Click on "add" button to add a connection to Twilio.Give a suitable
connection name of your choice.Enter your respective SID and
Auth Token and click on "continue".
Steps to access the SID and Auth Token was explained before in
2.3.TWILIO CREDENTIALS
Step 5: After clicking continue, by default you will have an incorrect sender
number.
Step 6: To enter the correct sender number enable the map option and enter your
sender number linked to your Twilio account.Steps to access the
sender number was explained before in 2.3.TWILIO CREDENTIALS.
Enter your personal mobile number including your country code to which
you have to receive a message in the "recipient number" box.
Step 7: For the message section, refer Step 8, Step 9 and Step 10 of
3.5.MAILGUN MODULE.
NOTE: Enter the same details which you have entered in the content section of
the mailgun module.
Finally, the Twilio dialog box should look like this.Click on the OK button.
You have created all the modules in integromat.Your final output should look like this.
Step 8: After creating the module click on the save button at the bottom.
Step 9: After saving dont forget to switch on scheduling.Click on scheduling
button at the bottom.A schedule setting dialog box appears select
"immediately" option and click OK button.
4.CONNECTING GOOGLE ASSISTANT TO IFTTT:
Step 1: Create an account in IFTTT. If you have not created your account, click
on the link below.
After logging in your page should look like this.
Step 2: By clicking on the username on the top right corner,a drop down menu
appears.Click on the create new applet option.
Step 3: Click on "+this" option.
Step 4: Search for google assistant and select it.
Step 5: Click on "say a simple phrase" option.
Step 6: Enter the details of what you want to say to your google assistant to get
the current temperature values.
(For sending the current temperature values you can call your google
assistant in three different ways.But it is optional.)
Step 7: Enter the phrase which you want the google assistant to say in response
to your phrase.Now click on create trigger button.
Step 8: Click on "that" option.
Step 9: Search for webhooks.
Step 10: Click a "make a web request" option.
Step 11: In the URL section, enter the address which you have copied before
while creating IFTTT module.Refer this form step 4 of 3.2.IFTTT MODULE.
After entering the URL your page should look like this.
Step 12: Select the "POST" method.The Content Type and Body should be
omitted.Click on the "create action" button.
Step 13: Give a suitable name of your choice to the applet.Click on the "Finish"
button.
Step 14: Make sure your applet is turned on.
Step 15: If you want to edit your applet turn off and turn on your applet once.If
you do so, configuring your applet page appears.After configuring dont
forget to click on the save button.
HURRAAHHHHHH!!!!!You have completed your project:-)
Now grab your android phone,say "OK google" and say the phrase which you had
set while creating the trigger.
OUTPUT:
Now you can know your current temperature values through google assistant from anywhere in the world!!!!!!!!!!
VIDEO FOR HARDWARE CONNECTIONS:
OUTPUT VIDEO:


Comments
Please log in or sign up to comment.