Ciao a tutti! I'm Jeko, aka Stefano, from Rome, Italy, and this my submission for the hackster.io IoT contest. I finally decided to join the Particle Alliance and give my contribution! :)
So, this is my project. I called it "The Online Force Detector".
It tells me in real time which of my friends are connected to the Playstation Network.
My friends and I play a lot Battlefront Star Wars, and I really like to play with them, but when no one is online, I like to spend time watching Star Wars movies or playing with my Star Wars collectibles :) And now, with the online force detector, I can know, in real time, who is disturbing the force! I mean... who is online :)
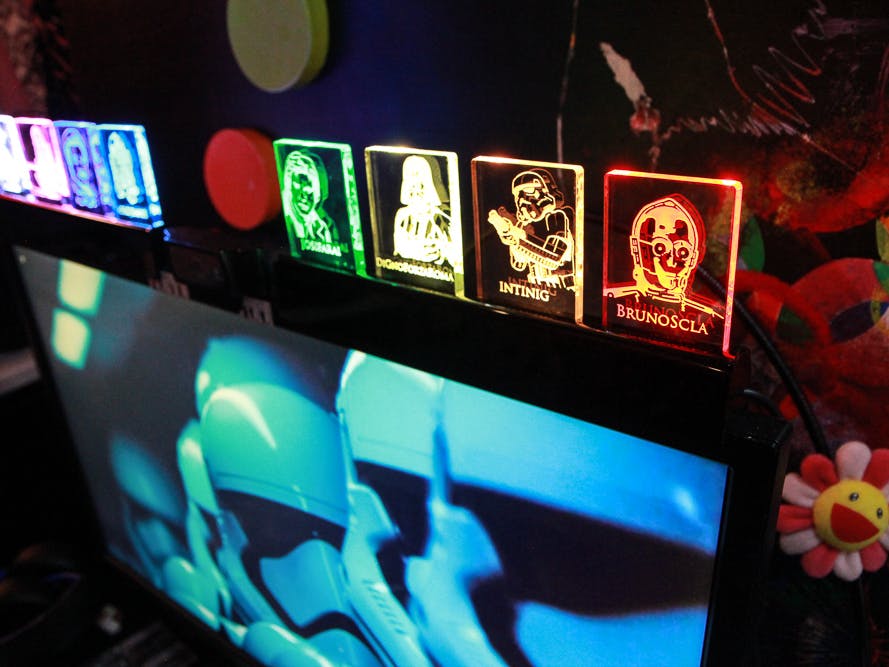
It has eight different lights, each one has an Adafruit Neopixel RGB led which projects the light through a wonderful laser etched piece of plexiglass, each representing a star wars hero, and obviously, one of my friends.
All the lights are connected to a Particle Photon, which is connected to an USB power source (with only 8 LEDs any usb power adapter or USB battery will be fine)
The Photon polls every minute a Javascript API, that responds with a string that contains the color information for all the lights.
This Javascript API is built on top of a Meteor.js web application, which also provides a mobile web interface, that is used to configure the friends Playstation Network ids and the corresponding light color.
it's so simple but also so useful!
This model has only 8 lights, and it's connected to the playstation network, but it's possible to connect up to 255 lights and to poll any webservice you like, it can alert you of any kind of disturbances of the force... emails, tweets, IFTTT, Instagram photos, incoming zombies... the customisation possibility are endless!
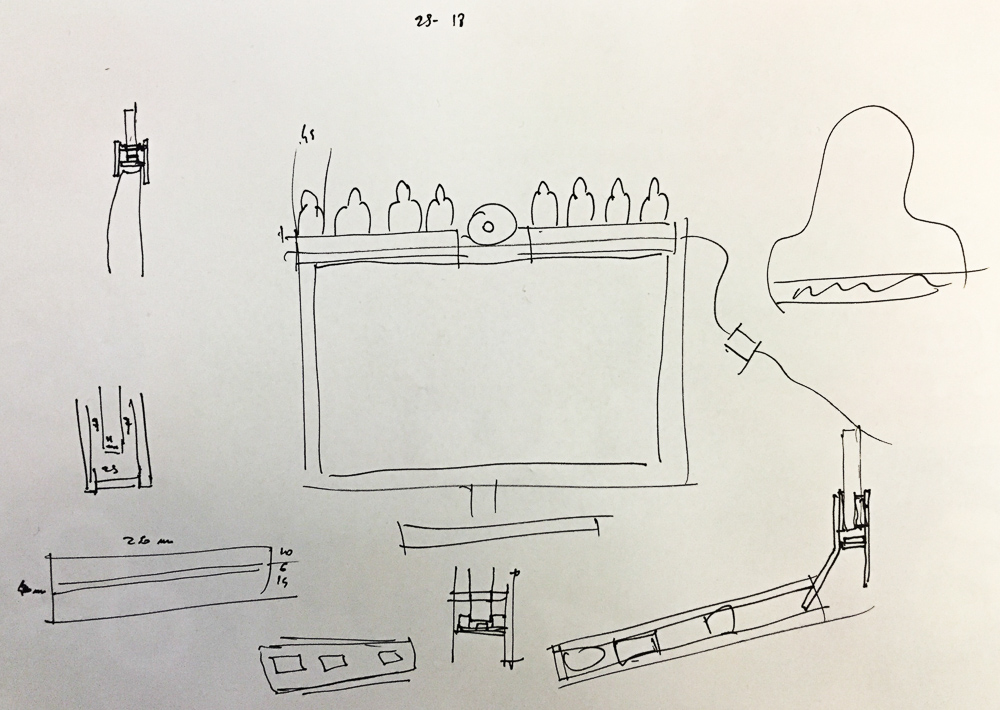
First of all, this is the original plan :)
The hardware
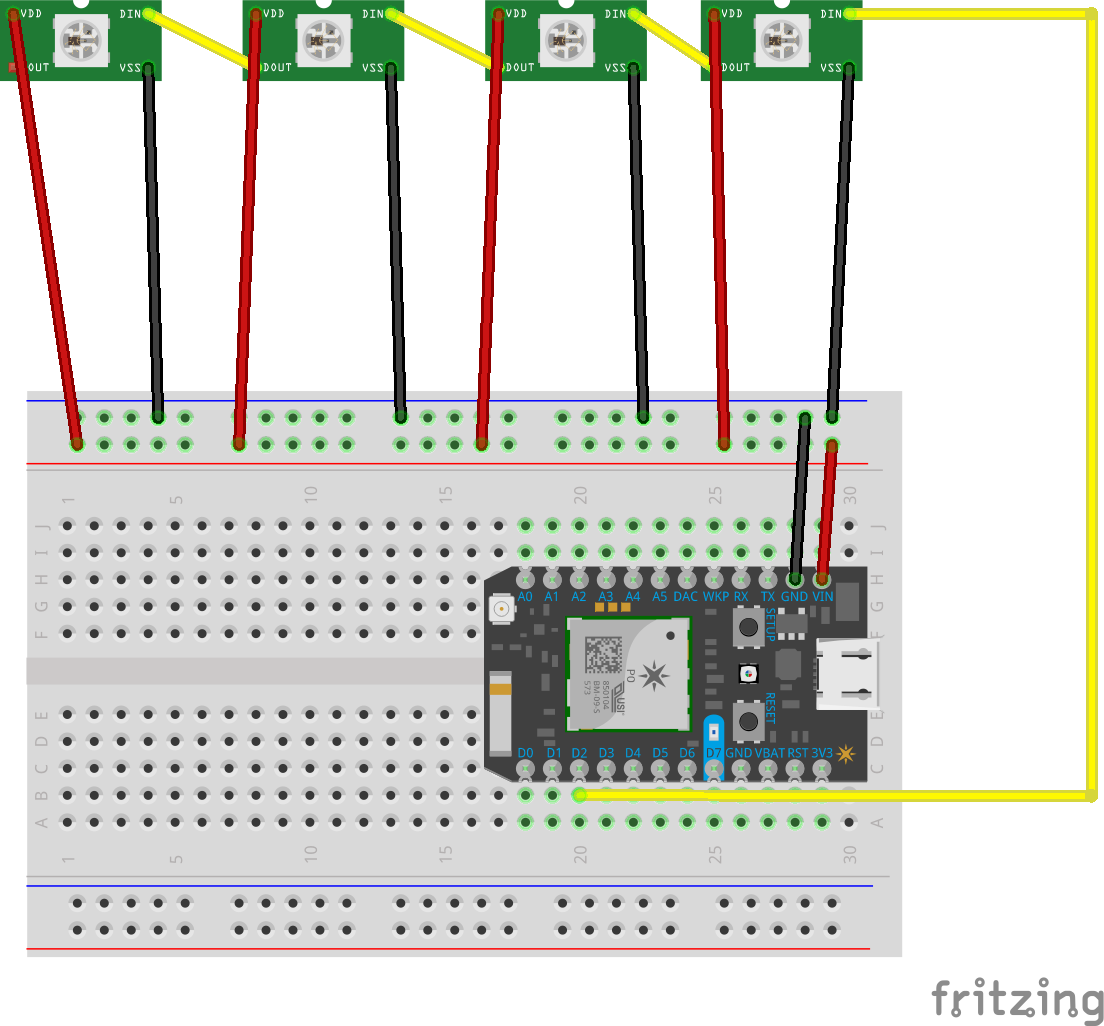
I used 8 WS8212b LEDs, that are compatible with the neopixel library that is provided in the Particle Build web IDE. The great advantage of this kind of LEDs is that they can be chained in series and controlled with a single signal wire, and they are so easy to use!
Since I used only 8 LEDs, I decided to draw the power directly from the VIN pin of the Photon, but if you want to use more LEDs, an external power supply will be required.
So the first step was making the hardware prototype. Here there are all the components: The Particle Photon, the 8 WS8212b LEDs, and 3 wires stripped from a ...strip.
And then, a little bit of soldering
ant the first hardware prototype is ready!
The design
I wanted to give it a great Star Wars look, so I took my inspiration from the Star Wars empire spacecrafts interiors design
I thought that a very simple black and transparent plexiglass design was perfect.
I used this fantastic free Star Wars Clipart font for the images, and the Adobe Trajan font for the names (it's the official Battlefront font).
Each support is a 25cm x 9.5cm 3mm thick piece of black plexiglass, with the four 5x50mm holes for the signs in the middle
First of all I've cut the two rectangles
Then I bent them
And then I've cut the holes for the signs. It's very important that you cut the holes after bending the plexiglass, and not before, otherwise the plexiglass will shatter in pieces (true story)
And the supports are ready! Now the plexiglass signs.
Each sign is a 50x70mm 5mm thick piece of transparent plexiglass, laser cut and etched
They are so simple, and so effective! Now it's time for the final assembly! So exciting! :D
I taped the LEDs to a white plexiglass strip (I took it from the box of the discarded plexiglass)
...after all it's just a prototype! And I was so eager to see it working! :) And I added two small blue tack balls for each LED, in this way the plexiglass sign, once in it's place, wouldn't move or touch the LED
I glued the parts, and I used a very thin black PVC sheet to close the sides
...and [star wars theme] ta dah! This is the first finished and working prototype :)
It looked gorgeous! (like every son to his father...)
The SoftwarePremise: The software is just a prototype, but it does perfectly it's job, even if there's no concept of security or optimisation at all. It was made to be simple and readable, not to be production ready, so use it at your discretion and DON'T use it in production! :)
The software architecture is pretty easy. There is obviously the Particle code, and then I developed a very simple server application, that has two main functions: it provides a web interface to configure the Online Force Detector (choose the colors and the PSN ids of my friends) and it also provides an API that tells to the Photon which lights to turn on, and which colors to use.
The photon software polls every minute the API using the Particle.publish() function, and then handles the server response which is a simple string containing the colors of the eight lights in int32 format (when a lamp is off, the color is 0). In this way, the Photon is totally passive, and the Online Force Detector can be easily configured to alert any kind of event, such as incoming emails, tweets, or it can be used with IFTTT, just by adding functions to the server application.
You can copy the Particle code from here, and paste it into the Particle web IDE. The only thing that you have to configure is the Particle webhook, and you can do it with the Particle CLI
particle webhook GET online_status http://<url-of-your-server-app>/colors
To debug the particle application, you can define DEBUG in the Particle code
#define DEBUG true
and then listen to the DEBUG channel with the Particle CLI
particle subscribe DEBUG mine
The server application is ready to be deployed in any Heroku compatible server platform, it's in javascript and it uses Meteor.js, it uses Mongodb for storage, and it use a modified version of the gumer-psn library to communicate with the Playstation Network API.
You can find the application here. I deployed it on a Digital Ocean server, following these instructions.
In order to login to the PSN APIs, you need to configure the PSN_EMAIL and PSN_PASS environment variables on the hosting server.
The server app also includes a test api that forces the Online Force Detector to turn on all the configured lights of their respective color
You can configure the test webhook in this way
particle webhook GET test http://<url-of-your-server-app>/colors/test
And invoke it from the CLI
particle publish test
I know, much of the complexity is in the software, and I am spending very few words on it, but if you know how to code, the code itself is pretty self explanatory and straightforward, and if you don't know how to code, a simple explanation here will not suffice, but you can contact me anytime and I will be very happy to help you, and I will accept very gladly any kind of contribution and improvement to the code (that, as I said before, is only a proof of concept)
So finally the Online Force Detector is ready! You can put it on your monitor
or behind the keyboard
or you can put it anywhere you like! Since it's wi-fi, it's totally independent from a PC or the Playstation, and it only requires an USB power adapter.
I really had a lot of fun making this project, I really hope that you like it!
Thanks for reading (and watching the video, too :) )
Ciao!
Jeko


Comments
Please log in or sign up to comment.