This a subsection of my project on focus stacking photography of fern gametophytes.
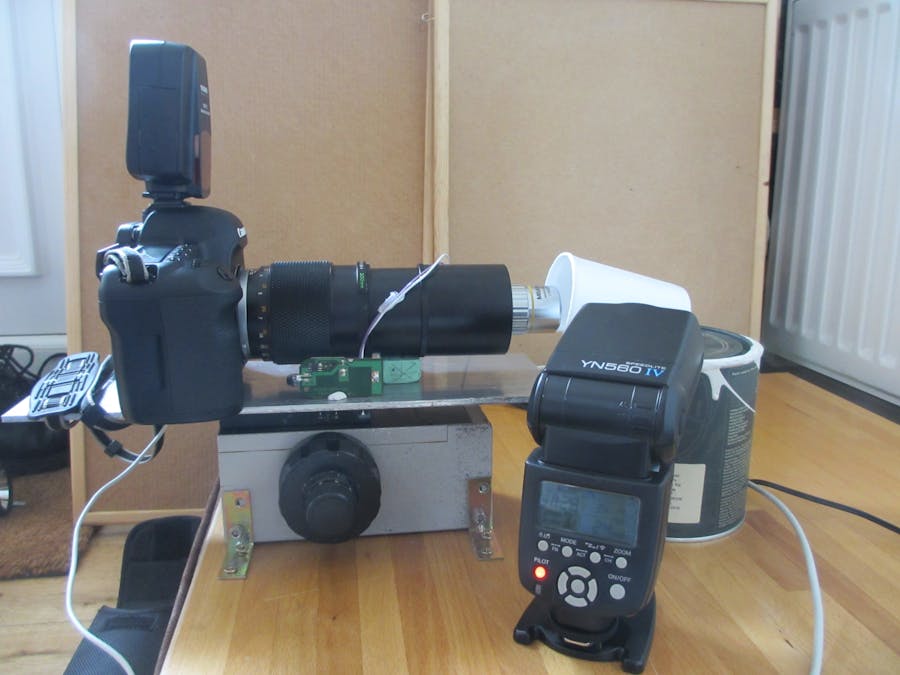
The rig can be lit with natural light if long exposures are to be used. Alternatively it can be used with with flashes or LED lamps, for shorter exposures that will stop any movement in the rig. My lighting equipment is as follows:
- Yongnuo YN-560 IV Flash Speedlite x3
- Yongnuo YN560-TX Trigger - Wireless flash controller
- 14 x AA rechargeable batteries
- A polystyrene cup to use as a diffuser. These are hard to come by now, but can be bought from ebay in sets of 25.
or
- 10 x IKEA LED Jansjo lamps.
- A polystyrene cup to use as a diffuser.
- Three extension leads to provide enough sockets to power the lights.
I have tried both flash and LED lighting and both tend to cause the fern cells to shrivel up, and the whole fern structure to rapidly collapse. As far as I can tell, the key is to use whichever setup is quickest for the operator to deal with, and that may be personal preference. The LED lamps are handy for setting up composition, but the flashes have the advantage of being turned off then no photo is being taken.
The most important thing seemed to be to do the whole photo series very quickly after the fern was removed from the pot. This means using short exposures, moving the rail as quickly as possible and leaving very little settling time in between shots. We have an adapted arduino program that moves the rail very rapidly to avoid stressing the fern for too long.
Flash lightingI found that 2 flashes were enough to light ferns for 1/160th exposure. Any faster than this and the curtain speed of the camera starts to show up as black lines at the bottom of the image.
Here are some photos of the setup, including the settings required to make the flashes respond to control from the camera.
Placement of the flash (for two flashes, the other was place directly opposite the first)
Positioning of the controller on the hotshoe:
Settings on the flash:
Settings on the remote controller on the hotshoe:
This is the polystyrene cup that diffuses the light to give the impression of a bright, naturally lit sky above the fern. This bright sky helps to avoid specular highlights on the lens-like cells of the fern.
I also took photos using an LED lighting setup. These lights provide continous lighting so I have to constantly turn them on and off at the wall switch to stop them from over heating the fern. They also made a big tangle of cables and made access to the fern tricky. They were handy for setting up the composition of the shot though.
In macrophotography at this scale it is essential to minimise vibration. I did this by controlling the camera remotely from the laptop and setting it up so that the shutter would not move when a photograph was taken. We also put the entire assembly on a couch cushion so that if there was any vibration at all, then the entire assembly would move together, rather than the photographic subject and the camera moving independently of one another. This was suggested to me by members of the online discussion forum http://www.photomacrography.net/.
Below is a photograph of the cushioning system. The whole photographic setup is mounted on a strong piece of worktop, and the piece of worktop is sitting on top of a couch cushion on a wooden floor.
Even with this system in place we found that just lifting or lowering a foot onto the wooden floor board was enough to cause very clear vibration, with the image going completely out of focus for a second in live view on the laptop screen. Having figured this out, we were very careful to walk very softly and slowly past the assembly while it was taking a series of shots.


Comments
Please log in or sign up to comment.