


Hardware components | ||||||
 |
| × | 1 | |||
| × | 1 | ||||
| × | 1 | ||||
Software apps and online services | ||||||
 |
| |||||
| ||||||
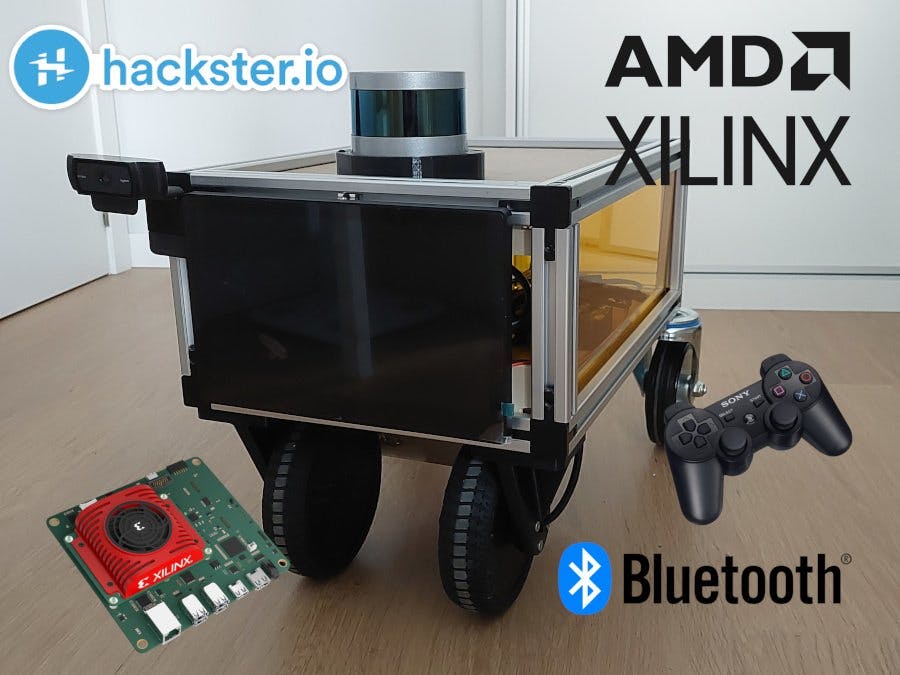
Kria Autonomous Robotic Platform (Karp) uses a BelkinUSBBluetoothAdapter and PlayStation 3 Joystick if you want to move the robot manually. In this tutorial, we will see which things are necessary to change inside the Petalinux project to make the Joystick work and pair it with the Bluetooth Adapter to send the corresponding commands to the Kria board using ROS 2.
1. Installing the necessary Bluetooth libraries for the Petalinux projectFor working with Bluetooth devices inside a Petalinux image we need to install bluez libraries. We need to activate them in Petalinux rootfs with,
petalinux-config -c rootfsAnd check the next packages,
To see the PS3 Joystick working we need to enable some configurations and patch the Kernel.
We need to add inside recipes-kernel/linux/linux-xlnx/bsp.cfg the next kernel configuration options.
- CONFIG_INPUT_JOYDEV=y
- CONFIG_HID_SONY=y
- CONFIG_INPUT_UINPUT=y
The first one CONFIG_INPUT_JOYDEV=y is to set your joystick or gamepad to be accessible as a char device /dev/input/jsX device.
The second one CONFIG_HID_SONY=y is to enable Sony support for Sony PS3/PS4 controllers in the kernel.
The last one CONFIG_INPUT_UINPUT=y is to support user-level drivers for input subsystem accessible under char device /dev/input/uinput.
For working with GASIA PS3 Controllers we need to make some changes to the Kernel. This patch Add-hidsony-gasiafix.patch is available in the code section and you need to add it in the next place recipes-kernel/linux/linux-xlnx/Add-hidsony-gasiafix.patch.
To make the configuration and the patch available in thekernel compilation file we need to add them in recipes-kernel/linux/linux-xlnx_%.bbappend like,
SRC_URI_append = " file://bsp.cfg \
                   file://Add-hidsony-gasiafix.patch \
"Sixad is software that can connect PS3 hardware (Sixaxis/DualShock3, Keypads, and Remotes) to a Linux-compatible machine. For installing Sixad inside Petalinux, an application is created inside meta-user/recipes-apps/sixad/sixad_git.bb that will allow us to pair our PS3 controller with the Belkin Broadcom Bluetooth USB.
The application recipe looks like this,
SUMMARY = "sixad can connect PS3 hardware (Sixaxis/DualShock3, Keypads and \
           Remotes) to a Linux-compatible machine"
LICENSE = "GPLv2"
LIC_FILES_CHKSUM = "file://COPYING;md5=751419260aa954499f7abaabaa882bbe"

SRCREV = "7ddb281ceed92da0c20caab37580d77c782d0657"
SRC_URI = "git://github.com/jlamperez/sixad;protocol=https"

EXTRA_OEMAKE = "GASIA_GAMEPAD_HACKS=1"

DEPENDS = "libusb bluez5"
RDEPENDS_${PN} += "bash"

inherit pkgconfig

S = "${WORKDIR}/git"

do_install() {
    oe_runmake install DESTDIR=${D}
}
In this recipe, we download sixad from github.com/jlamperez/sixad and since we have a GASIA PlayStation 3 Gamepad we use the EXTRA_OEMAKE = "GASIA_GAMEPAD_HACKS=1" Makefile variable. Finally, Sixad is installed on the rootfs as an application.
4. jstest in Petalinuxjstest is set of testing and calibration tools for joysticks that in Ubuntu you can install with joystick or linuxconsoletools.
In this case, we will create our own recipe and we will download linuxconsoletools. From this repo, we only compile the necessary jstest app but you can check this package, and compile other applications from there.
The recipe for installing jstest will be inside meta-user/recipes-apps/linuxconsoletools/linuxconsoletools_1.7.1.bb and looks like this,
DESCRIPTION = "This project maintains the Linux Console tools, which include \
               utilities to test and configure joysticks, connect legacy devices \
               to the kernel's input subsystem (providing support for serial \
               mice, touchscreens etc.), and test the input event layer."
HOMEPAGE = "http://sourceforge.net/projects/linuxconsole/"
LICENSE = "GPLv2"
LIC_FILES_CHKSUM = "file://COPYING;md5=b234ee4d69f5fce4486a80fdaf4a4263"

SRC_URI[sha256sum] = "bd4d4b7e37da02fc67e47ddf20b6f1243c0a7af7b02b918d5e72138ea8727547"
SRC_URI = "${SOURCEFORGE_MIRROR}/linuxconsole/linuxconsoletools-1.7.1.tar.bz2"

do_compile() {
    cd utils
    make jstest
    cd ..
}

do_install() {
    install -d ${D}${bindir}
    install -m 0755 utils/jstest ${D}${bindir}
}With all the points mentioned above and after add the jstest and sixad applications to the petalinux-image-minimal.bbappend recipe like
IMAGE_INSTALL_append =
  ...
  sixad \
  linuxconsoletools \
We are ready to check that the controller works with Kria.
First of all, we need to connect the PS3 Controller using the USB cable. You should see the js0 input device on the board.
$ ls /dev/input/
by-id  by-path  event0  event1  event2  event3  js0
You can connect to it with
sudo jstest /dev/input/js0If you move the joystick you will see moving values in
Joystick (SZMY-POWER CO.,LTD. PLAYSTATION(R)3 Controller) has 6 axes (X, Y, Z, Rx, Ry, Rz)
and 17 buttons (BtnA, BtnB, BtnX, BtnY, BtnTL, BtnTR, BtnTL2, BtnTR2, BtnSelect, BtnStart, BtnMode, BtnThumbL, BtnThumbR, (null), (null), (null), (null)).
Testing ... (interrupt to exit)
Axes:  0:     0  1:     0  2:-32767  3:     0  4:     0  5:-32767 Buttons:  0:off  1:off  2:off  3:off  4:off  5:off  6:off  7:off  8:off  9:off 10:off 11:off 12:off 13:off 14:off 15:off 16:off
Before using the PlayStation Joystick with Bluetooth you need to up the interface and use sixpair for pairing Bluetooth with the Joystick.
$ sudo hciconfig hci0 up
$ sudo sixpair
Current Bluetooth master: 43:45:c0:00:1f:ac
Setting master bd_addr to 00:19:0e:04:18:8f
Now if we unplug the USB cable, start sixad and follow sixad prompt by pressing the PS button we should be able to connect our controller.
xilinx-k26-starterkit-2021_2:~$ sudo sixad --start
Starting bluetooth: bluetoothd.
sixad-bin[1355]: started
sixad-bin[1355]: sixad started, press the PS button now
Watching... (5s)
sixad-sixaxis[1383]: started
sixad-sixaxis[1383]: Connected 'PLAYSTATION(R)3 Controller (00:26:5C:F6:70:01)' [Battery 05]
Again, for testing that the Controller is working:
sudo jstest /dev/input/js0In the past, we have written a project about how to install ROS 2 in Kria with Petalinux 2021.2. You can go there before following this section.
In ROS 2 there are 2 packages to interface with joystick, joy, and joy-linux.
The distinction only makes a difference when attempting to pass through the device into a container or virtual machine. The first interface is via the joystick driver subsystem, which generally shows up as a device in /dev/input/js0 (or other numbers at the end). This is the way that the "joy_linux" package accesses the joystick. The second way to interface is through the generic event subsystem, which generally shows up as /dev/input/event7 (or other numbers at the end). This is the way that SDL (and hence this "joy" package) accesses the joysticks.
We will use joy_linux for Karp. The ROS 2 recipes for joysticks are in meta-ros.
When installing this recipe to the image we should be able to launch a joy_linux node with:
source /usr/bin/ros_setup.bash
sudo chmod +rw /dev/input/js0
ros2 run joy_linux joy_linux_node
And if we move Joystick button we should see how the /joy topic changes with
ros2 topic echo /joyThis is a bonus section in which we will explain how we send commands inside Karp to make the robot move.
We basically use teleop_twist_joy package. This package converts joy messages to velocity commands. It subscribes to /joy topic and publishes /cmd_vel (geometry_msgs/msg/Twist)
For launching this package inside Kria board we need to do:
ros2 launch teleop_twist_joy teleop-launch.py joy_config:='ps3'If you launch this you will use ps3 configuration file that is specified inside the package, which is also the default behavior. You should see the next log when launching the launch file.
[INFO] [launch]: All log files can be found below /root/.ros/log/2022-03-05-09-54-30-975949-jlamperez-X570-439
[INFO] [launch]: Default logging verbosity is set to INFO
[INFO] [joy_node-1]: process started with pid [441]
[INFO] [teleop_node-2]: process started with pid [443]
[teleop_node-2] [INFO] [1646474071.052094684] [TeleopTwistJoy]: Teleop enable button 8.
[teleop_node-2] [INFO] [1646474071.052138156] [TeleopTwistJoy]: Turbo on button 10.
[teleop_node-2] [INFO] [1646474071.052143015] [TeleopTwistJoy]: Linear axis x on 1 at scale 0.700000.
[teleop_node-2] [INFO] [1646474071.052149798] [TeleopTwistJoy]: Turbo for linear axis x is scale 1.500000.
[teleop_node-2] [INFO] [1646474071.052154337] [TeleopTwistJoy]: Angular axis yaw on 0 at scale 0.400000.
[teleop_node-2] [INFO] [1646474071.052158074] [TeleopTwistJoy]: Turbo for angular axis yaw is scale 1.000000.
[joy_node-1] [INFO] [1646474071.980540979] [joy_node]: Opened joystick: SZMY-POWER CO.,LTD. PLAYSTATION(R)3 Controller.  deadzone: 0.30000
For sending commands you need to maintain L1 or L2 button pressed and move the left Joystick Up, Down, Right and Left. the L1 button is the turbo button which gives you extra speed. These extra speed and normal speed values are specified inside the ps3 config file. If you press L2 + the left joystick up and down you can see how the linear x value changes from 0.7 to -07. If you move the joystick right and left the angular z value changes from 0.4 to -0.4.
The ps3 config file looks like this
teleop_twist_joy_node:
  ros__parameters:
    axis_linear:
      x: 1
    scale_linear:
      x: 0.7
    scale_linear_turbo:
      x: 1.5

    axis_angular:
      yaw: 0
    scale_angular:
      yaw: 0.4

    enable_button: 6  # L2 shoulder button
    enable_turbo_button: 4  # L1 shoulder button
If you check the teleop-launch.py you can see which ROS 2 nodes are launched
launch_ros.actions.Node(
            package='joy', executable='joy_node', name='joy_node',
            parameters=[{
                'dev': joy_dev,
                'deadzone': 0.3,
                'autorepeat_rate': 20.0,
            }]),
        launch_ros.actions.Node(
            package='teleop_twist_joy', executable='teleop_node',
            name='teleop_twist_joy_node', parameters=[config_filepath],
            remappings={('/cmd_vel', launch.substitutions.LaunchConfiguration('joy_vel'))},
            )
Exactly the joy node and the teleop_twist_joy_node.
You can check how they related if you open rqt_graph
A video of how to move karp motors here,
8. meta-karpYou can find all these files inside https://github.com/jlamperez/meta-karp repository which is the Petalinux meta-user layer for Kria Autonomous Robotic Platform (KARP).


Comments
Please log in or sign up to comment.