


Hardware components | ||||||
 |
| × | 1 | |||
 |
| × | 1 | |||
 |
| × | 1 | |||
 |
| × | 2 | |||
 |
| × | 1 | |||
Software apps and online services | ||||||
 |
| |||||
Hand tools and fabrication machines | ||||||
 |
| |||||
Having enjoyed playing those retro games in years gone by, this clock brings back some of those fond memories of my youth.
(Actually that's BS, having to isolate oneself at home during this pandemic, this build came out of shear boredom).
3D PrintingRather than design my own case for this project, I used a case designed by mkchung22. Printing is straight forward and I used a 0.2mm height with no supports.
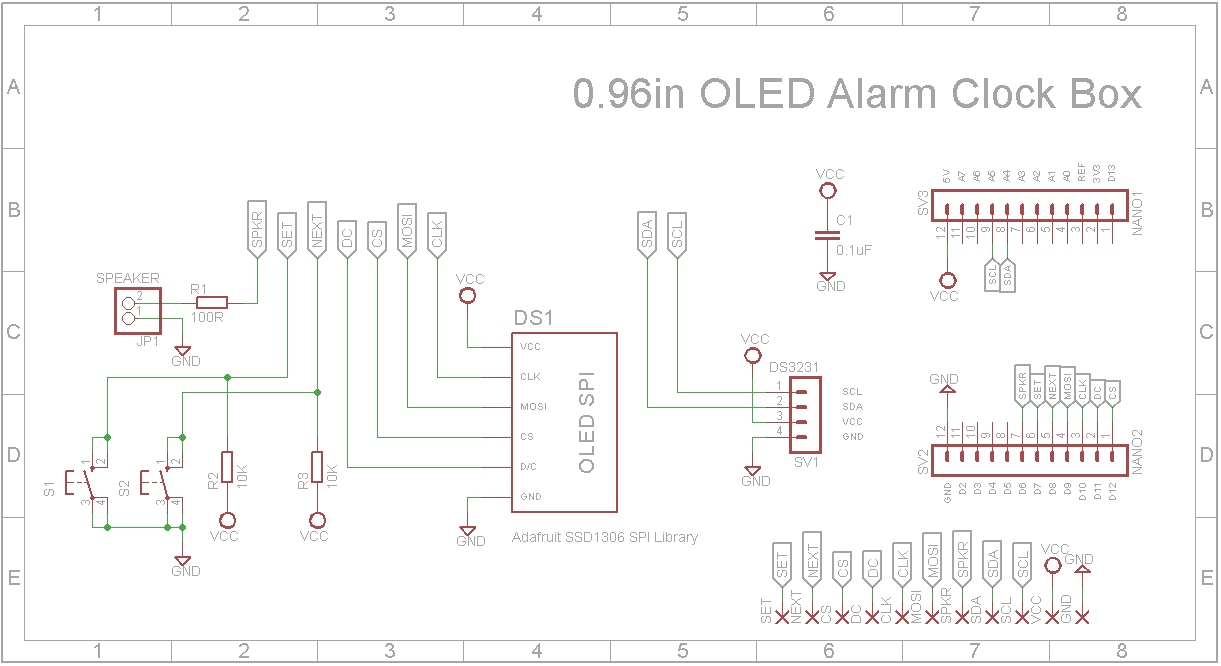
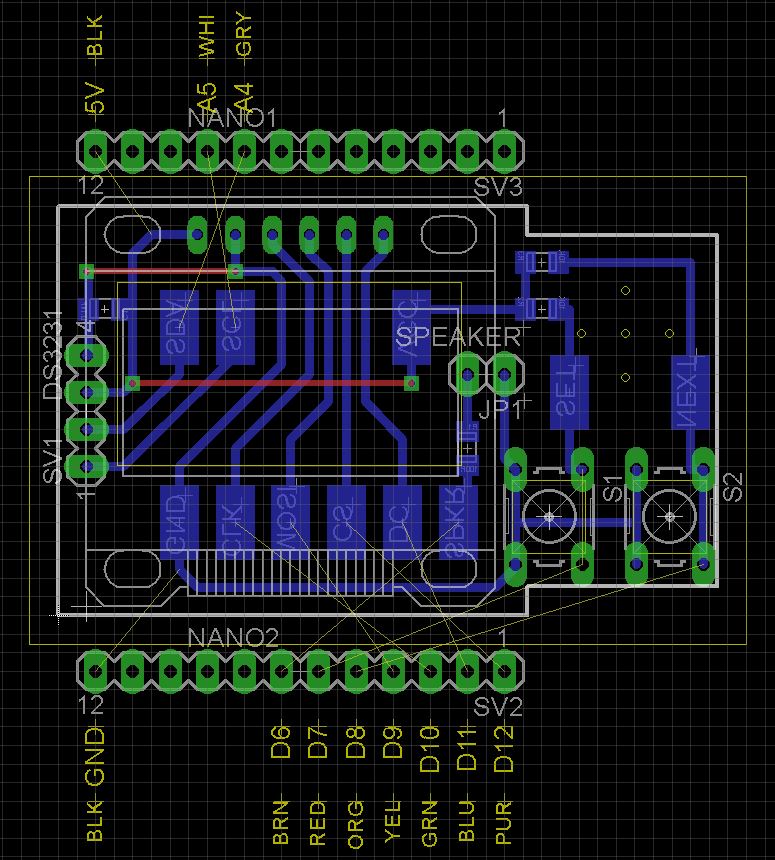
SchematicThe clock basically consists of an Arduino Nano, a DS3231 RTC, a SPI OLED 0.96" display and a couple of switches. The passive buzzer is optional since this clock isn't an alarm clock and therefore isn't used. You can wire the components up using standard hook-up wire and use hot glue to hold the modules in place. I decided that making a printed circuit board to hold the OLED display, buttons, speaker and RTC would be tidier and ultimately easier to build.
The Eagle files for PCB have been included should you wish to have the board commercially made or do as I did and make it yourself. I used the Toner method.
NOTE: The 0.96" OLED modules have variations in the order of the IO pins. I have some where VCC and GND are transposed.
It is a fairly tight fit.
Once you have wired up the components, program and test everything before trying to glue everything in place. I hot glued the Arduino Nano to the back panel. After placing the PCB into the box, I added two small pieces of foam to push the PCB hard against the front of the case when the back of the case is screwed on.
SoftwareAll credits to 0miker0 and mic159. I made very few changes to their code.
The two buttons are used to control the different modes of the clock. The LEFT button switches between the different display modes. The RIGHT button brings up the settings menu.
Use the left button to select the menu item and the right button to invoke it.
ConclusionHope this isolation stuff eases up soon so I can get back to Hiking. In the meantime....
Here is a video of the original clock from the 0miker0 website.


Comments
Please log in or sign up to comment.