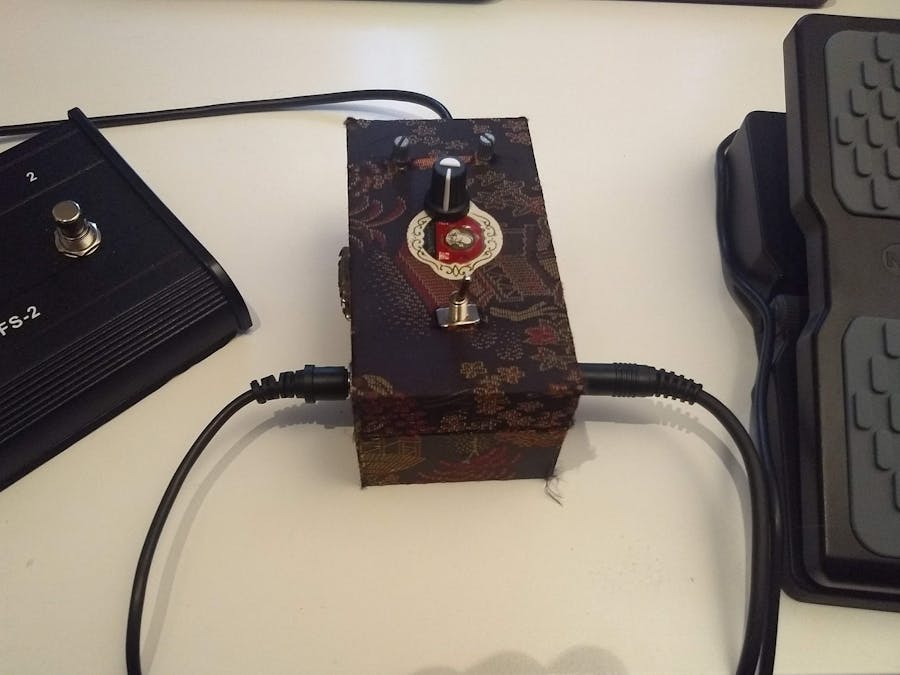
When I was looking to buy a MIDI stomp box with a Wah pedal, I was a little taken aback by the price. Decent ones sell for 200-300 Euro. After some online digging I found out that it's relatively easy to build one yourself for a fraction of the cost. This Arduino-based MIDI controller cost me around 40 Euro, including a seperate Wah pedal and foot switch.
It's pretty easy to put together. I think the hardest part is flashing the firmware of the Arduino Uno to change the USB connection from a serial communications port to a sound, video and game controller in Windows (I have not tested this on a Mac). Note: I used the HIDUINO project. Not all boards are compatible. From their GitHub page:
The HIDUINO project provides firmwares, documentation, and example code for building a class-compliant USB-MIDI device from an Arduino UNO or Mega 2560. HIDUINO does not use middleware software to convert serial messages through a MIDI loopback port (like LoopBe1 on Windows or IAC on OSX). Instead, HIDUINO provides a true USB-MIDI device for plug-and-play compatibility on Windows, OSX, and Linux - just like a commercial MIDI controller.
HIDUINO takes advantage of Arduino boards where a second AVR chip is used as the USB controller, so it won't work with single chip variants (e.g. Leonardo), nor older boards that use an FTDI chip as USB controller (e.g. Duemilanove). Many cheap Arduino knockoffs that pretend to be an Uno or Mega also might not work, since they tend to use the (slighly) cheaper FTDI chips.The Sketch
The first thing you have to do is upload the sketch (see code section). Using the MIDI.h library I programmed the Wah pedal, the two foot switches and the three potentiometers and the on-off switch to send MIDI control change messages. These are then recognized in your favourite DAW or VST (like Guitar Rig or Amplitube) and can be programmed to do all sorts of stuff.
After uploading the sketch, it is time to change the firmware of the Arduino Uno. To do this first download:
- HIDUINO zip file. hex files: the firmware files https://github.com/ddiakopoulos/hiduino
- AtmelFlip: to flash the firmware http://www.microchip.com/developmenttools/ProductDetails/PartNo/flip
Then, follow these steps:
- Make sure the sketch is uploaded to the Uno. After changing the firmware, the Uno is no longer recognized in the Arduino IDE. (This is easily reversible.)
- Unzip the HIDUINO.zip file. The 'compiled-firmwares' folder is important. The hex files are located there.
- Install Atmel Flip.
- Connect the Arduino to a free USB port.
- Short the two pins (see picture below) with a wire. Now the firmware is erased. You know it worked when the Arduino is no longer recognized as a COM port in the Arduino IDE.
- Disconnect and connect the Arduino Uno again. Windows will install an unknown USB device.
- Open Flip
- Select Device>Select>ATmega16U2. This is the chip on the Uno. There are some versions of the Uno with a ATmega8U2 chip. To make sure you have the ATmega16U2 one, check the chip on the board. (See picture above)
- Go to Settings> Communications > USB. Select 'Open'. It's possible that it won't open the connection at this point. You then have to install the driver manually. If this is the case, follow the next step.
- Go to Device manager in Windows and select the Unknown USB Device. Choose update driver and manually locate the driver. It is located at C:\ProgramFiles (x86)\Atmel\Flip 3.4.7\usb. After the installation repeat the previous step. it is now possible to open the connection in Flip.
- Next, in Flip, go to: File> Load Hex file. Choose arduino_midi.hex in the compiled firmwares folder in the HIDUINO folder you extracted earlier. Choose 'Run'. The new firmware is uploaded.
- When you connect the Uno now, Windows will recognize it as a MIDI Controller. It is listed as arduino_midi.
- If you want to restore the regular firmware later, open the hex file Arduino-usbserial-atmega16u2-Uno-Rev3 located at C:\ProgramFiles (x86)\Arduino\hardware\arduino\avr\firmwares\atmegaxxu2\arduino-usbserial
The software part is done. The Uno is now a MIDI contoller.
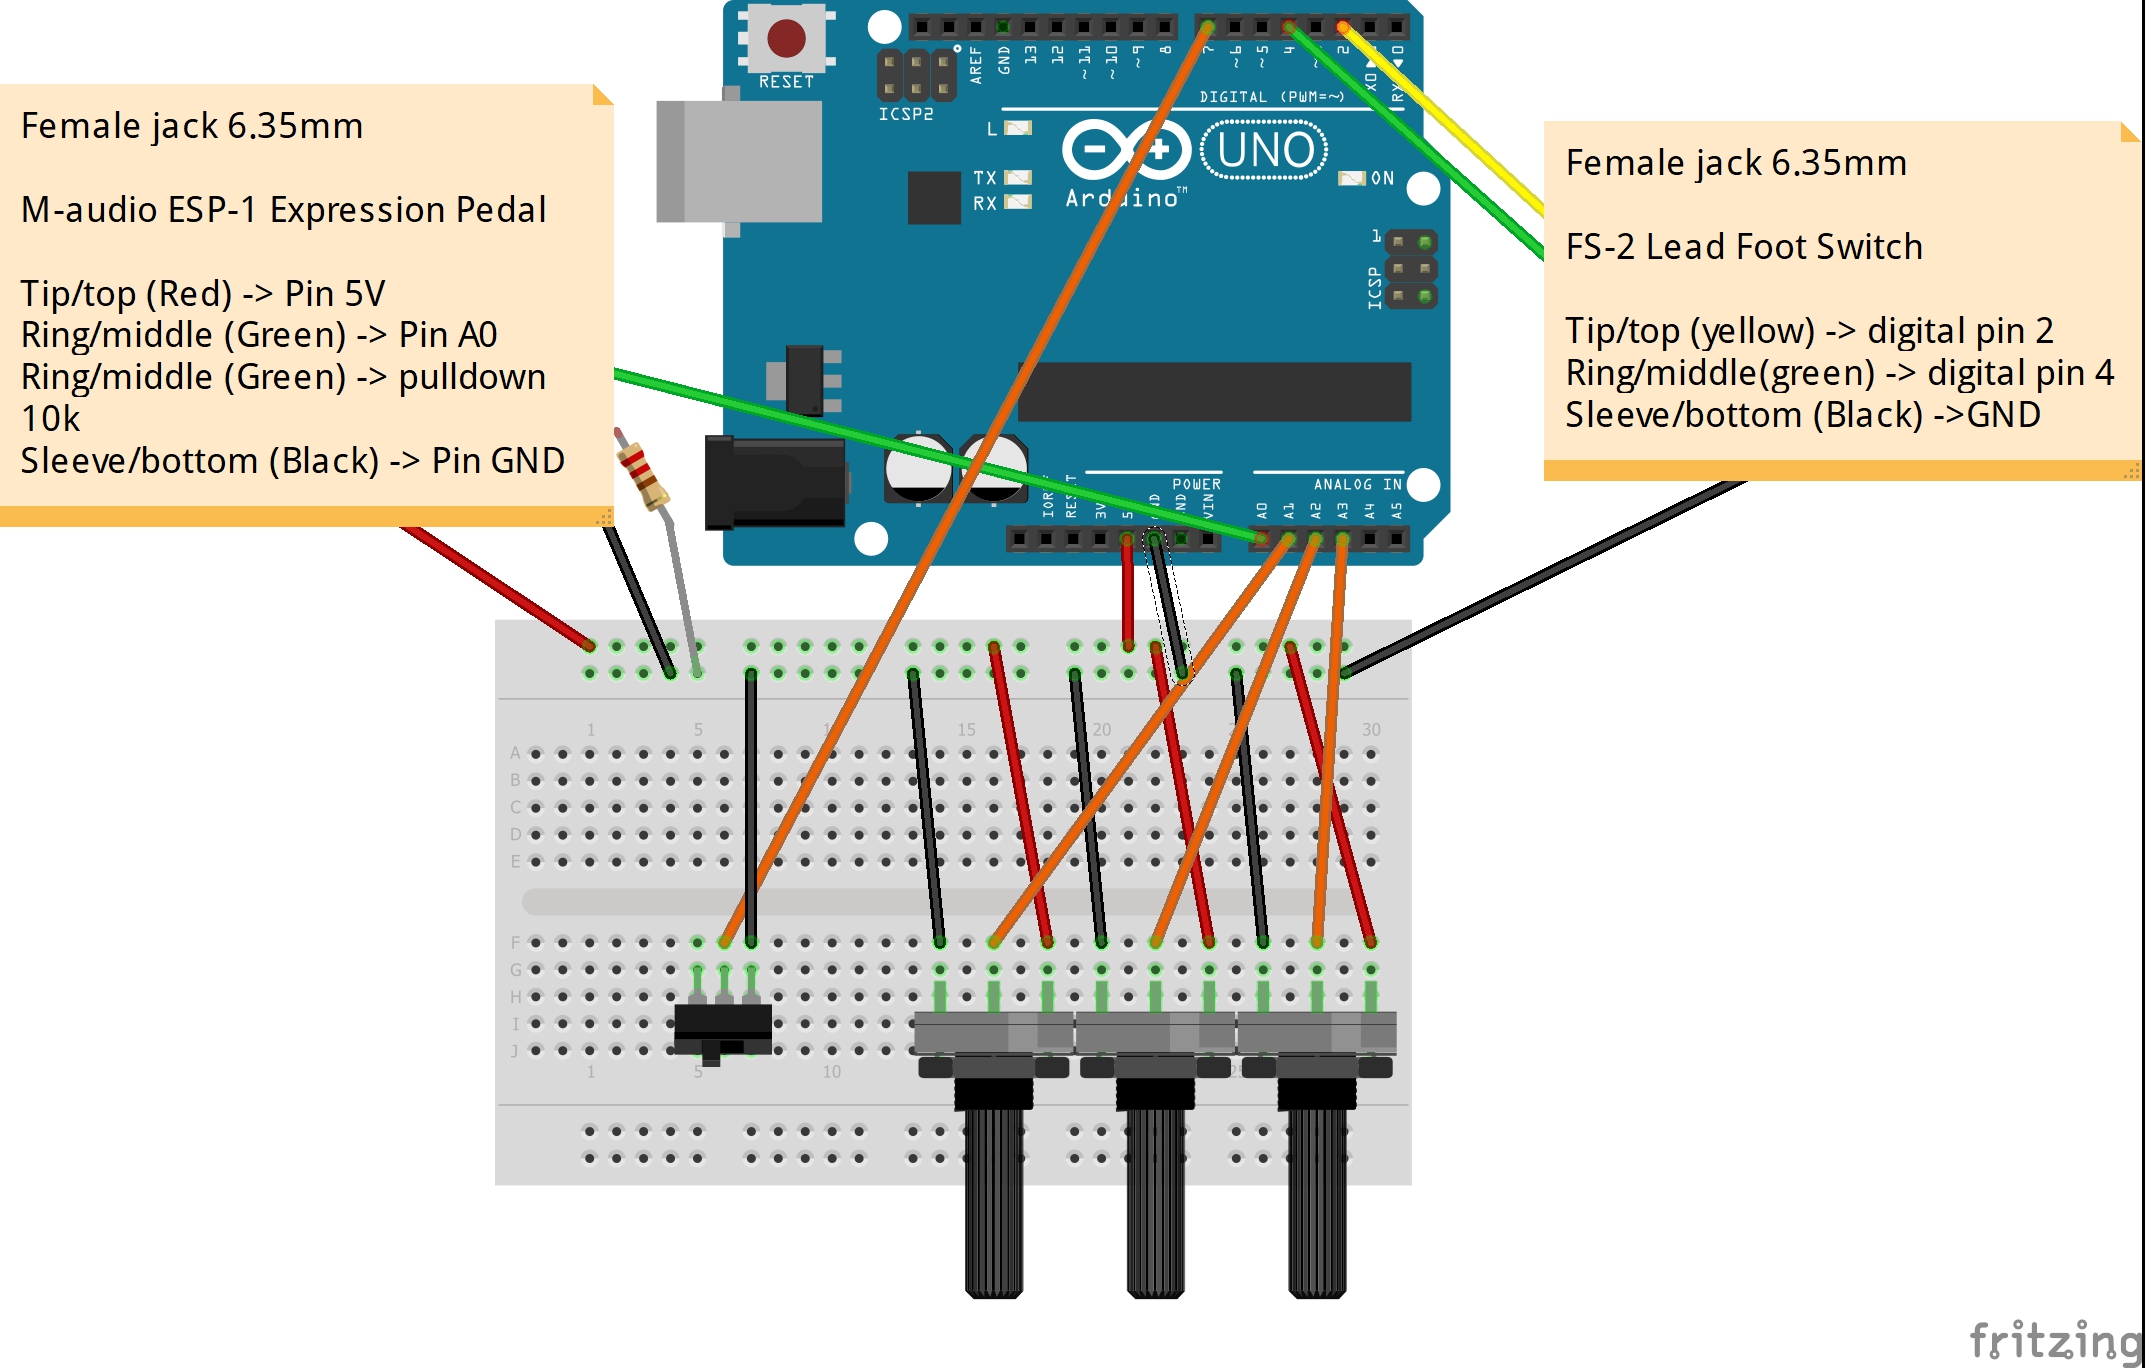
The HardwareThis part is more straightforward. Connect everything according to the Fritzing drawing:
And put everything in a box:


_ztBMuBhMHo.jpg?auto=compress%2Cformat&w=48&h=48&fit=fill&bg=ffffff)


Comments
Please log in or sign up to comment.