Hello, my name is Josue Ortiz-Ordonez and at the time that I am introducing myself I am in 11th grade This year my teacher, Mr Chen, taught us how to use microcontrollers. We learned how to program them, how to apply concepts of electricity, and certain additional parts that can be added onto an microcontroller. The microcontroller we used was the Arduino Uno, where we also learned of its applications such as its digital/analog pins, PWM (Pulse Width Modulation), and programming. For the final marking period we were asked by Mr Chen to create our own Arduino project in order to both demonstrate what we have learned for additional information for colleges to know about us when we apply for them during our senior year.
The name of the project for this class is called LAMPIXEL. The reason I chose this name is because because the project will be in the shape similar to most lamps, and to also incorporate the name of the lights known as “NeoPixels”. When Mr Chen asked our class that we had to come up individually with an idea in order to create a project, my project required the following:
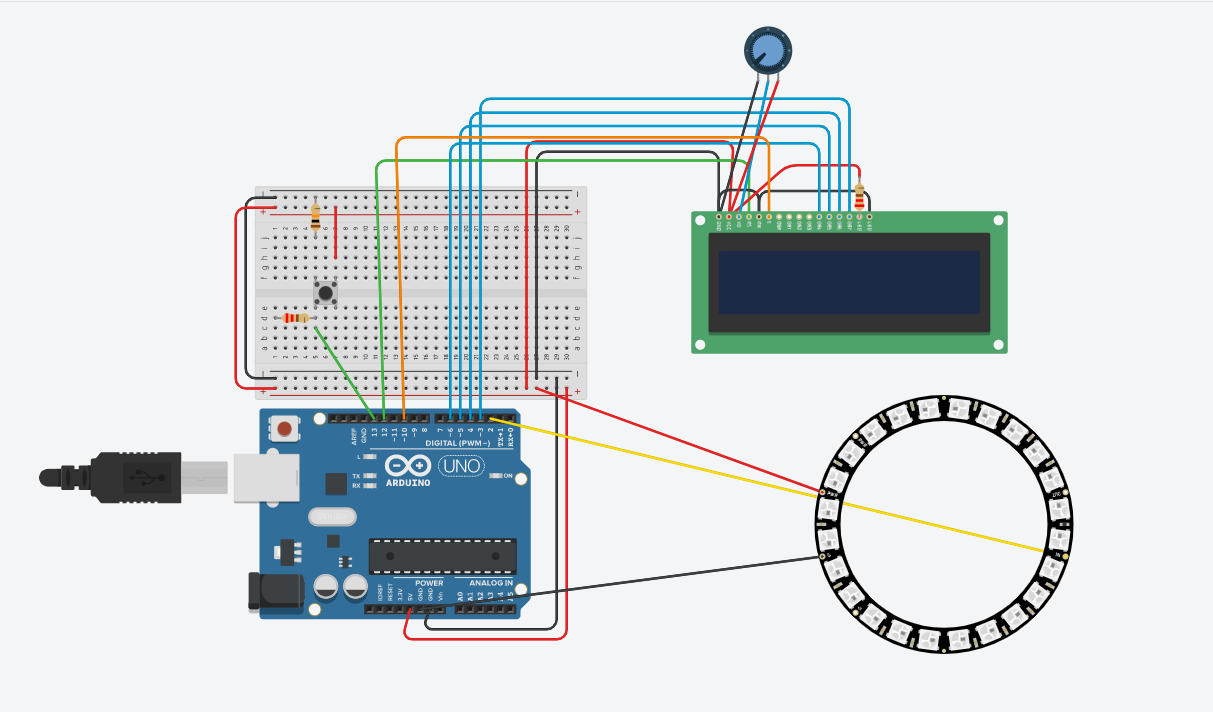
The goals of this project were to make a lamp, a sort of lamp that could be used to light up a small bedroom, a small gathering, or as night light. The lamp as well could represent a mood lamp, and it has the ability to change color such as red, blue, green, and white. The lamp can be plugged into an outlet so you don’t need to reply in the USB of a computer to apply power to it. Here are some of my preliminary designs, one made by drawing, the other using Tinkercad.
Because the NeoPixels were connected to the Arduino through 5V and ground, this was not the best way to provide power. Instead I used a buck converter with a 12V power supply. The buck converter would be apply to limit the amount of voltage that enter the Arduino, allowing the power supply to pass same voltage and more current to the NeoPixel in order to improve powering the NeoPixels. 12V would be reduced to 5V, and in order to this I used a multimeter to calculate the output out of the 12V and reduced it all the way to 5V. Therefore, since it would be connected in parallel, the power supply would supply the NeoPixels through the buck converter, while another connection is made to the Arduino.


_ztBMuBhMHo.jpg?auto=compress%2Cformat&w=48&h=48&fit=fill&bg=ffffff)


Comments
Please log in or sign up to comment.