We decided to remove most of the shrubs in one of our garden beds and start afresh. We topped up with some good fresh compost and planted a few smaller plants in the bed only to find that the local cat (and probably fox) community were very appreciative of their new public toilet!
I looked on the internet for a suitable cat scarer but found they were either ridiculously expensive (and often ineffective). Many were based on ultrasonics which reportedly can frighten cats but in many cases can also be heard by the neighbours and certainly by our own dog.
It seemed the best and most neighbour/animal-friendly scarer was based on a squirt of water. Again, these are available commercially but do seem rather expensive for what they are so I set about designing my own.
The DesignSome diy designers have used spray bottles with a servo to operate the trigger quite successfully but I decided to use a cheap PIR sensor and a car windscreen washer bottle and pump which can be found quite cheaply on Ebay as a complete kit. The kit also includes the jets, fixing parts and some tubing.
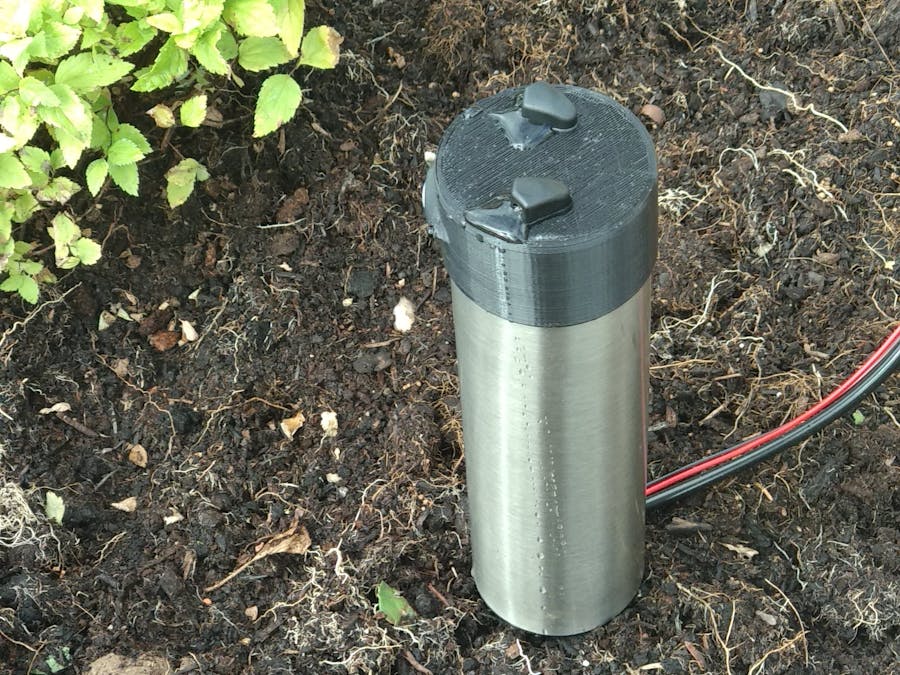
I re-cycled an old solar garden light which had a broken plastic lens and a no longer working solar panel. Of this, I just used the hollow metal post and the bottom plastic spike to raise and support the sensor and water jets.
I then designed a 3D printed housing for the PIR sensor and some minor additional electronics. The 2 water jets sit on the top of the housing with the tubing to them passed inside the metal post. The housing is designed to fit snuggly on top of the metal post so that rain water is drained around the outside, keeping the electronics and battery as dry as possible but keeping everything as self-contained as possible.
Testing of the PIR sensor showed it was very sensitive to fluctuations of daylight levels and kept triggering when the sun went in/came out. This may be avoided by not pointing it towards the south, but I was only interested in the sensor operating at night, so I added an LDR to the sensor (see "acknowledgements" section on how to do this) so it was inoperative during the day thus saving battery and water.
I also tried to reduce the area of detection by shielding part of the sensor lens with the 3D printed design so that only the centre part of the lens had visibility..
The PIR sensor has 2 adjustments. 1 for sensitivity which I set to minimum and 1 for 'on' duration which I also set to minimum (but can be set longer if required).
The PIR sensor output is not capable of driving the pump motor so requires additional electronics to control this. An IRFZ44N MOSFET was chosen for this job as it is relatively cheap, widely available, will turn on sufficiently using the 3v PIR sensor output, has low on resistance and high current capability.
Although the pump motor is 12v, it seems to operate OK at 9v so for compactness, I used a PP3 9v battery although I'm not sure how long this will last and may upgrade to a bigger capacity battery. Clearly most of the current will be drawn by the motor so keeping this on for as short a time as possible and only turning on when needed will extend the battery life.
If you require a bigger jet range then upping the battery voltage may give you this but the PIR sensor upper voltage is 12v so I don't recommend going past this voltage.
The PP3 and an on time of 2.5s gives a jet spray range of about 2-3 ft. As there are 2 jet heads each with 2 nozzles, there is a reasonable spread of spray to deter the cats.
The washer bottle kit came with about 2m of tubing. I wanted to extend this in order to place the bottle further away, so I used some black 4mm (inside diameter) garden irrigation tube I already had spare to achieve this.
The kit also came with some rubber seals to go under the jets. These should be used as they will help to keep out water from the internals of the housing. Some waterproof sealant around the PIR lens prior to fitment can also help with water proofing.
The additional electronics was mounted on a small piece of stripboard and soldered directly to the pins on the PIR sensor. I sprayed the PIR sensor electronics and the additional board with some clear protective lacquer to give additional environmental protection.
The PIR sensor is held in place by 2 plastic M2 x 15mm bolts passed through from the front of the housing and secured inside by 2 M2 plastic nuts. Attaching the nuts can be a bit fiddly but achievable with a pair of pliers/tweezers.
NOTE:
One thing to be aware of is that if the water bottle is well below the level of the jets, the water will drain back down to the bottle and the 2.5s 'on' time may not be enough time to get the water from the bottle to the jets, so the 'on' time may need to be extendedadjusted to compensate.
Also, the design is not fully waterproof so it is not recommended that this be used long term outside. Once the cats have got the message, it shouldn't be needed any longer and can be moved/stored for later use.
AcknowledgementsCAD Models
Thanks to Dali Dávila (and others) for the PIR sensor model published on GrabCAD
PIR Sensor LDR Modification
Thanks to bigclivedotcom for his youtube video on how to add the LDR for night-time only operation


Comments
Please log in or sign up to comment.