XinaBox produces a range of 70+ modular xChips, which include cores/CPUs, sensors, power, communication, output, and storage, using a connectivity standard without wires, soldering, breadboards or hardware knowledge
The xChip OD01 forms part of the output modules and is equipped with an OLED display unit that is capable of displaying any graphics or text. Very useful as a sensor data display.
The xChip BR01 is designed to interface with all Raspberry Pi modules. This provides an interface to support the xChip ecosystem, adding support for many additional sensors etc.
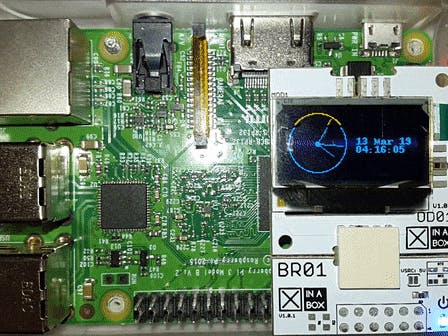
By the end of this guide, you will able to display a live clock to the xChip OD01.
Requirements- 1x BR01 - Raspberry Pi Bridge
- 1x OD01 – OLED Display 128x64 (SSD1306)
- 1x XC10 - 10-Pack xBUS Connectors
- Raspberry Pi 3B
- Hardware Setup
- Setting up the Raspberry Pi
- Result
- Summary
Connect BR01 and OD01 together using the XC10 xBUS connectors. You may connect it as shown in the diagram below. Please see this guide on how to assemble xChips generally.
Then attach your device with the Raspberry Pi 3 as shown.
1. Connect to your Raspberry Pi through HDMI, VNC or SSH
2. Open Terminal
3. Follow the installation instructions to install Luma.OLED library
4. Clone the Luma.OLED examples from repository:
git clone https://github.com/rm-hull/luma.examples.git
cd luma.examples
5. Run the Clock.py example:
python examples/clock.py
In this tutorial, we have shown how to display live clock on XinaBox xChip OD01 with Raspberry Pi. The xChip OD01 is very useful to display many different graphics.


Comments
Please log in or sign up to comment.