Hello all!
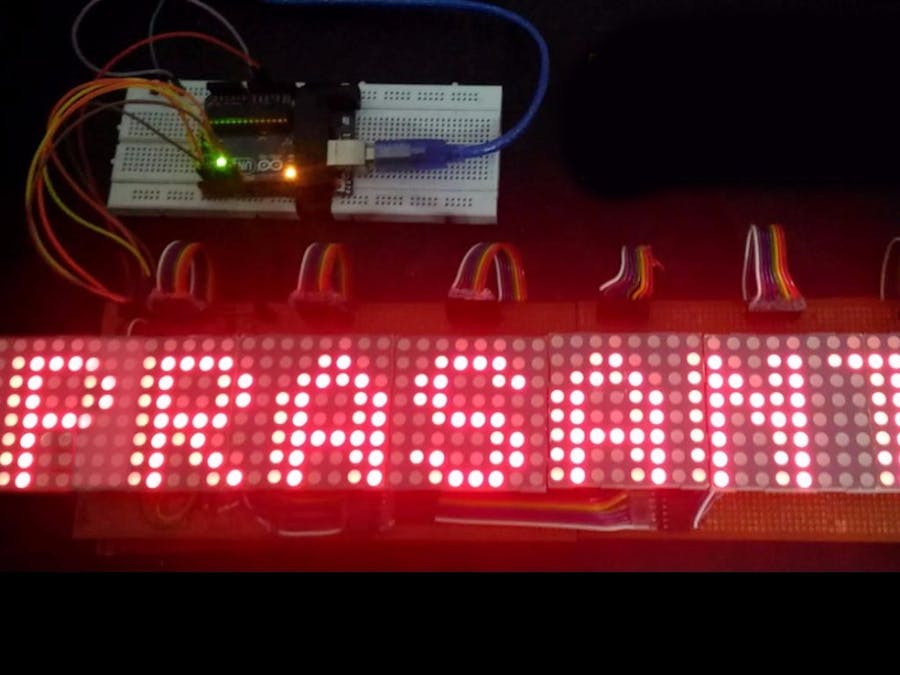
This project is about making a 48x8 Programmable Scrolling LED Matrix using an Arduino UNO and 74HC595 shift registers.
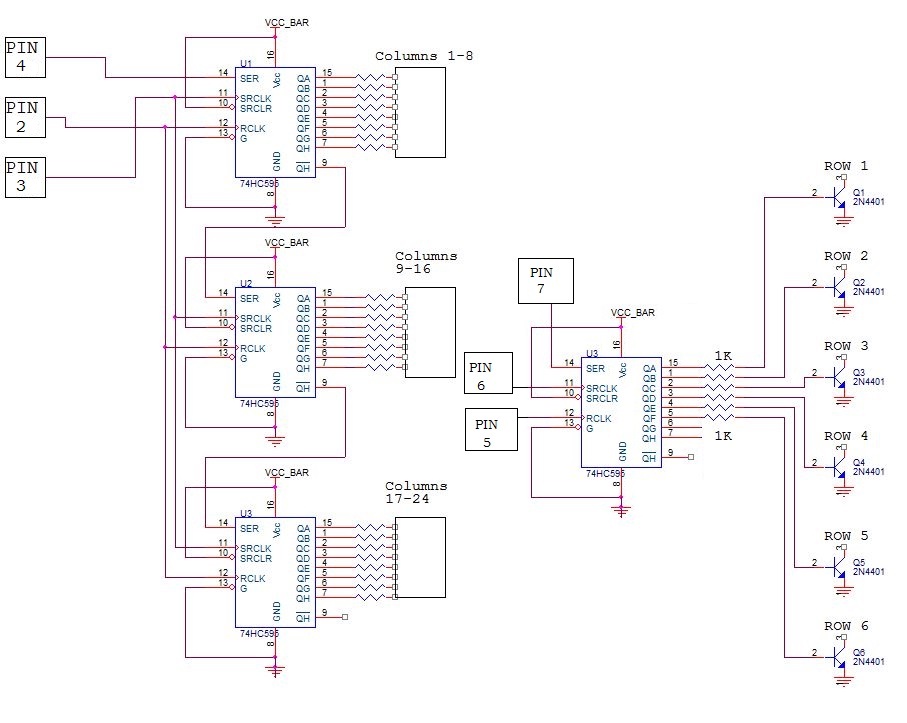
This was my first project with an Arduino development board. It was a challenge given to me by my teacher to try to build one. So at that time of accepting this challenge, i didn't even knew how to blink an LED using an arduino. So, i think even a beginner can do this with a little bit of patience and understanding. I found the circuit diagram online and that was my only reference to build this project. I started off with a little research about shift registers and multiplexing in arduino.
The Circuit
Gathering Components
I gathered all the components from different sources. I got this 5mm 8x8 common cathode LED matrix display from an online website.
Building the Prototype
It's shown in the circuit that a single shift register is used to control the 8 rows and for controlling the columns, we use one shift register for each 8 columns.
So if you are able to make a simple 8x8 matrix, you can simply just replicate the portion of the circuit for the column control and extend the matrix to any number of columns. You just need to add one 74hc595 for every 8 columns ( one 8x8 module) you add in to the circuit. Keeping that in mind, i made my 8x8 prototype.
Soldering Stage
I took seperate dot boards to make the row and column controls and extended wires and headers to connect them together.
Once you've successfully made a 8x8 matrix you just need to daisy-chain more shift registers with common clock to drive the columns. it just need a single 74hc595 to drive all rows. So based on the number of columns, more shift registers can be added, there is no limit for the number of columns you can add.
Building the Second Half
As i didn't had access to 3D printing at that time, i approached a local carpenter to make a case.
The case he made was much larger than i expected, it's better to design a smaller case using Fusion 360 or any other design software and 3D print the case. Holes were made in the case to connect the power and usb cables.
The Code
The Code can be found in the attachments with this project.
Here we will be scanning across the rows and feed the column lines with appropriate logic levels. The code will determine the speed of the scrolling message as well as the message that we are going to display. The direction of the scroll is right to left by default in the code, but with a little modification, it can be implemented in other directions too.
The Result
Thank you! :)


_ztBMuBhMHo.jpg?auto=compress%2Cformat&w=48&h=48&fit=fill&bg=ffffff)


Comments
Please log in or sign up to comment.