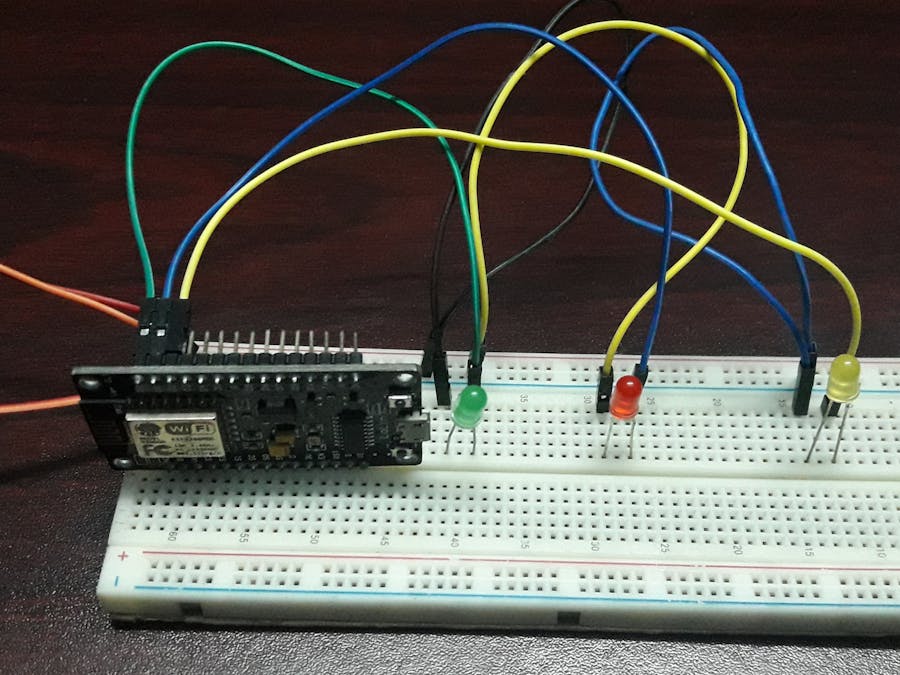
Here, in this project we are going to build up a system that will control some LED lights by using our Home WiFi. We can control our home appliances by using our Home WiFi. In this project we are going to control three LED lights using Cayenne IoT platform.
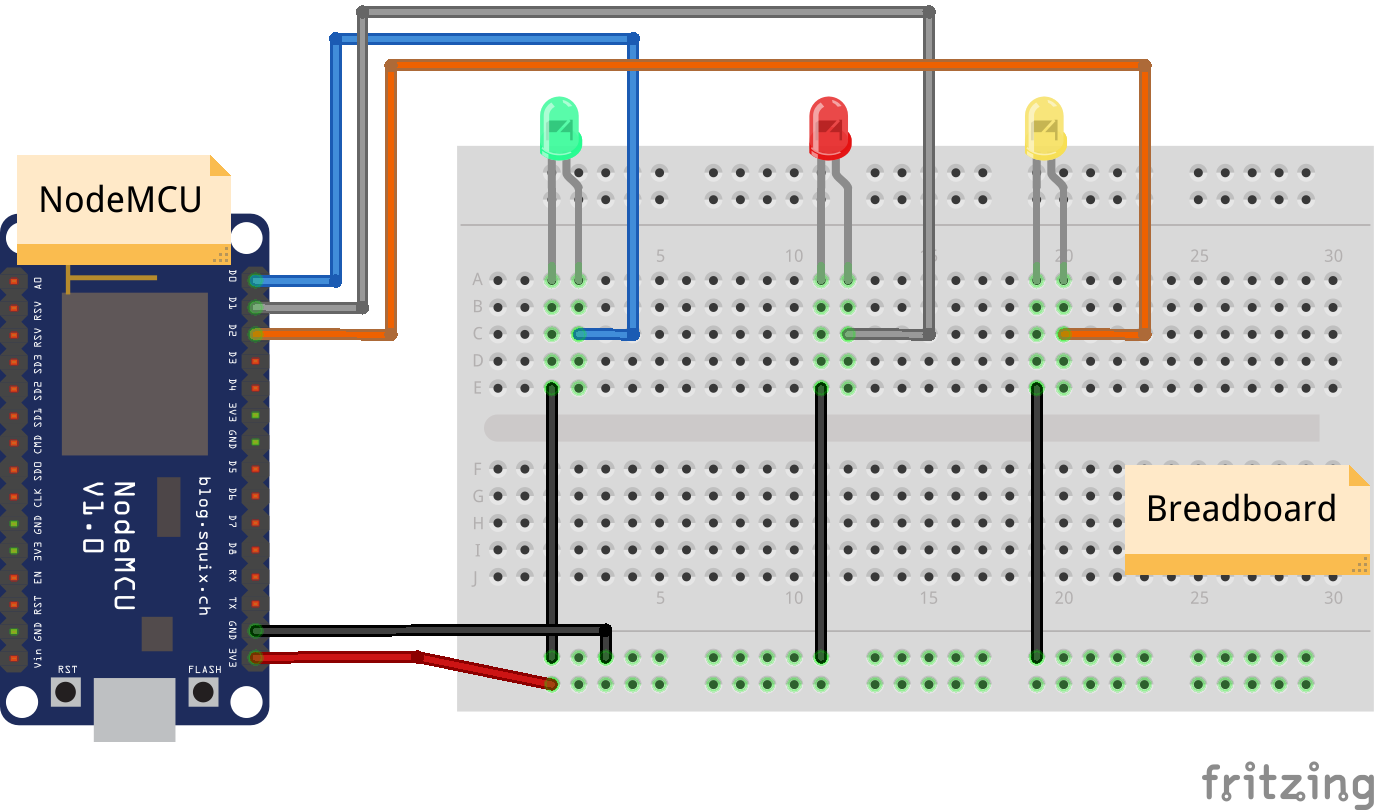
ConnectionsD0 ---------------------------- Anode (Green LED)
D1 ----------------------------- Anode (RED LED)
D2 ---------------------------- Anode (Yellow LED)
GND ------------------------- Breadboard Positive Rail
3V ---------------------------- Breadboard Negative Rail
Pin Diagram of NodeMCU(esp8266)Steps are going to discuss below:
Step-1
A. Open Arduino IDE
B.File --> Preferences or from keyboard type (Ctrl +,). You will see a new window. Then go to the Additional Boards Manager URLs and paste the link down below.
http://arduino.esp8266.com/stable/package_esp8266com_index.json
Step-2
A. In this step we need to go to the Tools---> Board ---> Board Manager
B. Next a new window will appear. Then we need to search esp8266 package and install it.
C. Now go to the Tools-->Board--->NodeMCU 1.0 (ESP-12E Module)
Now we are ready to building up our project using NodeMCU.
Cayenne IoT Platform Setup1. In your Arduino IDE go to Sketch ---> IncludeLibrary ---> Manage Libraries
2. Then Search for CayenneMQTT library and install it in your Arduino IDE.
3. Go to the cayenne IoT platform website (https://developers.mydevices.com/cayenne/features/)
4. Create a new account. If you have an account SIGN IN to the platform.
5. In the next phase we need to connect the Cayenne IoT platfrom with our NodeMCU. For this we need to add a new device to the website. Click on the Add New button. Then click on the Device/Widget button. Now search the Generic ESP8266 Board and click it.
6. Now click a new page will appear. There we will find the MQTT USERNAME, MQTT PASSWORD and CLIENT ID. Copy them and paste to your code.
7. Then upload the code to your NodeMCU. After completing the upload your NodeMCU board will connect to the Cayenne IoT platform website.
8. Then you can add buttons to control (ON/OFF) your LED Lights.
9. Go to Add New ---> Device/Widget ---> Custom Widgets ---> Button and add the Button Name, choose device, Sensor Data to Digital Actuator, Sensor Unit will be Digital(0/1), Channel Number(According to the code) and finally choose Button Icon.
10. Finally click on the Add Widget button. The new button will add to your dashboard.
11. Now you can control(ON/OFF) your LED light from Cayenne IoT platform website.
Project VideoCaution- Do not mismatch any connections.
- https://www.linkedin.com/posts/khaled-md-saifullah_nodemcu-basic-guideline-activity-6603302611523338240-vN8i
- https://github.com/KAST-Tech/Led-Light-Control-Over-the-Internet-Project


Comments
Please log in or sign up to comment.