


Hardware components | ||||||
 |
| × | 1 | |||
 |
| × | 4 | |||
 |
| × | 3 | |||
 |
| × | 9 | |||
 |
| × | 1 | |||
 |
| × | 12 | |||
 |
| × | 1 | |||
Software apps and online services | ||||||
 |
| |||||
I upgraded this project by designing a PCB with more features, you can inspect the enhanced version from here :)
DescriptionI wanted to approximately evaluate the amount of energy generated by a solar panel in a given direction by using light intensity values produced by photoresistors. Solar panels generate a high amount of energy under high solar radiation relative to the light intensity which is why I intended to use light intensity levels as indicators assigned to LED colors – red, yellow, and green. In other words, this project is for predicting the amount of energy generated by a solar panel between three light intensity thresholds, and also notifies you when the high threshold exceeded.
To support my projects and articles, you can visit my website here :)
[ E = A * r * H * PR ] is the formula for calculating the generated energy by a solar panel, where A is the area of the solar panel, r is the efficiency, H is the average solar radiation and PR is the performance ratio or coefficient( usually 0.75).
You can change all solar panel values at the code below.
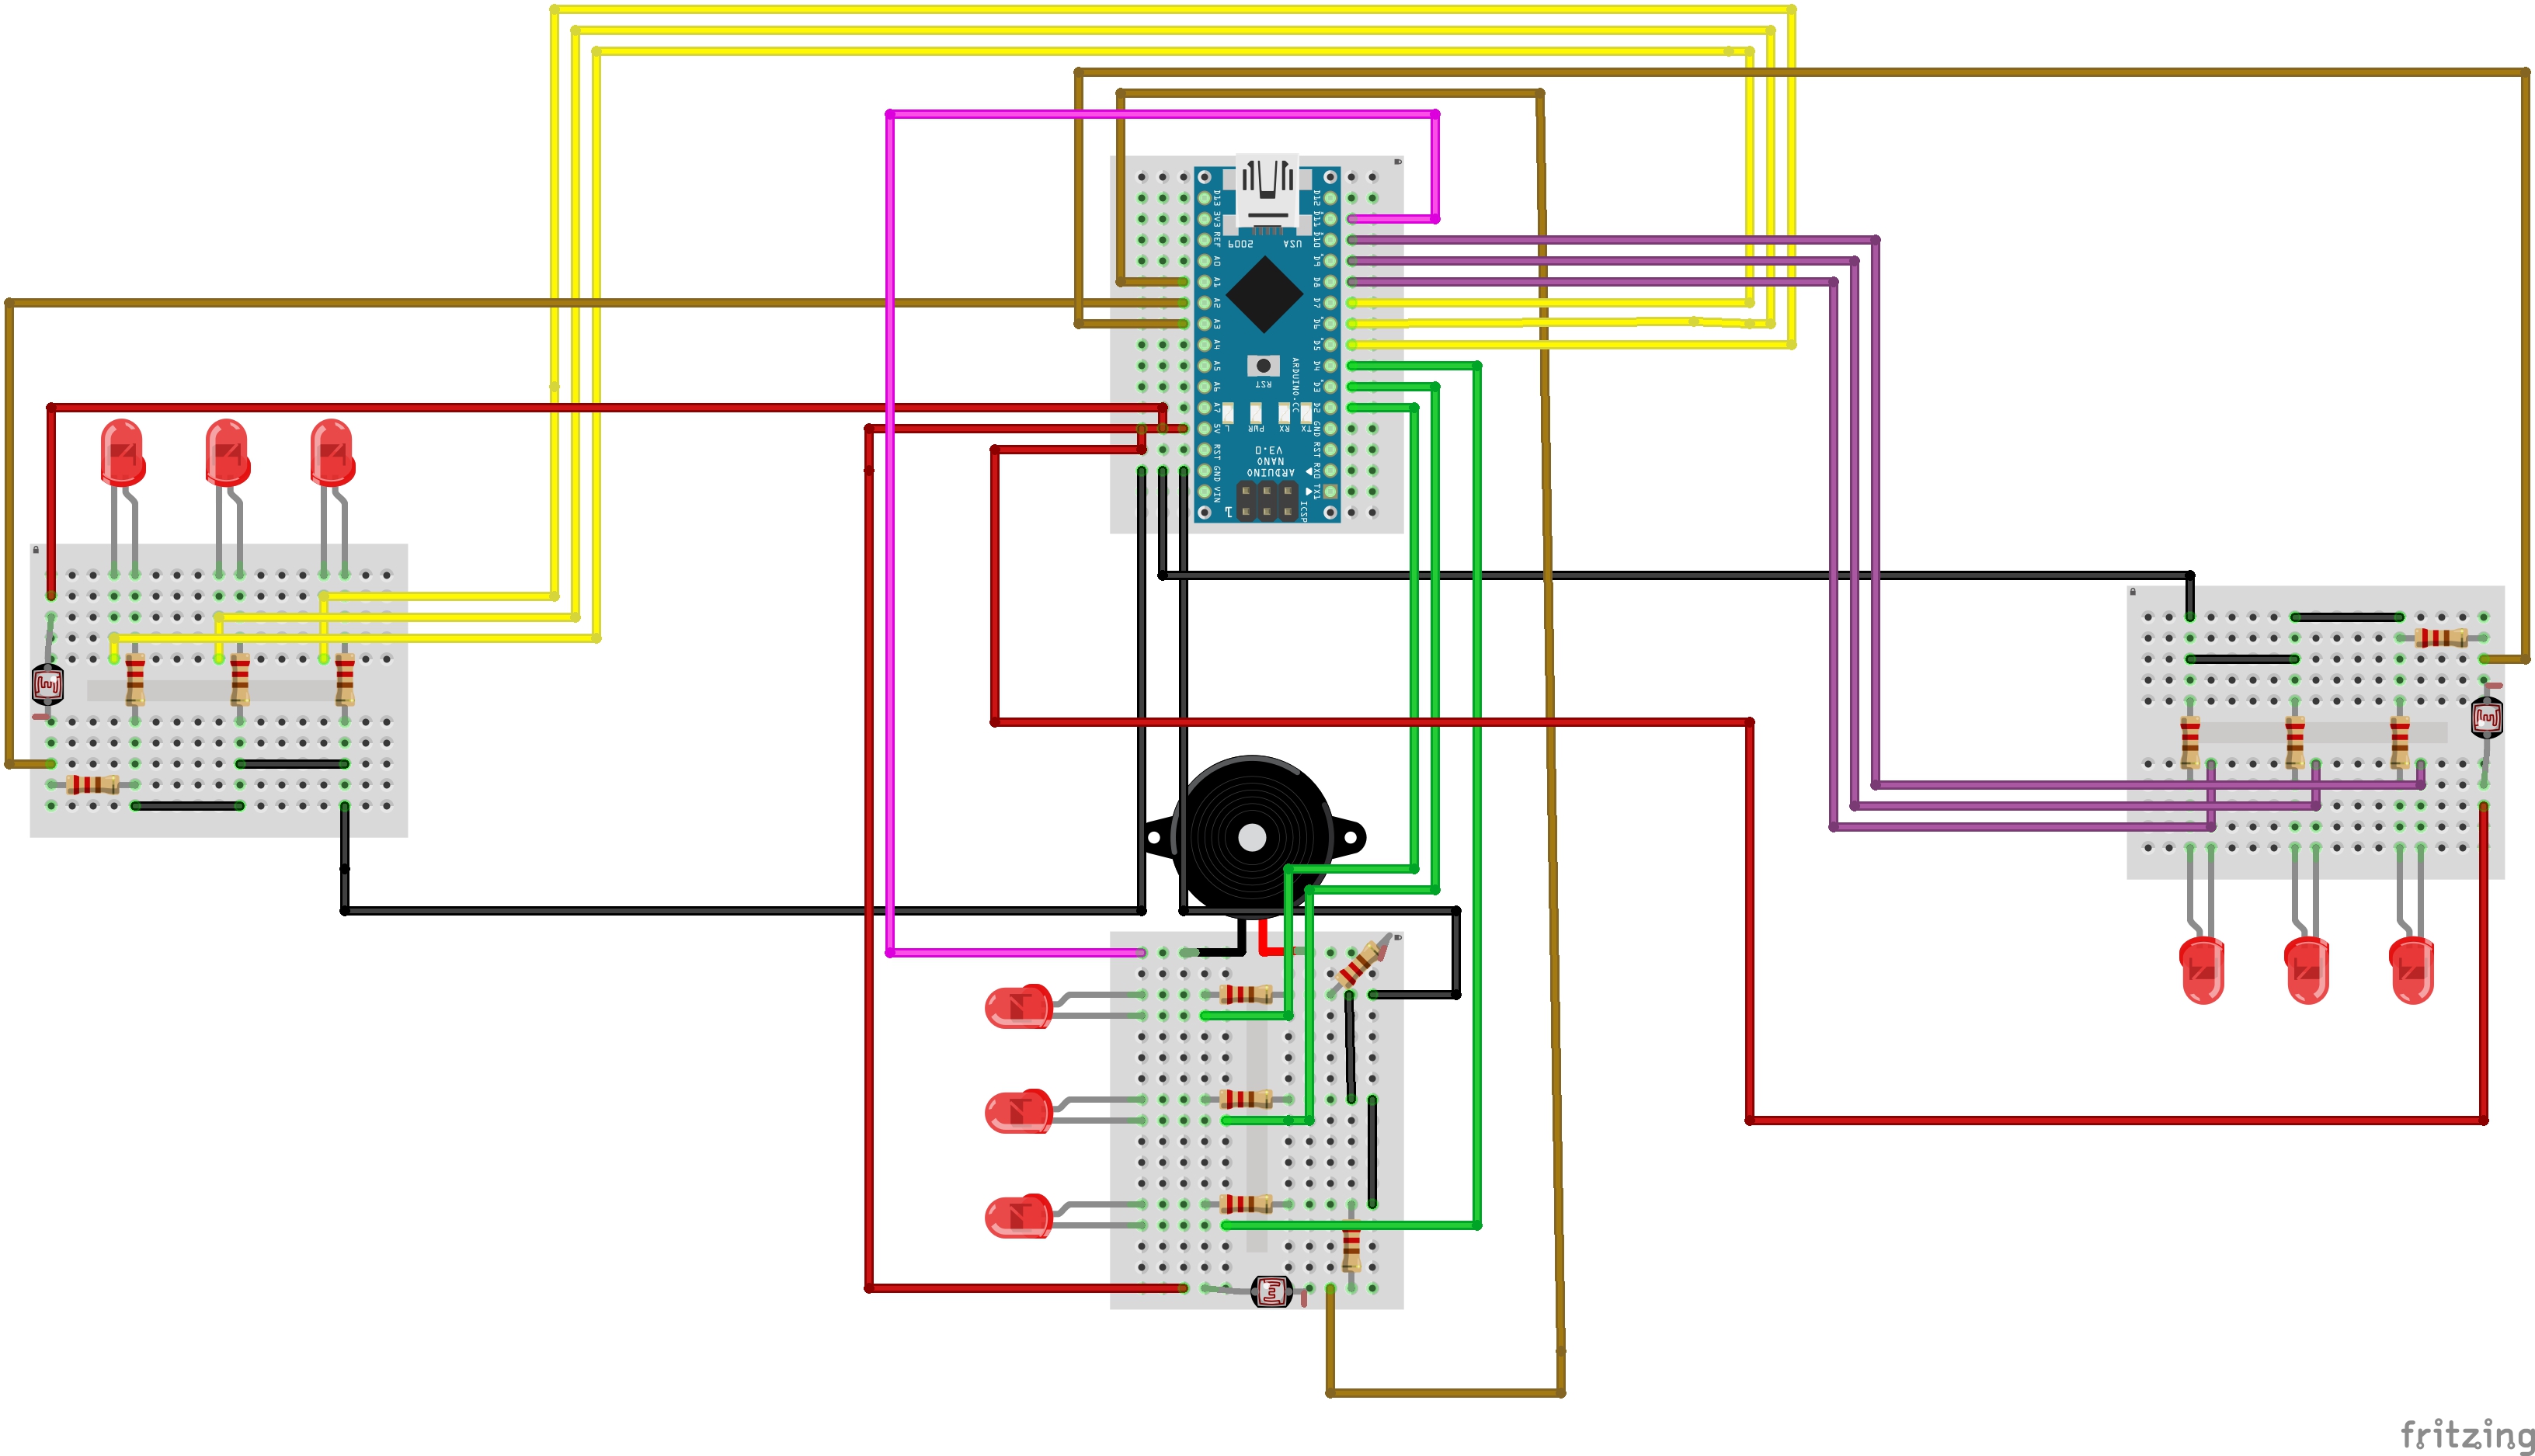
You can find a detailed connections guide at the code below.
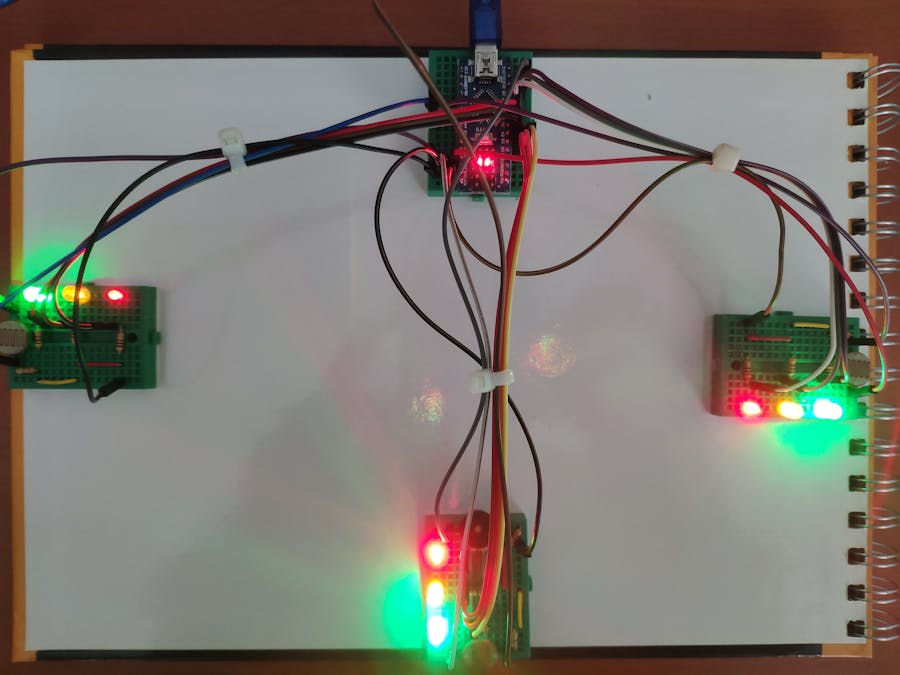
Connect LED, photopesistor and GND wire to a mini breadboard. And, connect buzzer to control_1 mini breadboard.
Make the connections between all mini breadboards, and it is ready to detect light intensity.
Energy production thresholds has three level at which LED colors change:
Low - Red
Moderate - Yellow
High - Green
Also, if you want, get the output through serial ports.
Now, you can use it to charge your Li-Po battery properly via a solar panel.


_3u05Tpwasz.png?auto=compress%2Cformat&w=40&h=40&fit=fillmax&bg=fff&dpr=2)


Comments
Please log in or sign up to comment.