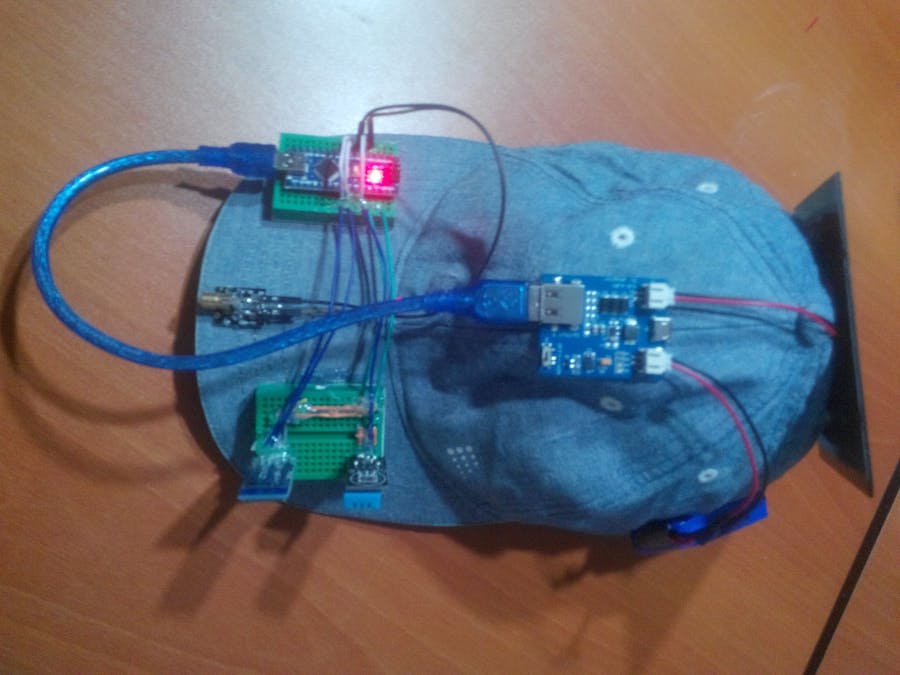
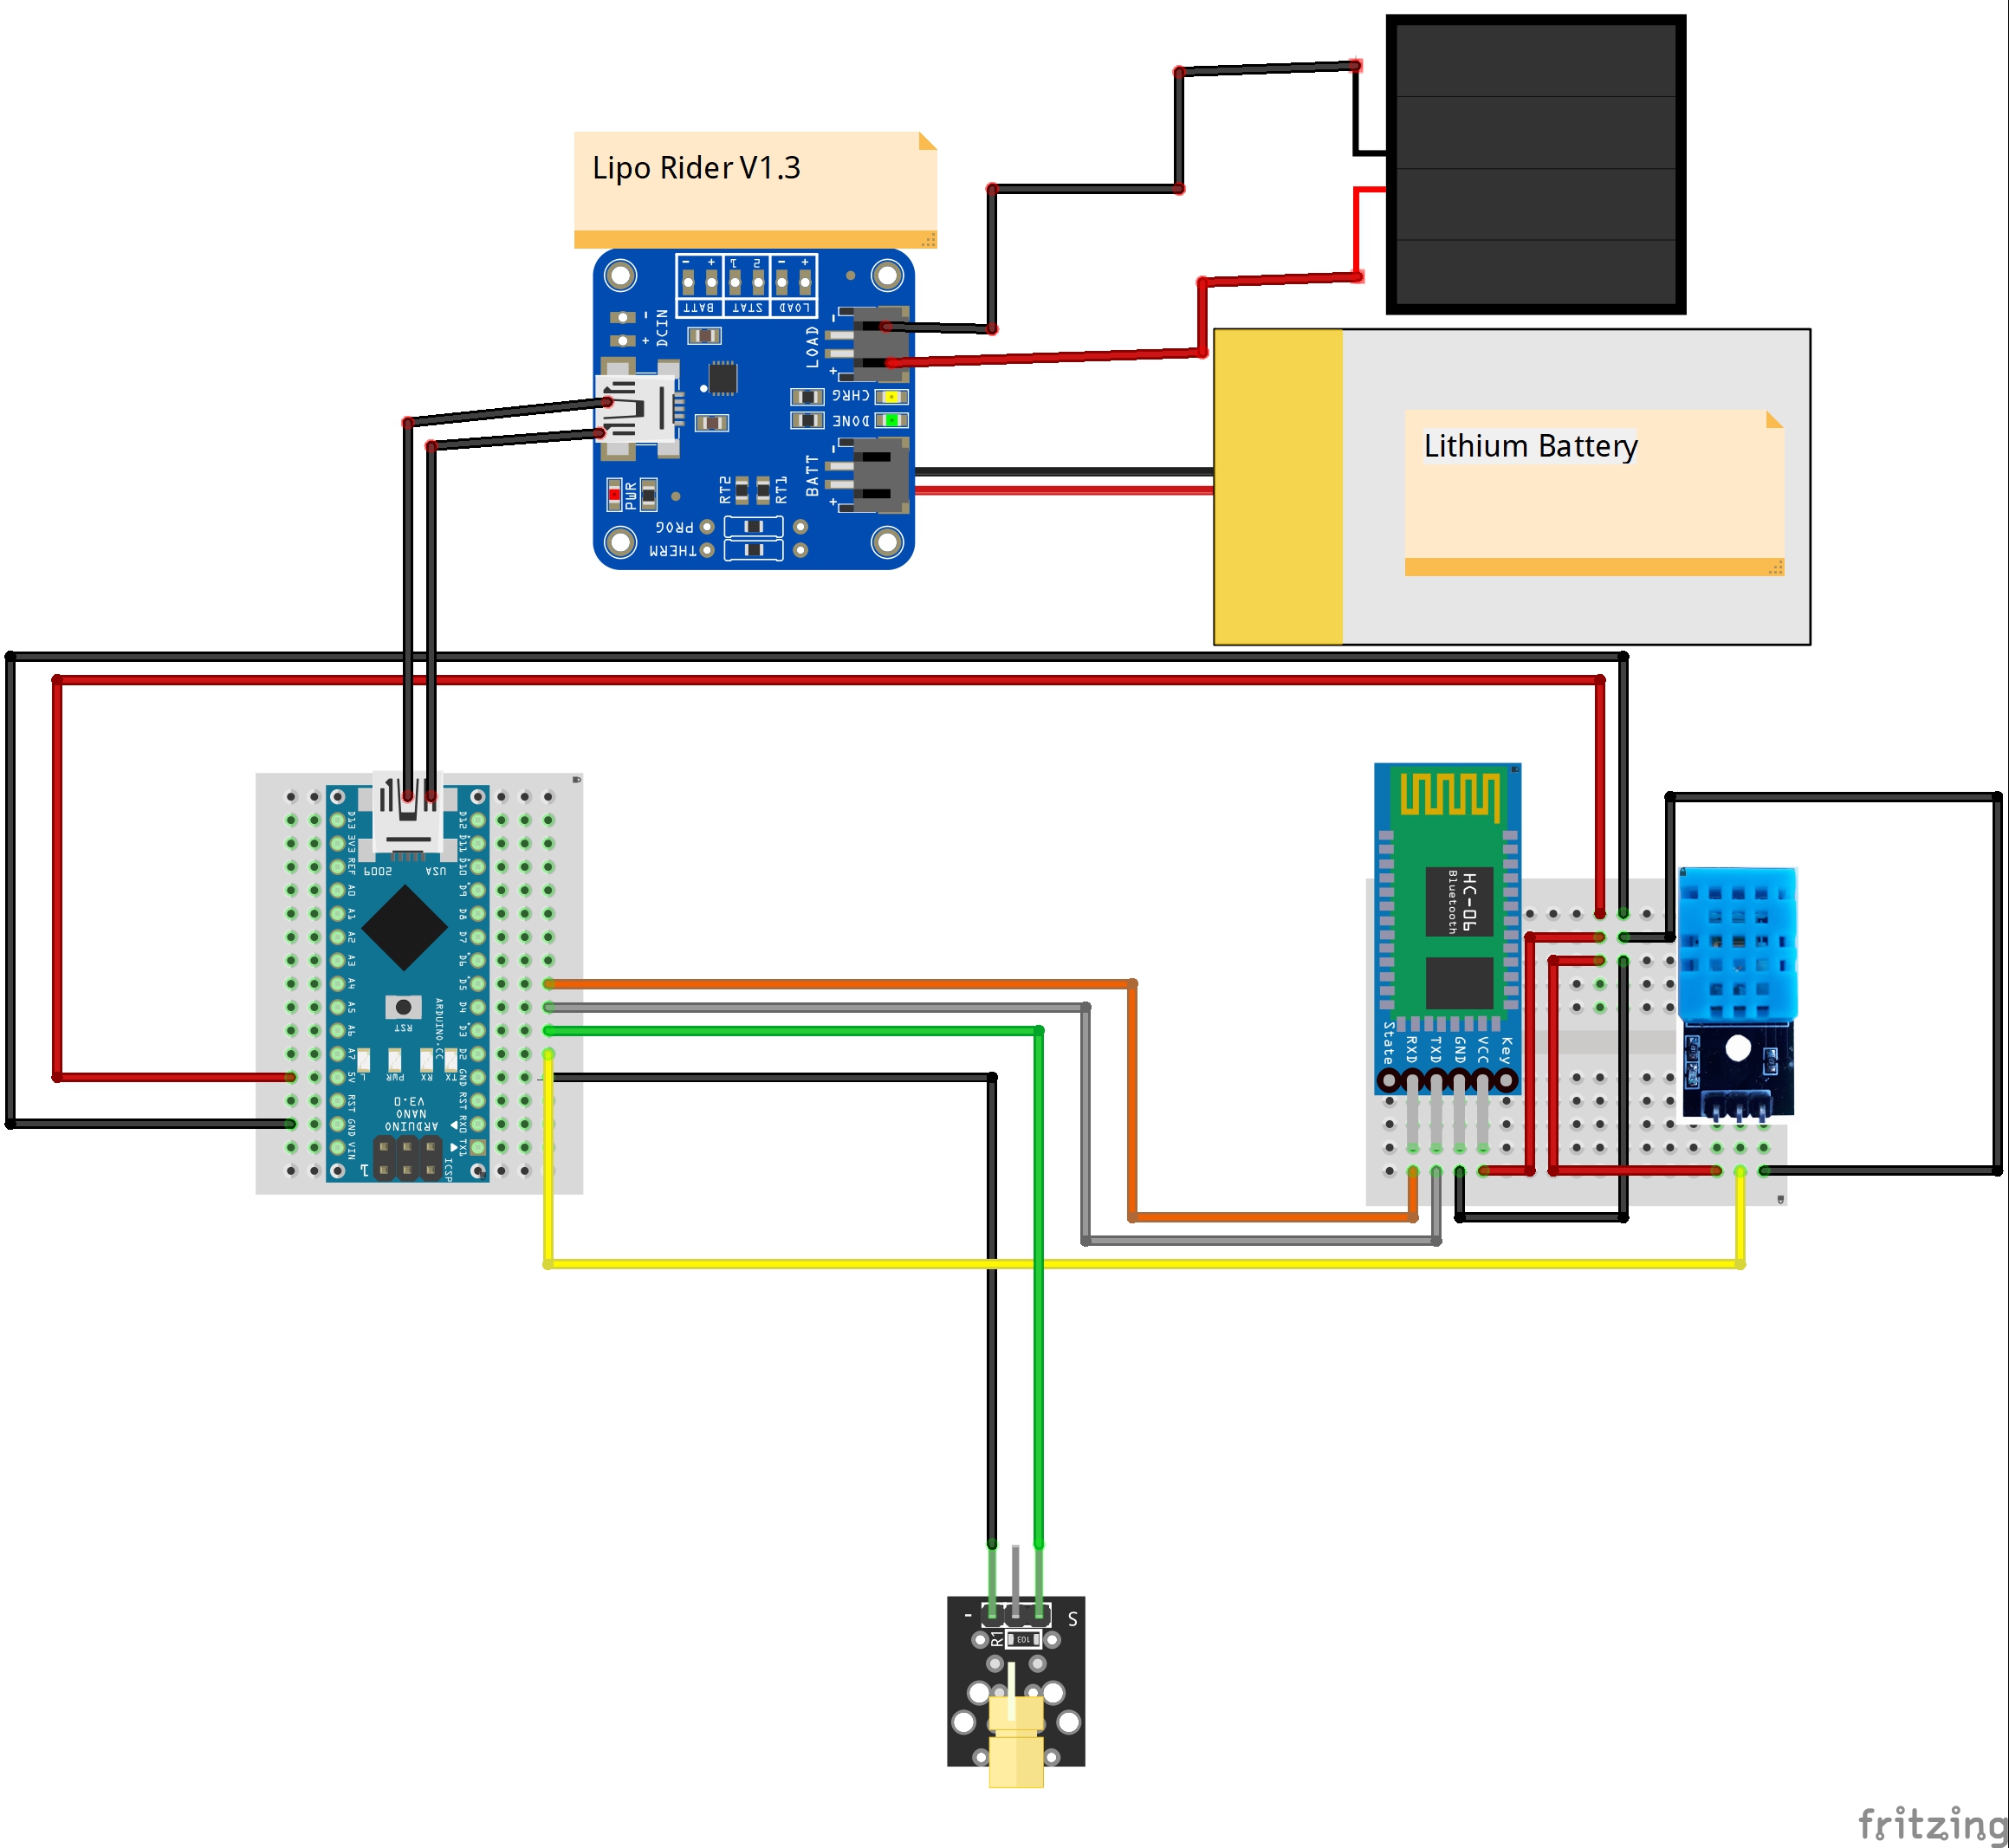
I had been working on a circuit being powered by the solar energy to charge my phone battery and I realized I could make it more efficient by turning the circuit into a portable weather station sending data to my phone through an Android app (Station) over Bluetooth, so I used LiPo Rider V1.3 to charge a lithium battery with the solar energy generating by a solar panel and to power Arduino Nano with the lithium battery as a current source.
To support my projects and articles, you can visit my website here :)
Components outside of the range may cause a circuit overload to Arduino, according to Lipo Rider V1.3 page on SeeedStudio.com so that make sure the solar panel and the lithium battery you have are in the right specifications for LiPo Rider.
Solder a JST connector to the solar panel and the lithium battery if it was not attached them one.
Connect the solar panel and the lithium battery to JST inputs and turn the control button on, then it is ready to charge either a phone battery or Arduino Nano.
Make the connections by taking the steps at the code and the schematic below.
In addition to the features of the project, I made a laser module controlled by Station (Android app), just for fun.
When the code is uploaded to Arduino Nano, Station (Android app for the project) is ready to collect the data packet being send by HC-06 Bluetooth Module.
Station (Android App)Features:
- Get the weather information constantly.
- Control the laser module
For more information: https://www.theamplituhedron.com/projects/Mobile-Weather-Station-Being-Powered-by-Solar-Energy/#h-4
Download Station.apk: https://www.theamplituhedron.com/projects/Mobile-Weather-Station-Being-Powered-by-Solar-Energy/#apk
Download Station.aia: https://www.theamplituhedron.com/projects/Mobile-Weather-Station-Being-Powered-by-Solar-Energy/#aia
After I finished the project, I put it on the top of my rope hat by using a hot glue gun and therefore sunlight strikes the solar panel at close to a right angle. Now, I use my improved rope hat as a test device for my experiments on the outside.


_3u05Tpwasz.png?auto=compress%2Cformat&w=40&h=40&fit=fillmax&bg=fff&dpr=2)


Comments
Please log in or sign up to comment.