


Hardware components | ||||||
 |
| × | 1 | |||
 |
| × | 1 | |||
 |
| × | 1 | |||
 |
| × | 4 | |||
 |
| × | 1 | |||
Software apps and online services | ||||||
 |
| |||||
TikTok….the app that has taken over the internet. However, it takes more than just a camera and dancing to go viral. You may notice that a lot of these trendy teens have these cool lights in the background, fading between many different colors. Our project, “Ray of Light, ” is here to aid you on your path to stardom!
Our device is targeted towards those who want to go viral on TikTok! It is a cheap and easy solution to get the lights you want in your video without spending hundreds of dollars paying for them! However, its applications extend far beyond applications to social media influencers; for example, if you simply want to change the lighting of your room or are a photographer and want to experiment with lighting… the possibilities are endless!
Here is a little more about how you can recreate this at home… just keep reading!
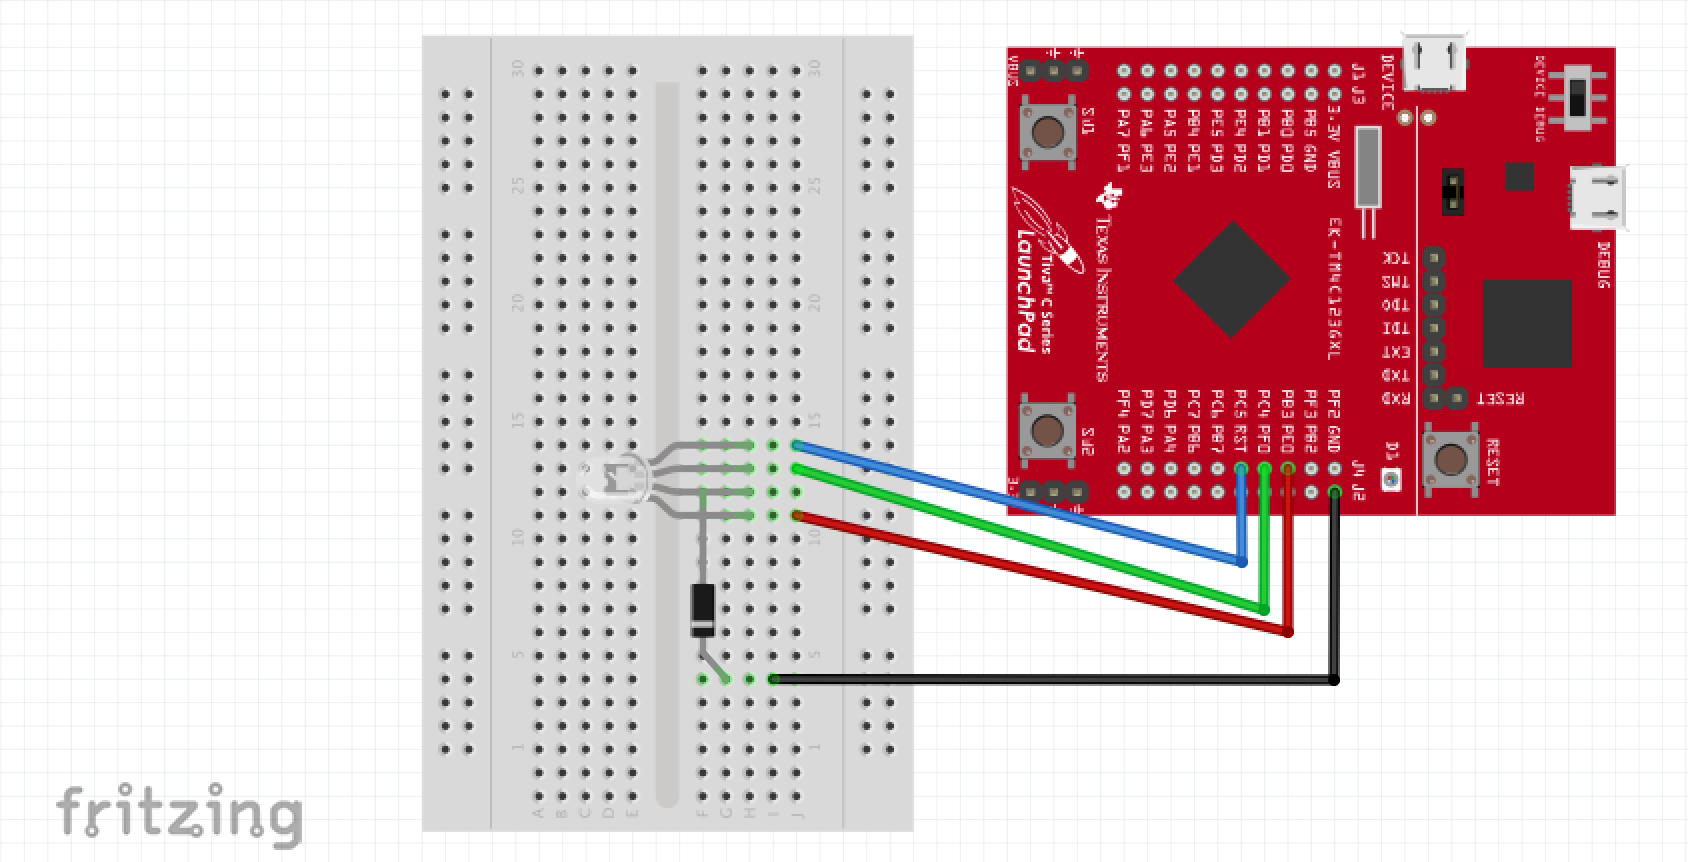
Build Instructions:(1) Take the breadboard and the RGB LED. All 4 legs of the LED will be inserted in column C of the breadboard, with each leg in a different, consecutive row (in our example, we will be using rows 11-14). Orient the LED so that the longest leg will be inserted in row 12. The remaining legs should be inserted into rows 11, 13, and 14.
(2) Attach one jumper wire so that one end is inserted into the 3.3V slot on the LaunchPad and the other end is connected to the 4a slot on the breadboard. This provides the voltage to power our circuit.
(3) Attach the second jumper wire so that one end is inserted into port PD0 on the LaunchPad and the other end is connected to the 11a slot on the breadboard. This provides for the red values of our LED.
(4) Attach the third jumper wire so that one end is inserted into port PD1 on the LaunchPad and the other end is connected to the 13a slot on the breadboard.This provides for the green values of our LED.
(5) Attach the fourth jumper wire so that one end is inserted into port PD2 on the LaunchPad and the other end is connected to the 14a slot on the breadboard. This provides for the blue values of our LED.
To implement tilt switch, implement the two following steps:
(6) Attach the tilt switch to the breadboard, with the cathode inserted into slot 4d and the anode inserted into slot 12e.
(7) Move the power wire to row 4 to connect the tilt switch to the circuit. The "Ray of Light" is now complete!
FinishedProduct:
Here is a video from a satisfied customer:


Comments
Please log in or sign up to comment.