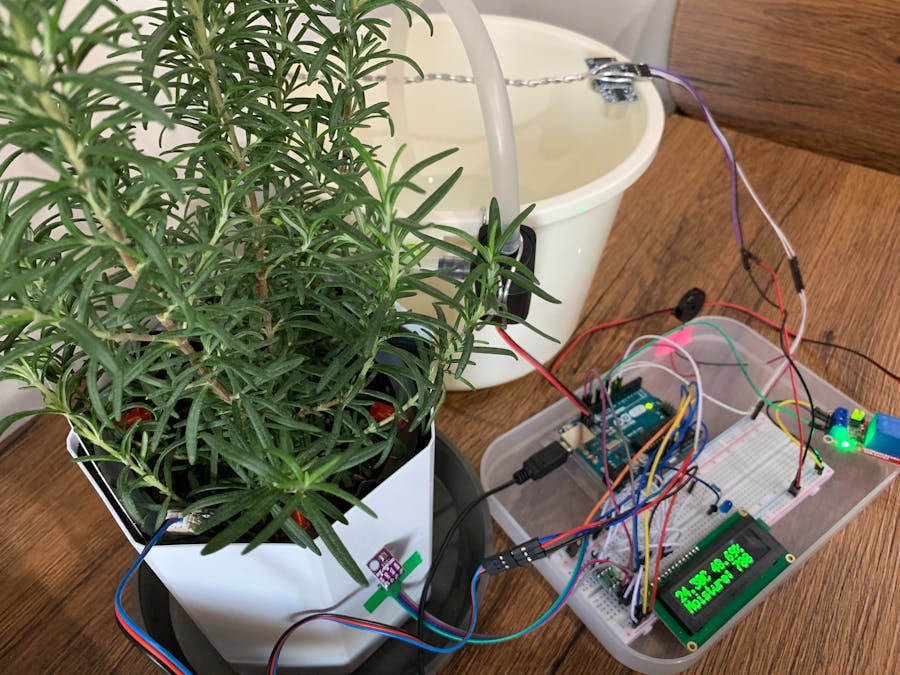
This is my first project. I love plants, so I created an automatic watering system.
Our system measures the soil moisture and waters automatically according to it. A blue LED tells us when the bucket is empty. BME280 monitors and OLED displays the temperature and humidity in the room. Temporary, it's used indoors only because it needs electrical outlet. In the future, we want to use solar power to run it.
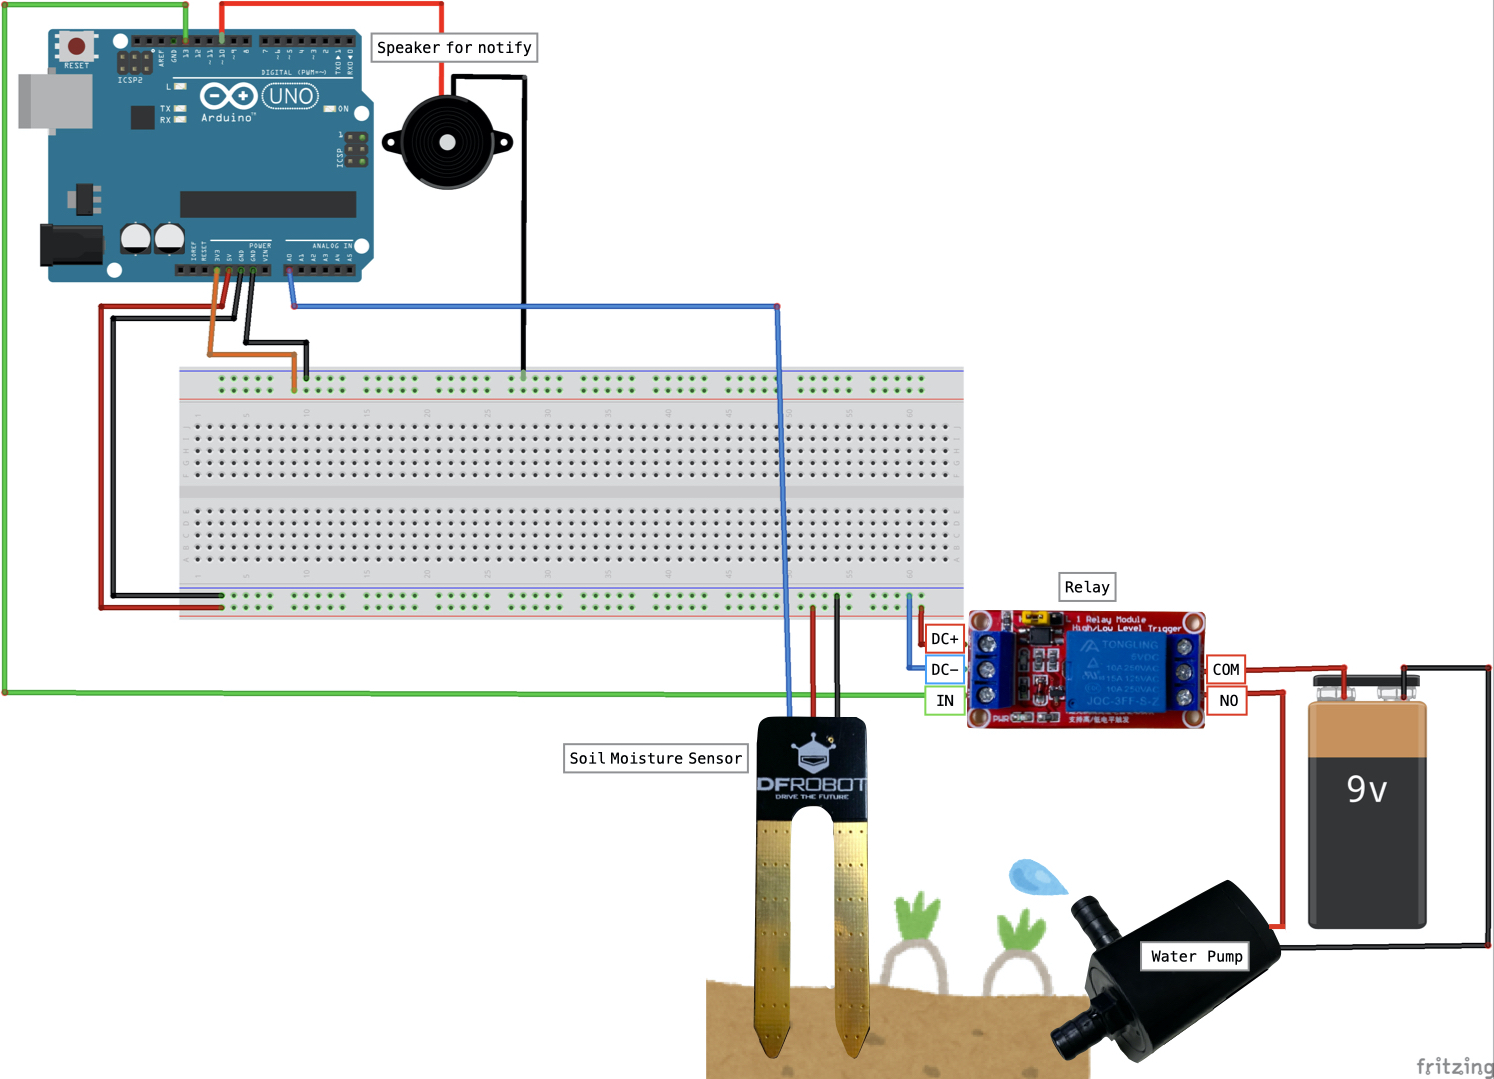
Step1 -Watering-When the value obtained from the soil moiture sensor falls below 300, the water pump starts to run and waters for plants. "300" indicates that the soil is dry. An outlet supplies power to the pump and the relay module(JQC-3FF-S-Z) regulates the pump. A piezo speaker will let us know that watering is complete. The soil moisture is measured once every 60 seconds.
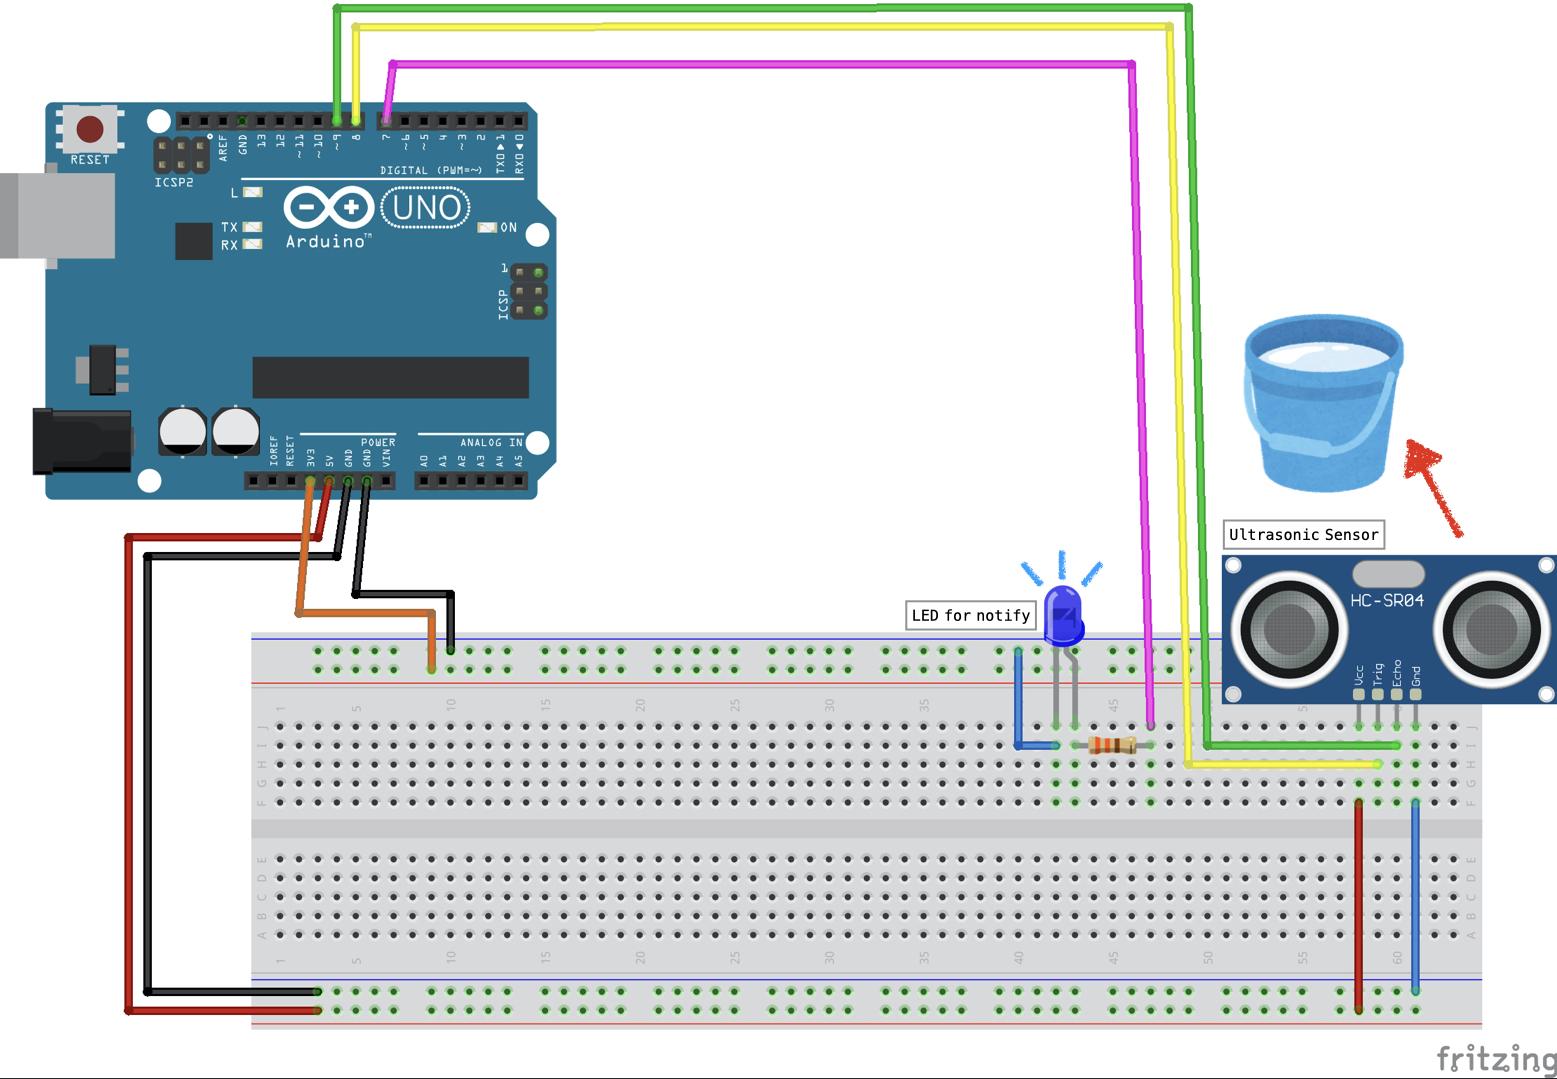
Use an ultrasonic sensor to know how much water is left in our watering bucket. When the height of the water in the bucket is less than 2cm, a blue LED will turn on. When there is enough water in the bucket, the LED are off.
The ultrasonic sensor measures the distance to the water. The serial monitor shows around 10 cm, which roughly matches the actual distance to water.
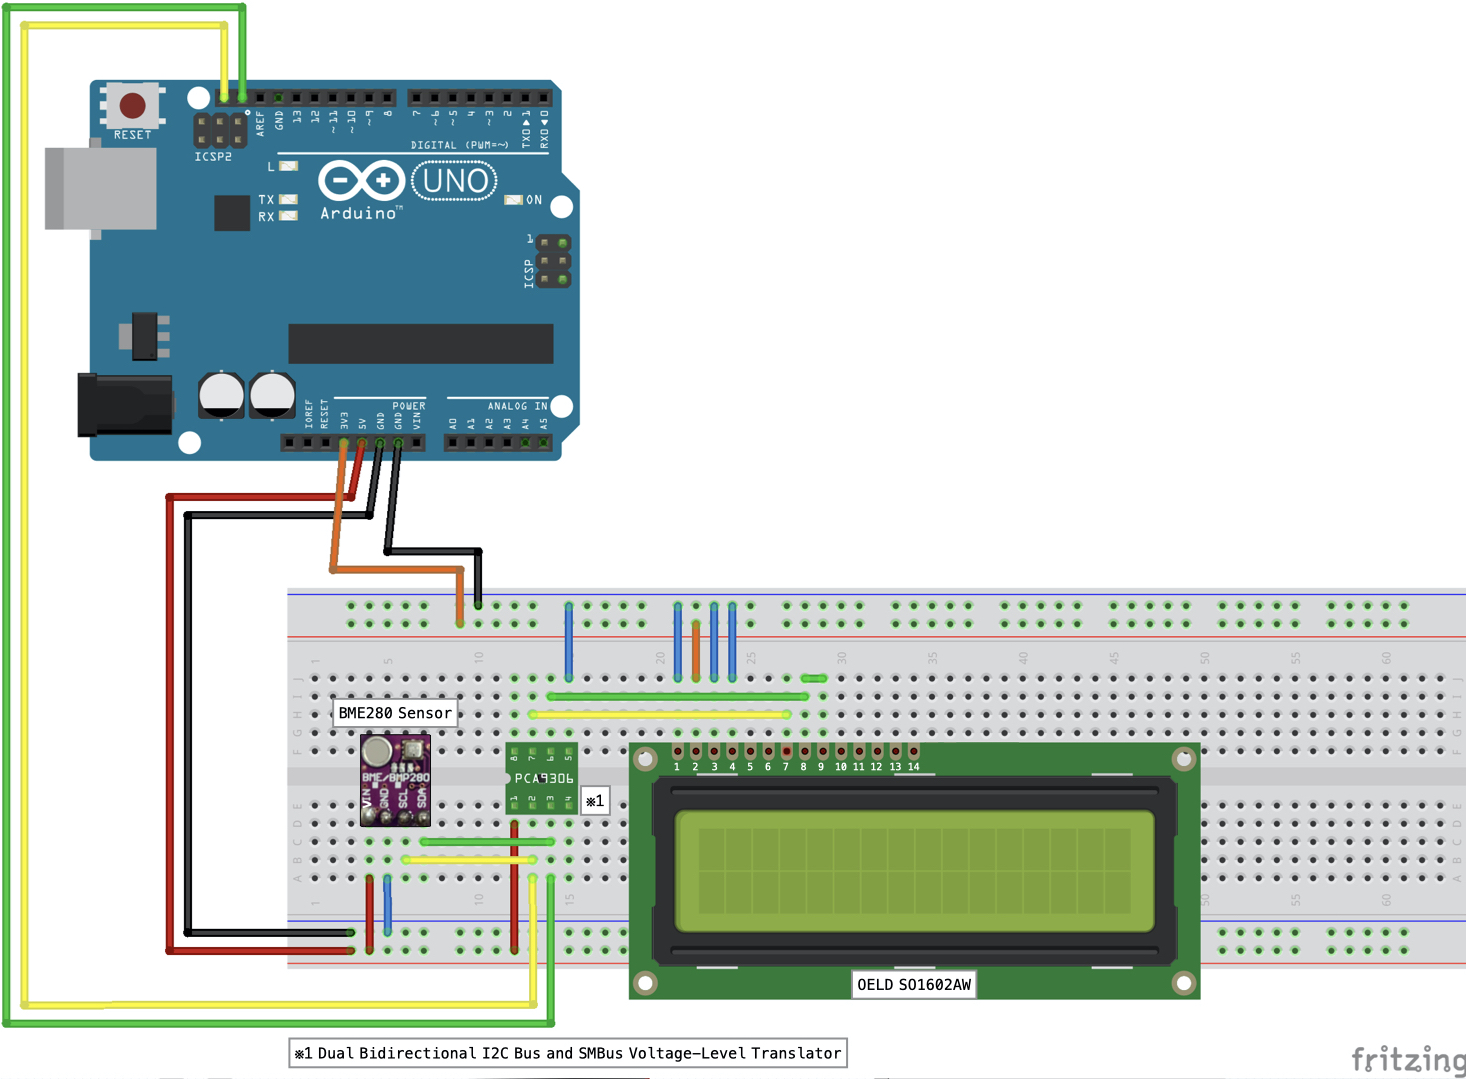
Our system measures the temperature and humidity in the room, and displays these values on an OLED. It also shows the soil moisture.
In this project, I used an OLED with I2C connection. And I used the "I2CLiquidCrystal" library as a reference for that OLED. Download from here.→https://n.mtng.org/ele/arduino/i2c.html
According to the reference site, this library was created by the author with reference to the official Arduino "LiquidCrystal" library. →https://www.arduino.cc/en/Reference/LiquidCrystalConstructor
When using a display, please change the library and code according to the display you are using.
We wish to make more wonderful and useful devices in the future!
This time we used rosemary, which prefers dry conditions rather than wet. We should be careful not to over water it. It smells great. We're very happy.
Writing the sketches in one file makes it difficult to see the wiring, we created a separate file for each step. In practice, we used an Arduino and a breadboard.


_ztBMuBhMHo.jpg?auto=compress%2Cformat&w=48&h=48&fit=fill&bg=ffffff)


Comments