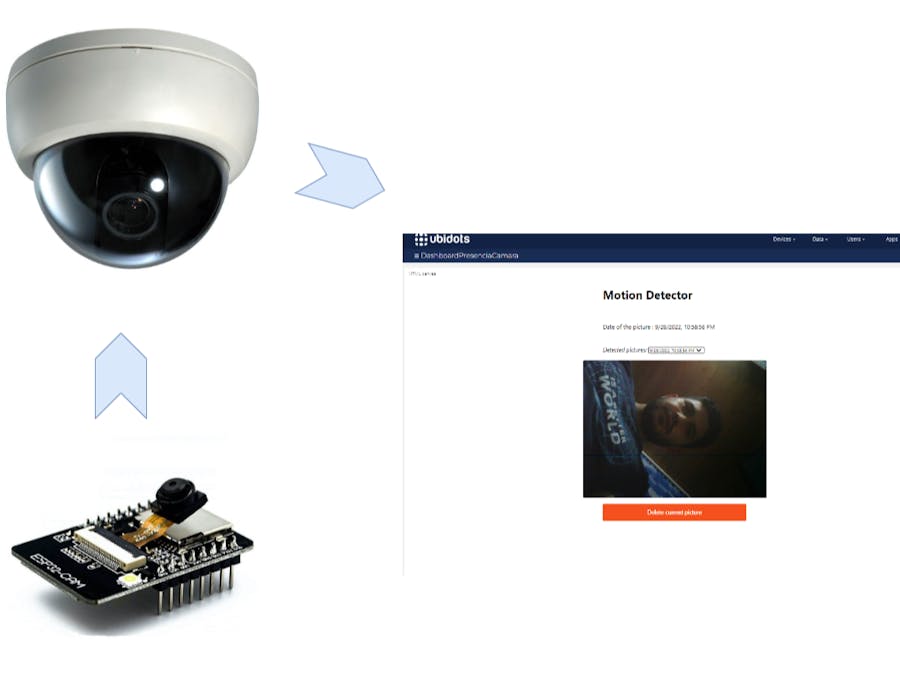
A short while ago, I dealt with a difficult situation in my neighborhood. There were some strangers walking around our house and they didn't appear to have good intentions. My family and I usually traveled on the weekends and there was no way to verify if everything was in order so I decided to start a project that helps us to keep an eye on the house and inform us if there are strangers walking around and spying.
How does it work?When a motion is detected by the PIR sensor, a photo will be sent by the ESP32CAM to Google Drive, then the FileID, FolderID, and FileName will be sent to Ubidots to visualize the pictures in a widget created in an HTML Canvas.
What should you do to make this project?To accomplish this project, you need to follow these steps:
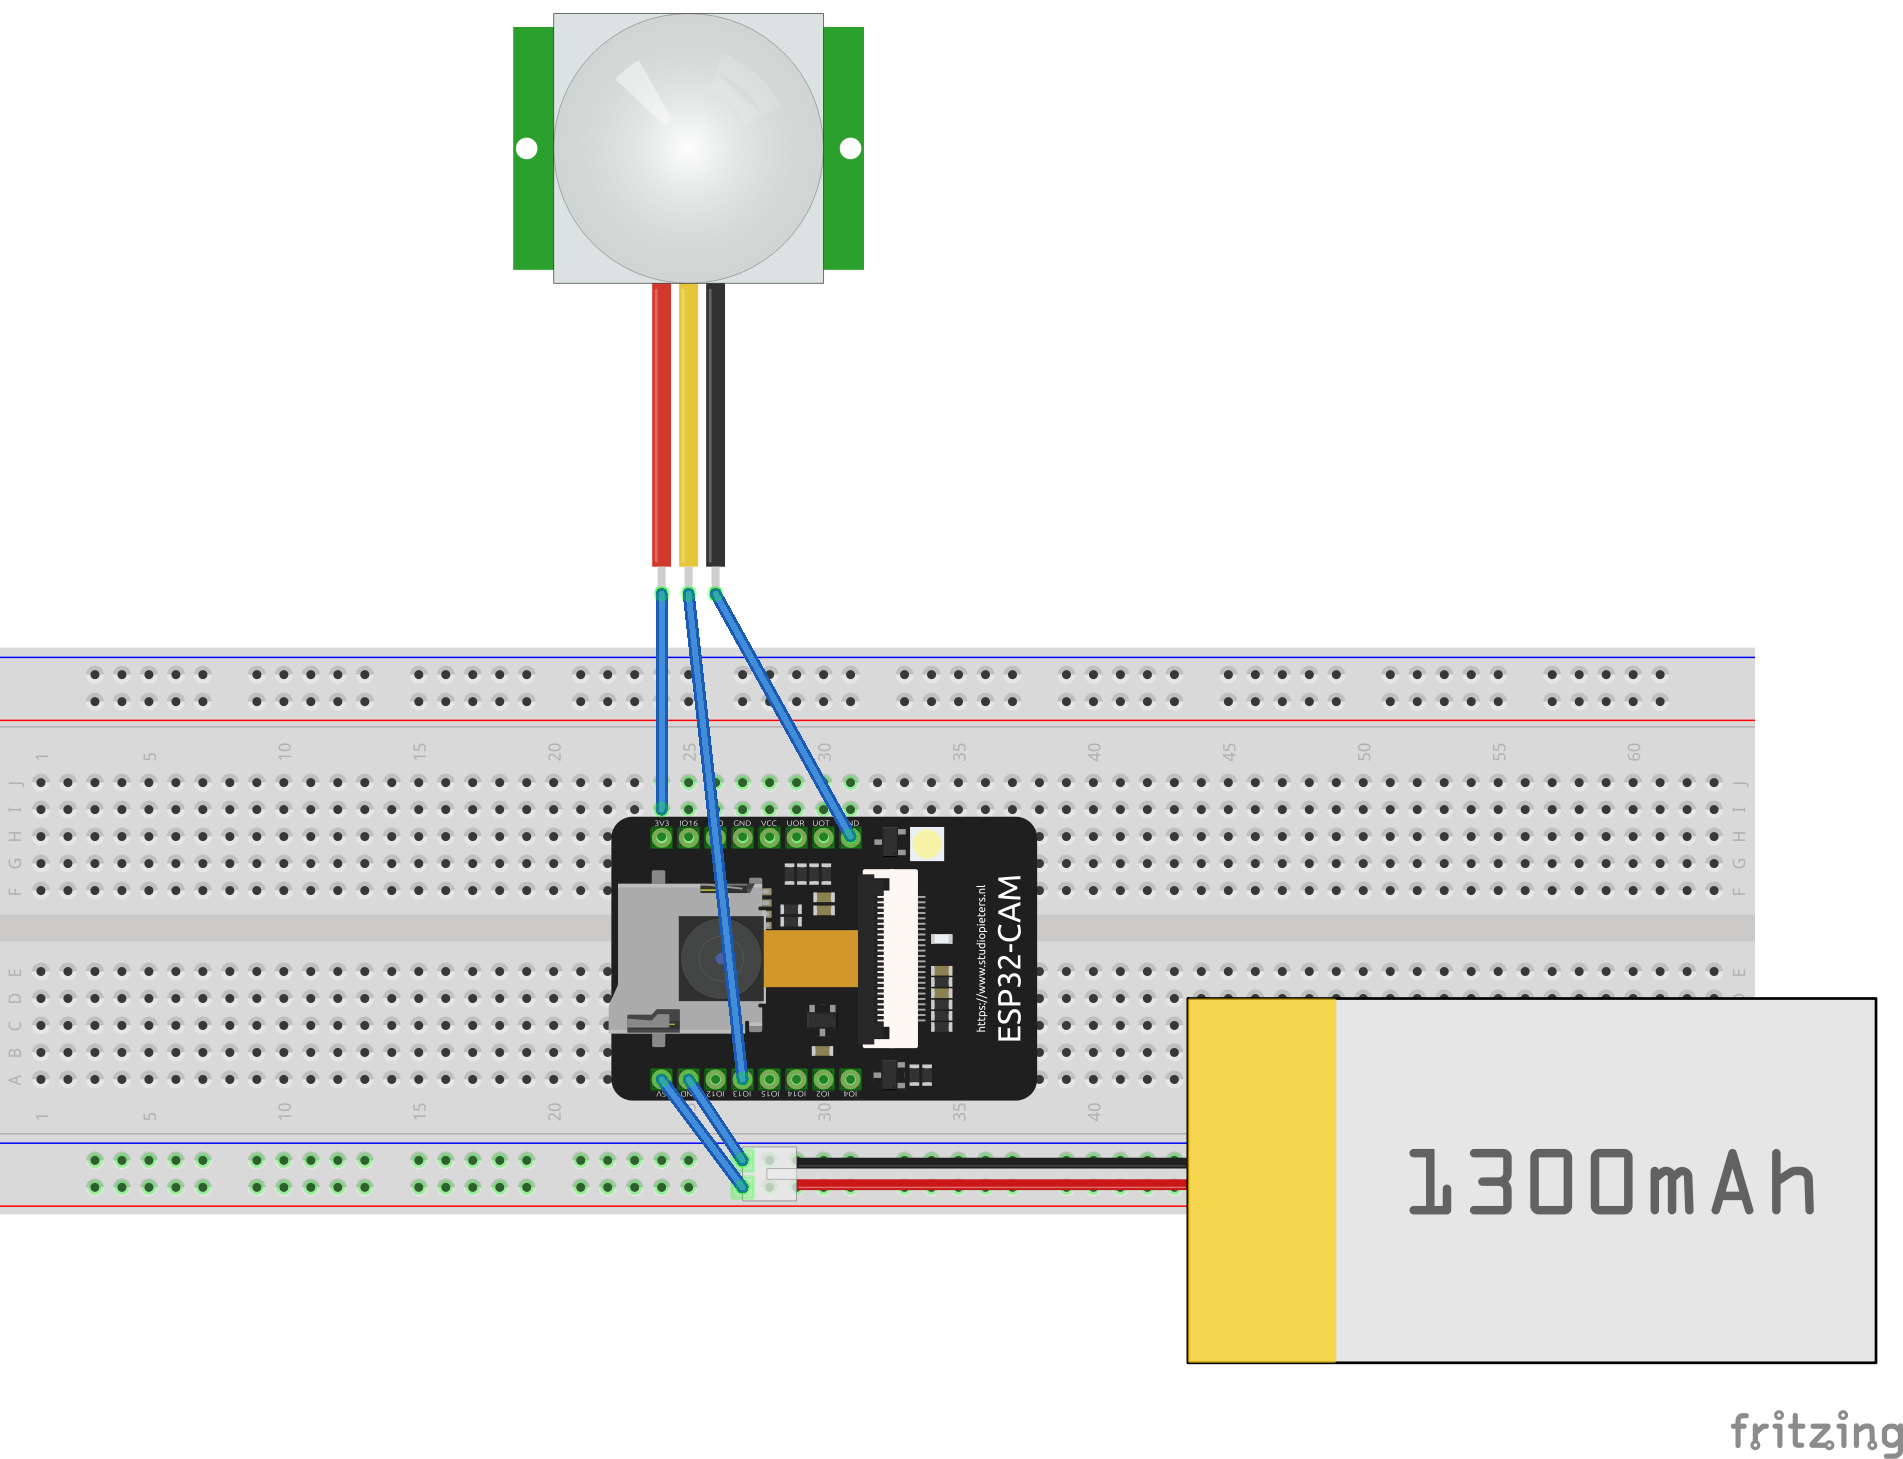
1. Wire the PIR motion sensor to the ESP32CAMWith some Jumper Wires connect the PIR motion sensor to the ESP32CAM following the schematic shown in the image below, note that you can change the pinout inside the code.
To create a new Google Script project follow these steps:
- Go to the Google Apps Script website.
- Click on the top-left“+” button and create a new project.
- Copy the code found in this repository and paste it into your Google Script project.
- Put the Token of your Ubidots account in the variable called "TOKEN". Thus, we'll send in the context of the dot the fileID, folderID, and fileName in String format. Typically the context is used to store Strings in key-value pairs.
var TOKEN = "YOUR-TOKEN";You can change the variable label and device label as desired. In such device and variable, you'll store the fileID, folderID, and fileName of the picture taken by the ESP32CAM.
- Publish your code and change the permissions of the script to allow everyone to see it.
- Copy the ID that appears once you publish the script. We'll use it inside the ESP32CAM.
There are many tutorials on the internet that shows us how to program the ESP32 CAM, an excellent guide can be found here: ESP32CAM. Download the respective code from this repository and open it in your Arduino IDE.
Inside the ESP32CAM code...Some modifications have to be done inside the code to run properly it on your ESP32CAM.
- Put your wireless network credentials in the SSID and Password fields.
const char* ssid     = "SSID";
const char* password = "PASSWORD";- Paste the ID of your Google Script in the following variable.
String myScript = "/macros/s/ID-OF-URL/exec"; //Replace with your URL IDFinally, run all the code in your Arduino IDE and flash your ESP32CAM.
4. Customize your widget.HTML canvas widget allows you to customize your own widgets. Click here to learn more. With the widget created in this section, you'll be able to see the pictures taken by the ESP32CAM. In addition, you'll see a dropdown with some registers of the pictures and if required, you can remove it.
Now, let’s create our own widget using these code snippets:
- Go to the "Data" dropdown in the navigation bar, then "Dashboards", and select the dashboard you'll be working on.
- Click on the top-right “+” button in your dashboard.
- Select the HTML Canvas option.
- Copy and paste in the HTML Canvas the HTML, CSS, and JavaScript codes found in the repository attached.
- In the JavaScript code, put the Token of your Ubidots account in the variable called "TOKEN".
const TOKEN = "YOUR-UBIDOTS-TOKEN";// Put here your Ubidots Token- Verify the permissions in the Google Drive folder that contains all the pictures. You have to allow access to everyone.
Important note: You have to be sure that the device label and variable label set in the Google Script project match with the device label and variable label set in the JavaScript code.
5. Set up an alert.Ubidots Events allow you to trigger Email, SMS, Voice call, and even Webhook notifications based on your sensor data. Click here to learn more about Events. In this case, we’ll use the events to receive e-mails with the pictures captured by the ESP32CAM, please follow these steps.
- Go to the "Data" dropdown in the navigation bar, then "Events".
- Click on the top-right “+” button and create a new event.
- Set your event to be triggered once the variable receives "1".
- Please note that Ubidots allows you to use custom fields inside event actions. For example, we’ll include the URL to the image file, which is stored in the context of the data point. To access the context, use this notation:
Hey there, the system has detected an outsider for :{{variable.last_value_timestamp}}, please check the picture in the following link:
https://drive.google.com/file/d/{{variable.last_value_context.fileID}}/view?usp=sharing
In "Then actions" set a zero in the variable to reset the event trigger.


_3u05Tpwasz.png?auto=compress%2Cformat&w=40&h=40&fit=fillmax&bg=fff&dpr=2)
Comments
Please log in or sign up to comment.