/*
-- remote control car wemos --
This source code of graphical user interface
has been generated automatically by RemoteXY editor.
To compile this code using RemoteXY library 2.4.3 or later version
download by link http://remotexy.com/en/library/
To connect using RemoteXY mobile app by link http://remotexy.com/en/download/
- for ANDROID 4.5.1 or later version;
- for iOS 1.4.1 or later version;
This source code is free software; you can redistribute it and/or
modify it under the terms of the GNU Lesser General Public
License as published by the Free Software Foundation; either
version 2.1 of the License, or (at your option) any later version.
*/
//////////////////////////////////////////////
// RemoteXY include library //
//////////////////////////////////////////////
// RemoteXY select connection mode and include library
#define REMOTEXY_MODE__ESP8266WIFI_LIB_POINT
#include <ESP8266WiFi.h>
#include <RemoteXY.h>
// RemoteXY connection settings
#define REMOTEXY_WIFI_SSID "LightTubes"
#define REMOTEXY_WIFI_PASSWORD "12345678"
#define REMOTEXY_SERVER_PORT 6377
// RemoteXY configurate
#pragma pack(push, 1)
uint8_t RemoteXY_CONF[] =
{ 255,4,0,0,0,43,0,10,164,0,
1,1,5,19,12,12,2,31,70,0,
1,1,5,33,12,12,2,31,66,0,
1,1,68,26,12,12,2,31,76,0,
1,1,82,26,12,12,2,31,82,0 };
// this structure defines all the variables and events of your control interface
struct {
// input variables
uint8_t button_f; // =1 if button pressed, else =0
uint8_t button_b; // =1 if button pressed, else =0
uint8_t button_l; // =1 if button pressed, else =0
uint8_t button_r; // =1 if button pressed, else =0
// other variable
uint8_t connect_flag; // =1 if wire connected, else =0
} RemoteXY;
#pragma pack(pop)
/////////////////////////////////////////////
// END RemoteXY include //
/////////////////////////////////////////////
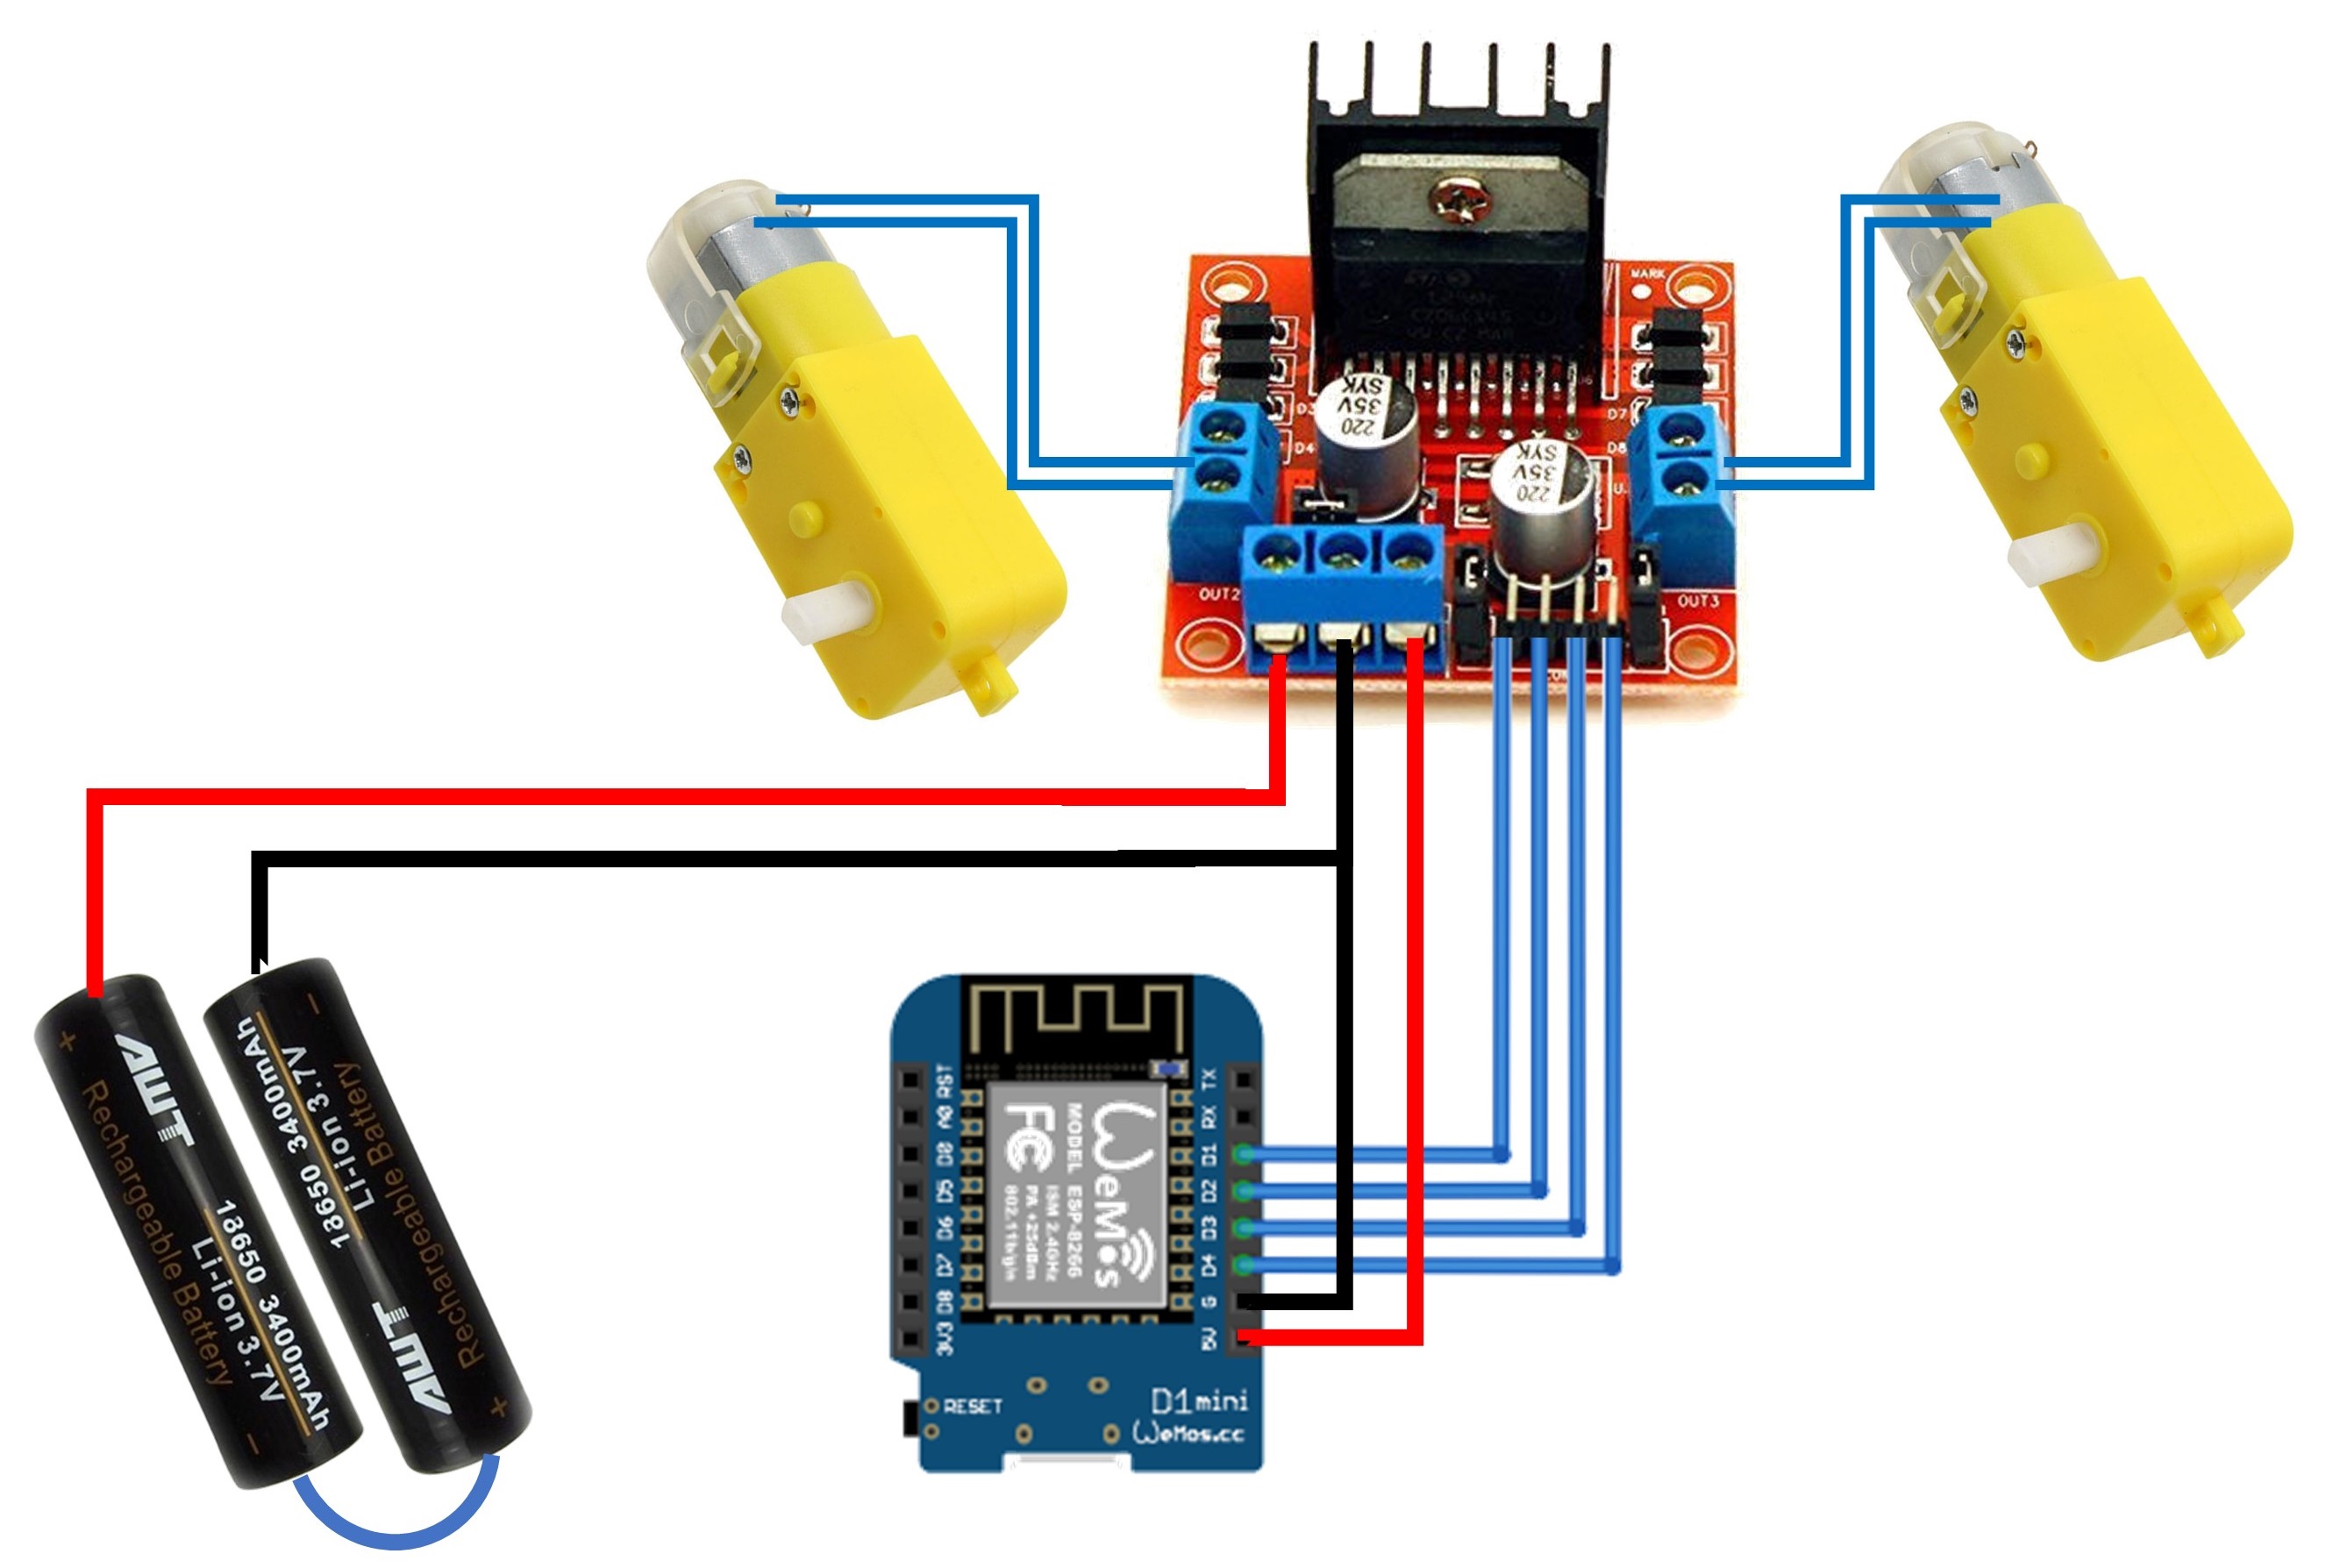
#define out1 D1
#define out2 D2
#define out3 D3
#define out4 D4
void setup()
{
RemoteXY_Init ();
pinMode (out1, OUTPUT);
pinMode (out2, OUTPUT);
pinMode (out3, OUTPUT);
pinMode (out4, OUTPUT);
// TODO you setup code
}
void loop()
{
RemoteXY_Handler ();
if (RemoteXY.button_f == HIGH){ //forward
digitalWrite(out1, HIGH);
digitalWrite(out2, LOW);
digitalWrite(out3, HIGH);
digitalWrite(out4, LOW);
}
else if (RemoteXY.button_b == HIGH){ //backward
digitalWrite(out1, LOW);
digitalWrite(out2, HIGH);
digitalWrite(out3, LOW);
digitalWrite(out4, HIGH);
}
else if (RemoteXY.button_l == HIGH){ //turn left
digitalWrite(out1, HIGH);
digitalWrite(out2, LOW);
digitalWrite(out3, LOW);
digitalWrite(out4, HIGH);
}
else if (RemoteXY.button_r == HIGH){ //turn right
digitalWrite(out1, LOW);
digitalWrite(out2, HIGH);
digitalWrite(out3, HIGH);
digitalWrite(out4, LOW);
}
else {
digitalWrite(out1, LOW);
digitalWrite(out2, LOW);
digitalWrite(out3, LOW);
digitalWrite(out4, LOW);
}
// TODO you loop code
// use the RemoteXY structure for data transfer
// do not call delay()
}


_ztBMuBhMHo.jpg?auto=compress%2Cformat&w=48&h=48&fit=fill&bg=ffffff)

_3u05Tpwasz.png?auto=compress%2Cformat&w=40&h=40&fit=fillmax&bg=fff&dpr=2)
Comments