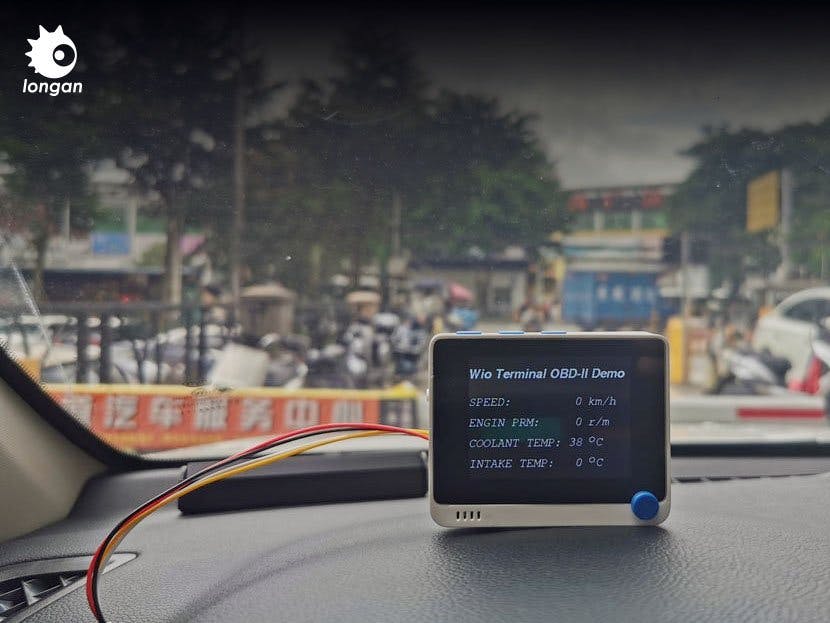
If you have some understanding of CAN Bus and Arduino programming, and want to hack your car, then this tutorial can provide you with a solution.
As for why you want to hack your car, I don't know, but this is indeed an interesting thing.
This project mainly used the Serial CAN Bus Module by Longan Labs and the Wio Terminal main control board by Seeed Studio.
The OBD-II Serial CAN Bus Dev Kit is a CAN Bus control kit designed by Longan Labs. It uses UART to communicate with the single-chip microcomputer. It is compact and easy to use.
Wio Terminal comes from Seeedstuio, which is a development board with a screen that can be programmed with Arduino.
In this project, the following functions are mainly realized:
- Read the cycling speed, rotation speed and oil temperature and other information, displayed on the Wio Terminal screen
If you want more date from the car, please refer to https://en.wikipedia.org/wiki/OBD-II_PIDs
Step 1 : Principle Introduction
Almost all modern vehicles have an OBD-II interface, which is a bridge between the car and the outside world. We can get all the car information and control the car through the OBD-II interface.
And, it is a dangerous thing to control the car, you'd better have a deep understanding of the OBD-II interface before proceeding. This article only reads some basic information from the car, so you can safely follow the steps provided in this tutorial.
Step 2 : Get Components ReadyImportant Note: This project needs the V1.3 version or later of Serial can bus module.
Step 3: Soldering
This may be the most difficult step, if you have never used a soldering iron.
We need to solder the wire provided by OBD-II CAN-BUS Dev kit to an OBD-connector. You can look at the picture, we soldered the red wire to the 6pin of the connector, and the black wire to 14pin. When 6pin represents CANH, 14pin represents CANL.
Step 4: Hardware Connection
- The Serial CAN Bus Module included in the OBD-II CAN-BUS Dev kit is connected to the Wio Terminal UART interface via Grove cable
- Connect the wires from the previous step to the Serial CAN Bus Module, connect red to CANH and black to CANL.
Here we need to make some settings for the serial can bus module.
Before we start, we need to download the code of this project. You can click to download Arduino Library.
If you are using wio terminal for the first tme, you can check wiki for wio terminal
First, we open the setting demo in the sketch, where we will set the mask and filter of the serial can bus module.
Then burning the setting demo to the wio terminal, open the serial monitor and enter a character at random to see whether the setting is successful or not.
After the setting is completed, burn the demo to the wio terminal and you can see the data on the screen.
Step 6: Test on Your CarNext, we need to go to the car and test it. You can find the OBD-II interface under the steering wheel, plug the connector into the OBD-II interface, turn on the wio terminal, and you can see the result.
Step 7: What Can Be ImprovedWio is a powerful main control board, we used quite a few functions in it. For example, Bluetooth, wi-wifi, etc.
Of course, you can also make a more beautiful interface. In short, you can play and enjoy the production process.
More CAN Bus gadgets: Longan Labs Official Site


Comments
Please log in or sign up to comment.