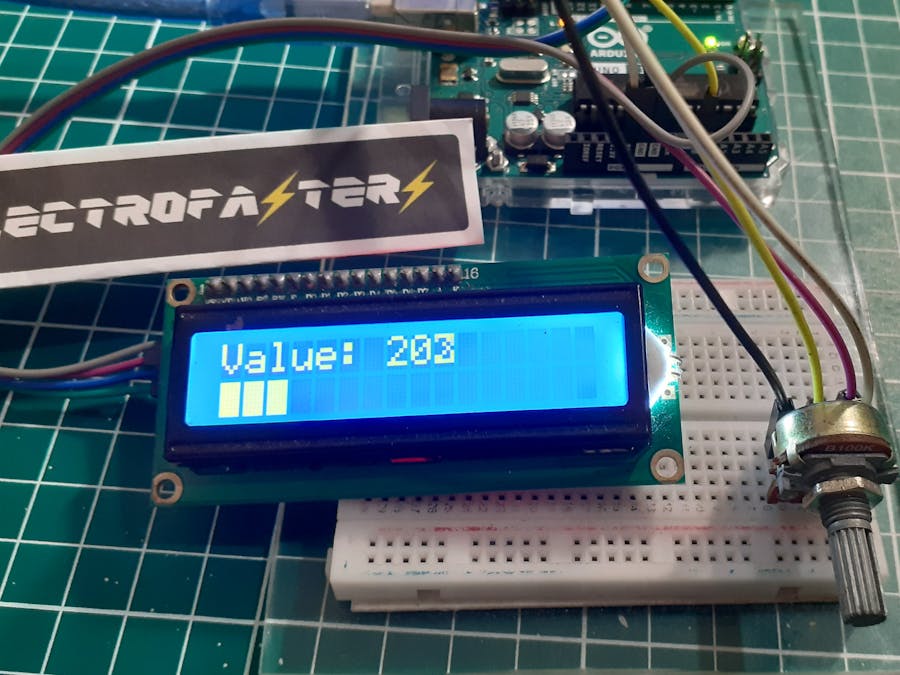
In every electronic project we must think about what the input and output devices to use, the potentiometer is one of the best known and cheapest, we use the analog input reading due to the interaction of the project with the environment, along with this We must give importance to the output or presentation of the value, therefore, after making some of the previous videos, this time I start the graphic representation with an LCD.
To view previous posts, go here: 8xLEDs, 8x8 LEDs matrix, 7-segments display, and 4-digit 7-segment display.
DiagramThe first thing we should do is look at the LCD pinout, it has 16 pins. Components101
To connect the LCD you should use several cables to the arduino and a potentiometer. See the image from LastMinuteEngineers
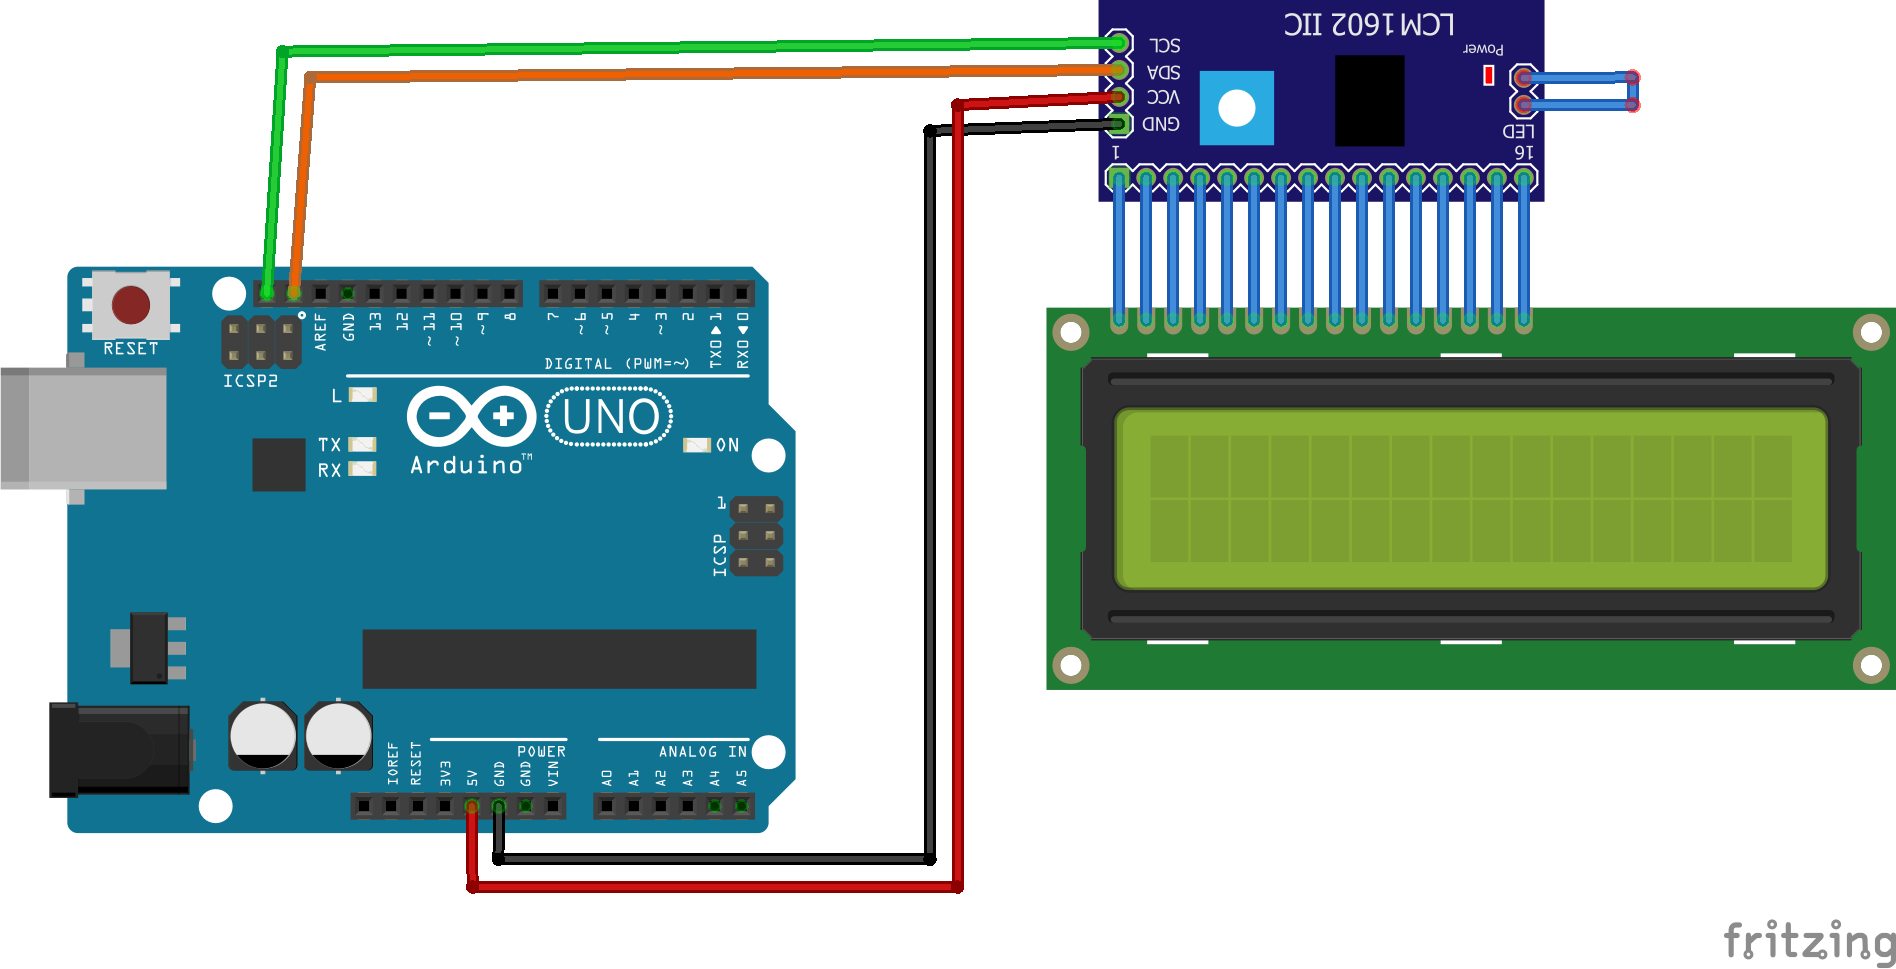
But there is an easier way to connect the LCD to the arduino, with an i2C adapter that uses a PCF8574 chip. We barely use four cables and we can now use the LCD as we please. Handsontec
Now we make the connections presented and of course, we must install the LiquidCrystal_I2C.h library. Refers to Arduino's Library Manager if needed.
Another aspect that must be known is that every i2C device must have a unique address, in fact there is a factory address and a lot of information about it. I always recommend scanning the i2C components to identify them using the scanner.
Once you have the i2C address, perform a screen test to verify the connection. HelloWorld test.
Into the displayOnce the connections and tests have been made, we carry out the following code, first including the libraries and declaring the LCD.
#include <Wire.h>
#include <LiquidCrystal_I2C.h>
LiquidCrystal_I2C lcd(0x3F,16,2);
For my LCD it corresponds to the i2C address 0x3F. Now in the setup we start the LCD and the backlight.
void setup() {
  lcd.init();
  lcd.backlight();
}
The loop does have a bit of analysis:
void loop() {
  int value = analogRead(A0); // read of potentiometer value
  int nivel = map(value, 0, 1000, 0, 16);

  lcd.setCursor(0,0);
  lcd.print("Value:");
  lcd.setCursor(7,0);
  lcd.print(value);
  for (int i=0;i<nivel;i++){
    lcd.setCursor(i, 1);
    lcd.print(char(255));
  }

  delay(200);
  lcd.clear();

}
You have to read the value of the potentiometer and interpolate it between 0 and 16 with the MAP function. We show the value in the first row of the screen but in the second we show the filled box to represent a bar that depends on the measured value. Finally remember to clean the screen and restart everything.
ConclusionThe handling of the LCDs is very pleasant when it comes to presenting values, of course there are lightning effects for cleaning the screen after each reading. Analyzing the case in comparison to the other posts, in this one I have managed to present the numerical value of the reading together with a graphic representation, it seems great to me. Please leave your comment if you liked this information, of course remember that there is already a lot of explanation about other details that you will surely need to read to delve a little more, but come on, this is a didactic guide and not an encyclopedia. See you soon!!!eeeeeeeee


_ztBMuBhMHo.jpg?auto=compress%2Cformat&w=48&h=48&fit=fill&bg=ffffff)


Comments
Please log in or sign up to comment.