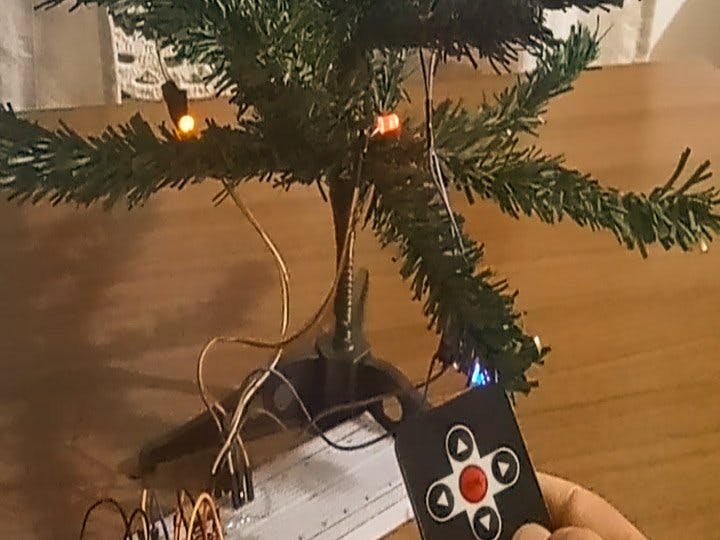
Today I'm going to share with you how to use an IR (infrared) transmitter and receptor to control how your Christmas lights blink. It is a simple lesson that will teach you how to send commands remotely to your Arduino.
Christmas lights are beautiful. I don't know about you, but I love seeing them blinking at night. The combination of colorful LEDs makes Christmas more special. That's why I decided to build a project around it recently. But before going into the step-by-step guide, you can see the final result in the video below:
Got interested? So it's time to get our hands dirty.
Step 1We are going to make our own Christmas lights. To accomplish it, we need to join the LEDs in parallel. A parallel connection means the positive pole connects to the other positive rods along the chain. The same is true for the negative poles.
I didn't have many LEDs, so I only built three wires (red, blue, and yellow), but you can make more wires if you wish or add more LEDs in each one.
If you have copper wire, that's great. However, I didn't have it when I built the project. Then I picked some jumpers and soldered them on the LEDs.
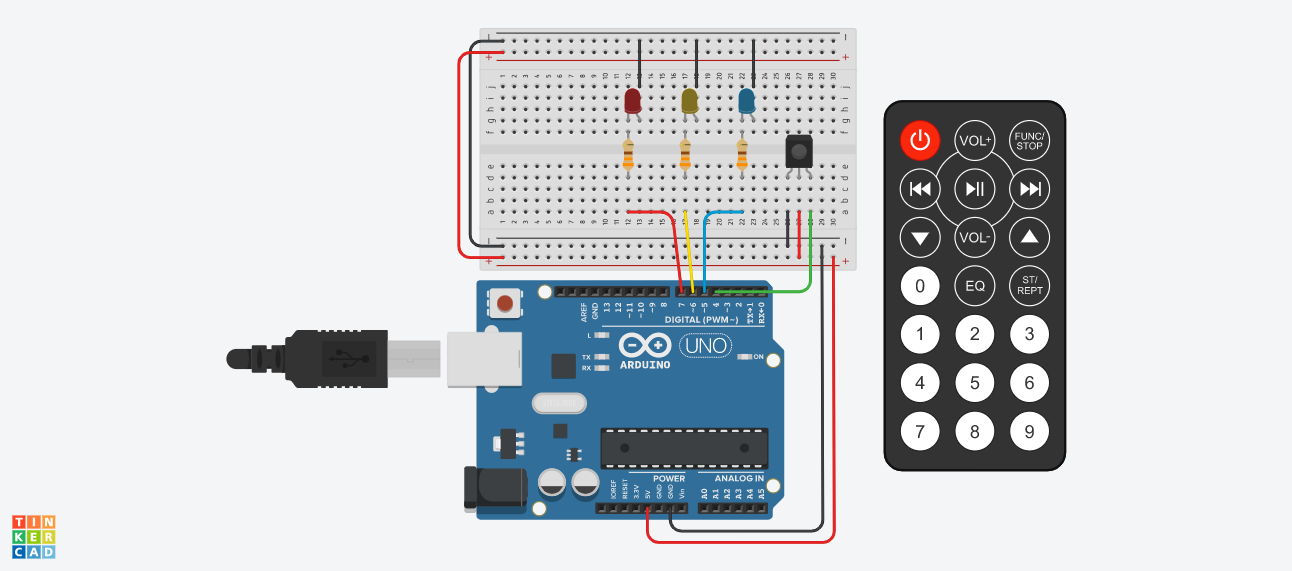
The next step is to attach the IR receiver and the Christmas lights to Arduino UNO. Plug a wire from Arduino GND to your breadboard, and connect the negative wires of the LEDs to the board.
Also, connect the positive wires to the breadboard. They will be powered from ports 5, 6, and 7. Don't forget to add a 330-ohm resistor between each positive wire and its supply.
After all, add the IR receiver. Attach the right leg to port 4, the middle stick to 5V, and the left rod to GND. If you did it right, every time the receiver gets a signal from the remote control, it blinks its built-in red LED. So press some buttons on the remote and see whether everything is working.
We finished the electric connections. Now upload the code to your Arduino UNO and have fun.


_ztBMuBhMHo.jpg?auto=compress%2Cformat&w=48&h=48&fit=fill&bg=ffffff)


Comments
Please log in or sign up to comment.