Overview
The monitoring of incoming cargo into US ports and roadways is of vital importance for a multitude of security and economic reasons. Cargo shipments can be subject to problems such as theft, tampering, or being used to smuggle contraband without the knowledge of the shipper.
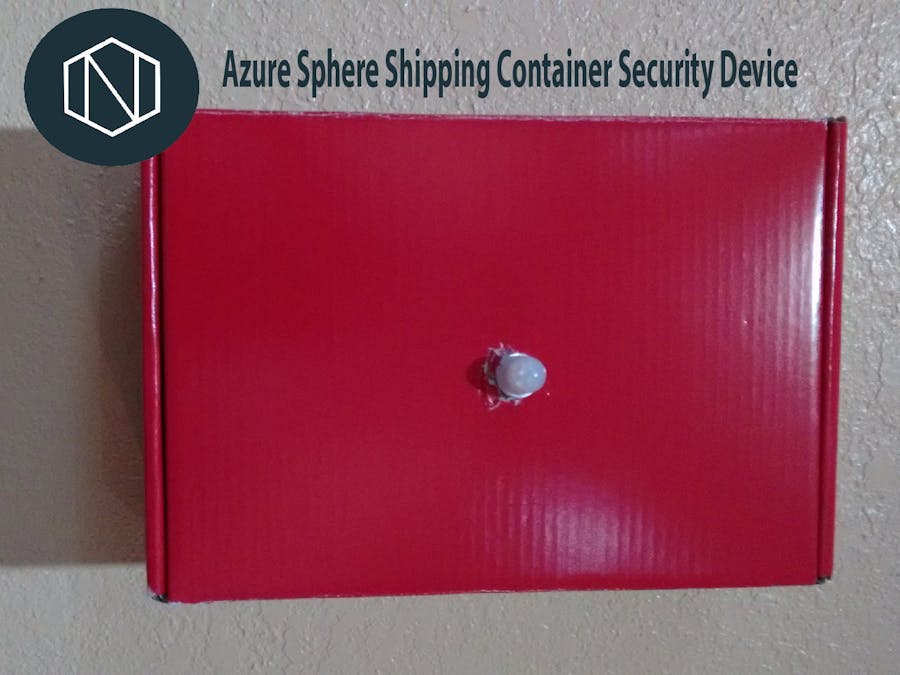
The Azure Sphere Shipping Container Security Device is a portable security device that will be mounted inside the doors of a container and will be used to continuously monitor for unauthorized door access, unauthorized relocation of the container outside the facility , and detect breaches to any of the six walls of a container.
Prerequisite
These thing need to be setup for a working Azure Sphere development environment.
Configure IoT Central Hub
Once the IoT Central Hub and had been set up with the Azure Sphere MT3620, create the following interfaces in device template :
- Temperature
- Latitude
- Longitude
- Vibration
- Infrared
Then go to view and create five chart as below. These chart will help to visualize Azure Sphere data over time.
Azure Sphere MT3620 Implementation
1.GPS
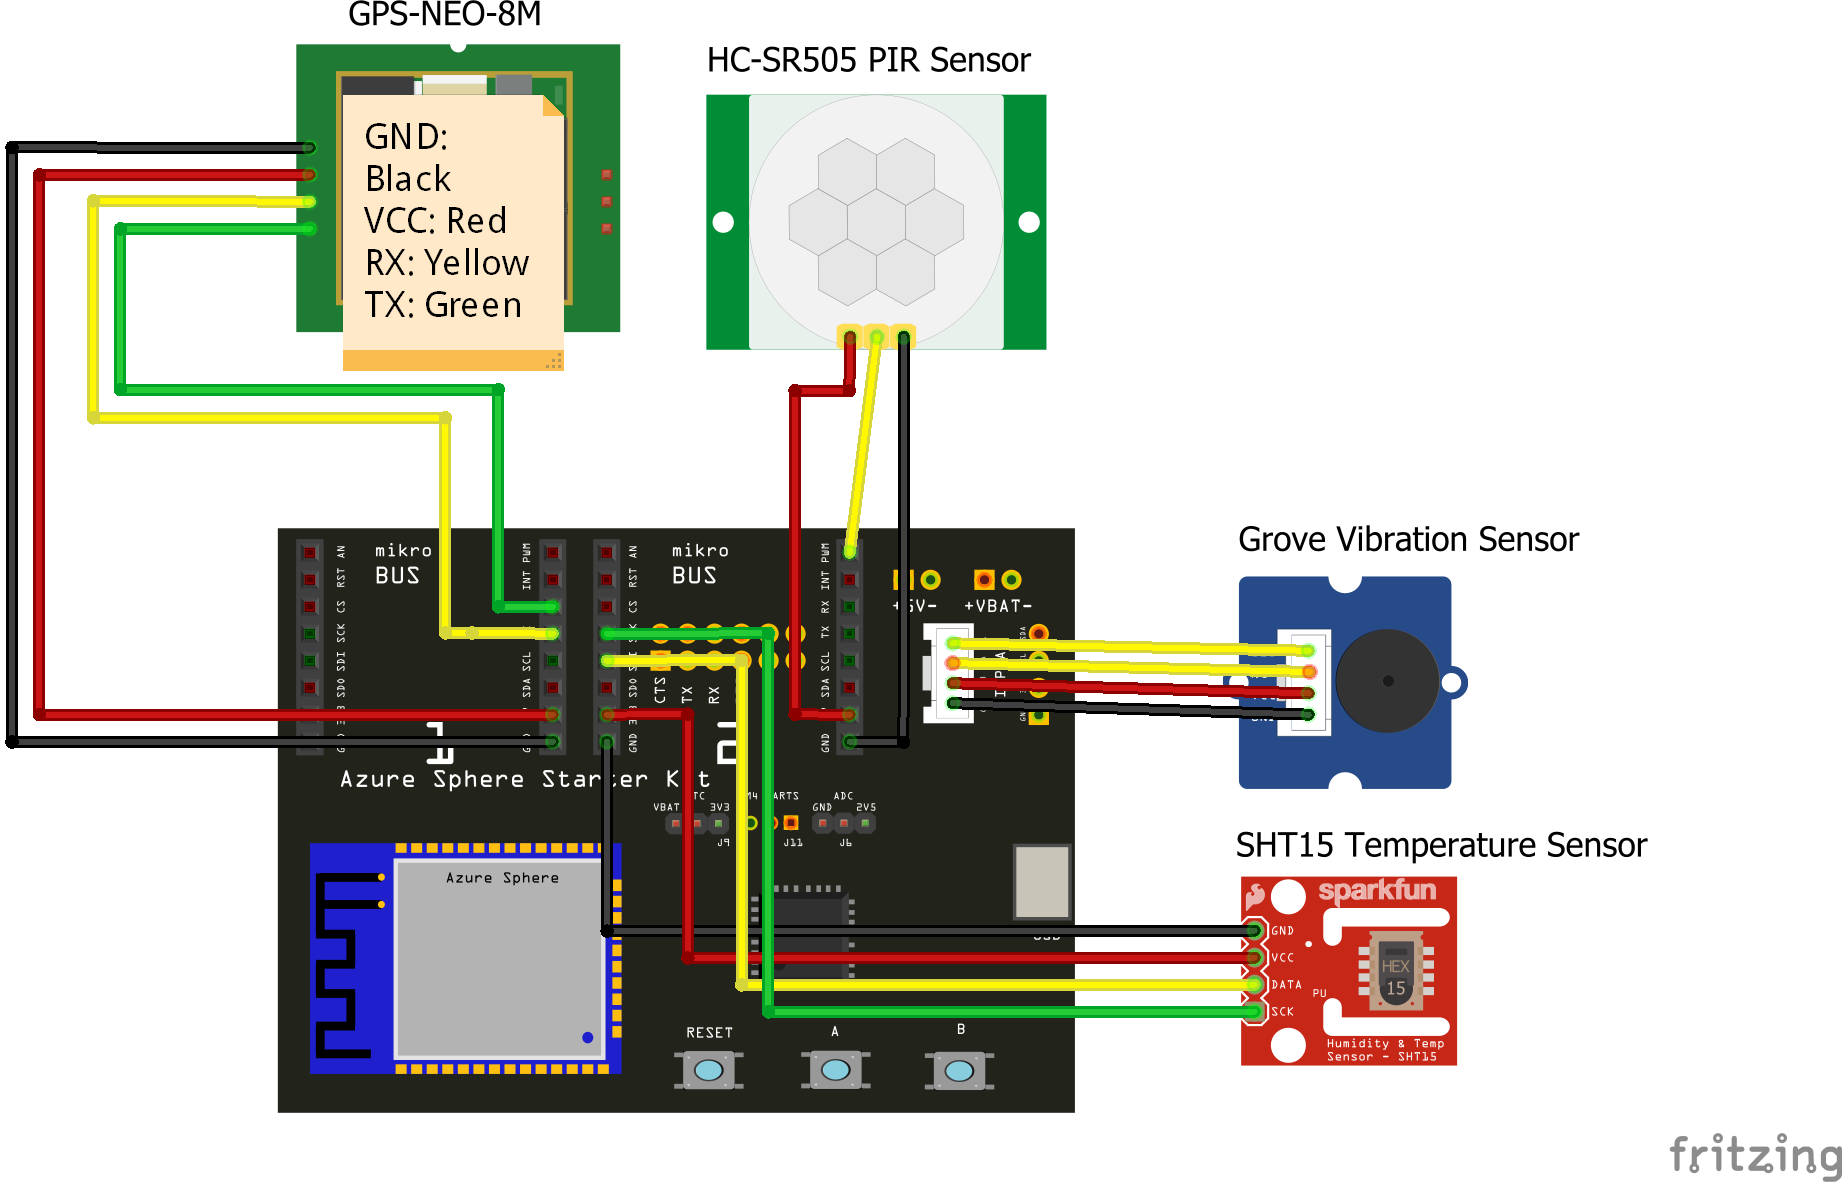
The first sensor that I interface the MT3620 is the GPS. For GPS, I used UART protocol to get the data from the GPS module. Below is the function for GPS:
//UART
static void UartGPSEventHandler(EventData* eventData)
{
    const size_t receiveBufferSize = 256;
    uint8_t receiveBuffer[receiveBufferSize + 1]; // allow extra byte for string
    ssize_t bytesRead;
    // Read incoming UART data. It is expected behavior that messages may be received
    // partial chunks.
    bytesRead = read(uartFd, receiveBuffer, receiveBufferSize);
    if (bytesRead < 0) {
    Log_Debug("ERROR: Could not read UART: %s (%d).\n", strerror(errno), errno);
    terminationRequired = true;
    return;
}
2. Grove Vibration Sensor
Next , I configure the Grove Vibration Sensor with I2C protocol. The output is an analog value from 0-3.3V which i scale to 0-100. In my system, anything above 60 is consider major vibration and could be a possible breach.
int PiezoV_Read(void* inst)
{
PiezoVInstance* this = (PiezoVInstance*)inst;
uint16_t dig_T1;
int16_t dig_T2;
int16_t dig_T3;
if (!PiezoReadReg16(this->I2cFd, Piezo_ADDRESS, Piezo_REG_DIG_T1, &dig_T1)) return;
if (!PiezoReadReg16(this->I2cFd, Piezo_ADDRESS, Piezo_REG_DIG_T2, (uint16_t*)&dig_T2)) return;
if (!PiezoReadReg16(this->I2cFd, Piezo_ADDRESS, Piezo_REG_DIG_T3, (uint16_t*)&dig_T3)) return;
int32_t adc_T;
adc_T >>= 4;
int32_t var1 = (((adc_T >> 3) - ((int32_t)(dig_T1 << 1))) * ((int32_t)dig_T2)) >> 11;
int32_t var2 = (((((adc_T >> 4) - ((int32_t)dig_T1)) * ((adc_T >> 4) - ((int32_t)dig_T1))) >> 12) * ((int32_t)dig_T3)) >> 14;
int32_t t_fine = var1 + var2;
int32_t PieazoValue = (float)((t_fine * 5 + 128) >> 8) / 100;
return PieazoValue;
}
3.Temperature Sensor
Temperature Sensor is also use I2C protocol. The process is similar to Vibration Sensor but the register address is changed.
void* TempHumiBaroSHT15_Open(int i2cFd)
{
TempHumiBaroSHT15Instance* this = (TempHumiBaroSHT15Instance*)malloc(sizeof(TempHumiBaroSHT15Instance));
this->I2cFd = i2cFd;
this->Temperature = NAN;
uint8_t val8;
if (!Temp_ReadReg8(this->I2cFd, SHT15_ADDRESS, SHT15_REG_CHIPID, &val8)) return NULL;
if (val8 != 0x60) return NULL;
Temp_WriteReg8(this->I2cFd, SHT15_ADDRESS, SHT15_REG_CONTROLHUMID, 0x05);
Temp_WriteReg8(this->I2cFd, SHT15_ADDRESS, SHT15_REG_CONTROL, 0xb7);
return this;
}
void TempHumiBaroSHT15_Read(void* inst)
{
TempHumiBaroSHT15Instance* this = (TempHumiBaroSHT15Instance*)inst;
this->Temperature = NAN;
uint16_t dig_T1;
int16_t dig_T2;
int16_t dig_T3;
if (!Temp_ReadReg16(this->I2cFd, SHT15_ADDRESS, SHT15_REG_DIG_T1, &dig_T1)) return;
if (!Temp_ReadReg16(this->I2cFd, SHT15_ADDRESS, SHT15_REG_DIG_T2, (uint16_t*)&dig_T2)) return;
if (!Temp_ReadReg16(this->I2cFd, SHT15_ADDRESS, SHT15_REG_DIG_T3, (uint16_t*)&dig_T3)) return;
int32_t adc_T;
if (!Temp_ReadReg24BE(this->I2cFd, SHT15_ADDRESS, SHT15_REG_TEMPDATA, &adc_T)) return;
adc_T >>= 4;
int32_t var1 = (((adc_T >> 3) - ((int32_t)(dig_T1 << 1))) * ((int32_t)dig_T2)) >> 11;
int32_t var2 = (((((adc_T >> 4) - ((int32_t)dig_T1)) * ((adc_T >> 4) - ((int32_t)dig_T1))) >> 12) * ((int32_t)dig_T3)) >> 14;
int32_t t_fine = var1 + var2;
this->Temperature = (float)((t_fine * 5 + 128) >> 8) / 100;
}
float TempHumiBaroSHT15_GetTemperature(void* inst)
{
TempHumiBaroSHT15Instance* this = (TempHumiBaroSHT15Instance*)inst;
return this->Temperature;
}
4. PIR Motion Sensor
The motion sensor implementation is simple. The senor output a high (3.3V) if there detection of human presence and a low (0V) if there no detection. I connect the output of the PIR Motion Sensor to a PWM pin on the MT3620. The simply just check the pin value and send a 1 or 0 based on the pin voltage level.
void SendInfrared(void* inst)
{
static int value = 0;
GPIO_GetValue(GPIOPIN, value);
char tempBuffer[20];
int len = snprintf(tempBuffer, 20, "%3.2f", value);
if (len > 0)
{
SendTelemetry("Infrared", tempBuffer);
}
}
5. Sending Data
To send data from the MT3620 to the Azure sphere, I create a function that format data to IoT Central Hub protocol and send it to the Hub via Internet. The function is show below.
static void SendTelemetry(const unsigned char* key, const unsigned char* value)
{
static char eventBuffer[100] = { 0 };
static const char* EventMsgTemplate = "{ \"%s\": \"%s\" }";
int len = snprintf(eventBuffer, sizeof(eventBuffer), EventMsgTemplate, key, value);
if (len < 0)
return;
Log_Debug("Sending IoT Hub Message: %s\n", eventBuffer);
IOTHUB_MESSAGE_HANDLE messageHandle = IoTHubMessage_CreateFromString(eventBuffer);
if (messageHandle == 0) {
Log_Debug("WARNING: unable to create a new IoTHubMessage\n");
return;
}
if (IoTHubDeviceClient_LL_SendEventAsync(iothubClientHandle, messageHandle, SendMessageCallback,
/*&callback_param*/ 0) != IOTHUB_CLIENT_OK) {
Log_Debug("WARNING: failed to hand over the message to IoTHubClient\n");
}
else {
Log_Debug("INFO: IoTHubClient accepted the message for delivery\n");
}
IoTHubMessage_Destroy(messageHandle);
}
As an example, i create a function called SendTemp that send Temperature value at an interval of 500ms using the SendTelemetry function.
void SendTemperature(void* inst)
{
TempHumiBaroSHT15_Open(i2cFd);
TempHumiBaroSHT15_Read();
float temprature = TempHumiBaroSHT15_GetTemperature();
char tempBuffer[20];
int len = snprintf(tempBuffer, 20, "%3.2f", temprature);
if (len > 0)
{
SendTelemetry("Temperature", tempBuffer);
}
}
The important part here is that the you must set the data the same as the name you set in IoT Central Hub or else it won't get recognized. The full code is in the repo below. The code is compile and build using Visual Studio 2017. Once the whole project is uploaded to the MT3620, the graph in IoT Central Hub in the device section will begin display data as show below.
Setting Up Azure Cloud Services
For this project, I used the Azure Cloud Services to create an Azure Event Hubs to store the data from the IoT Central Hub. The Azure Event Hubs are going to serve as a cloud storage platform where my app going to pull data that the MT3620 send out.
First, I set up an Azure Event Hubs as show below :
Then I go and find the primary key connection string-primary key. These number going to be used to link with the Azure IoT Central Hub and the phone app.
Then enter the connection primary-key into the Azure IoT Central Hub in the data export section.
App Implementation
The android app is made using React Native for ease of cross-platform between ios and android. The main point key thing in this app is the need to set up the Azure Event Hubs. Once the Azure Event Hub is configure correctly and filled with data, I used the following line to import the data.
import Azure from "iotc-1e97f318-f85b-42fa-88f8-4f27f7d5a85d.azure-devices.net"The URL come directly from the Azure Sphere Event Hub primary-key link. For example, I used the key in Detect.js which is a page that use infrared data to detect human presence. The code is show below with usage of Azure Event Hub API.
import React, { Component } from 'react';
import Azure from "iotc-1e97f318-f85b-42fa-88f8-4f27f7d5a85d.azure-devices.net"
....
export default class Detect extends Component {
....
constructor (props) {
super(props)
this.state = {
text: 'No Detection',
color: '#0984e3'
}
}
componentDidMount(){
var counter = 0;
setInterval(() => {
var Infrared = Azure.Infrared.data;
if(Infrared==0){ this.setState({text: 'No Detection'});}
else           { this.setState({text: 'Human Detection'});}
counter++;
}, 2000);
}
render() {
return (
<View style={styles.container}>
<TouchableOpacity style={{backgroundColor:this.state.color, width:300, height: 200, borderRadius:25, }} onPress={() => navigate('Home', {name: 'Home'})} >
<Text style={styles.buttonText}>{this.state.text}</Text>
</TouchableOpacity>
</View>
);
}
}
The whole app project is in the Github repository below.
Compiling Command
1. Android App
To compile the Azure Android App you must have React Native install and a working android phone connected to your computer.
Go to AzureApp folder and run
react-native run-android2.Azure Sphere MT3620 Firmware
To compile the firmware you must have VS2017 with Azure Sphere SDK install. Launch the .sln file in AzureFirmware folder and press F5 to compile.
Final Product
Demo
Other Information
Azure Device ID : Husky
Azure Device Email Registration : kurst811@gmail.com


_Mw80dOzqEV.jpg)

Comments
Please log in or sign up to comment.