Illuminate
Illuminate is a smart night light that use SS430 Kemet Pyroelectronic Sensor to brighten the light when a person approach it as well as give the Illuminate an indication of what time during the night when the user going to approach Illuminate. Using these data, Illuminate an try and predict time of the night when the user going to approach illuminate.
Schematics
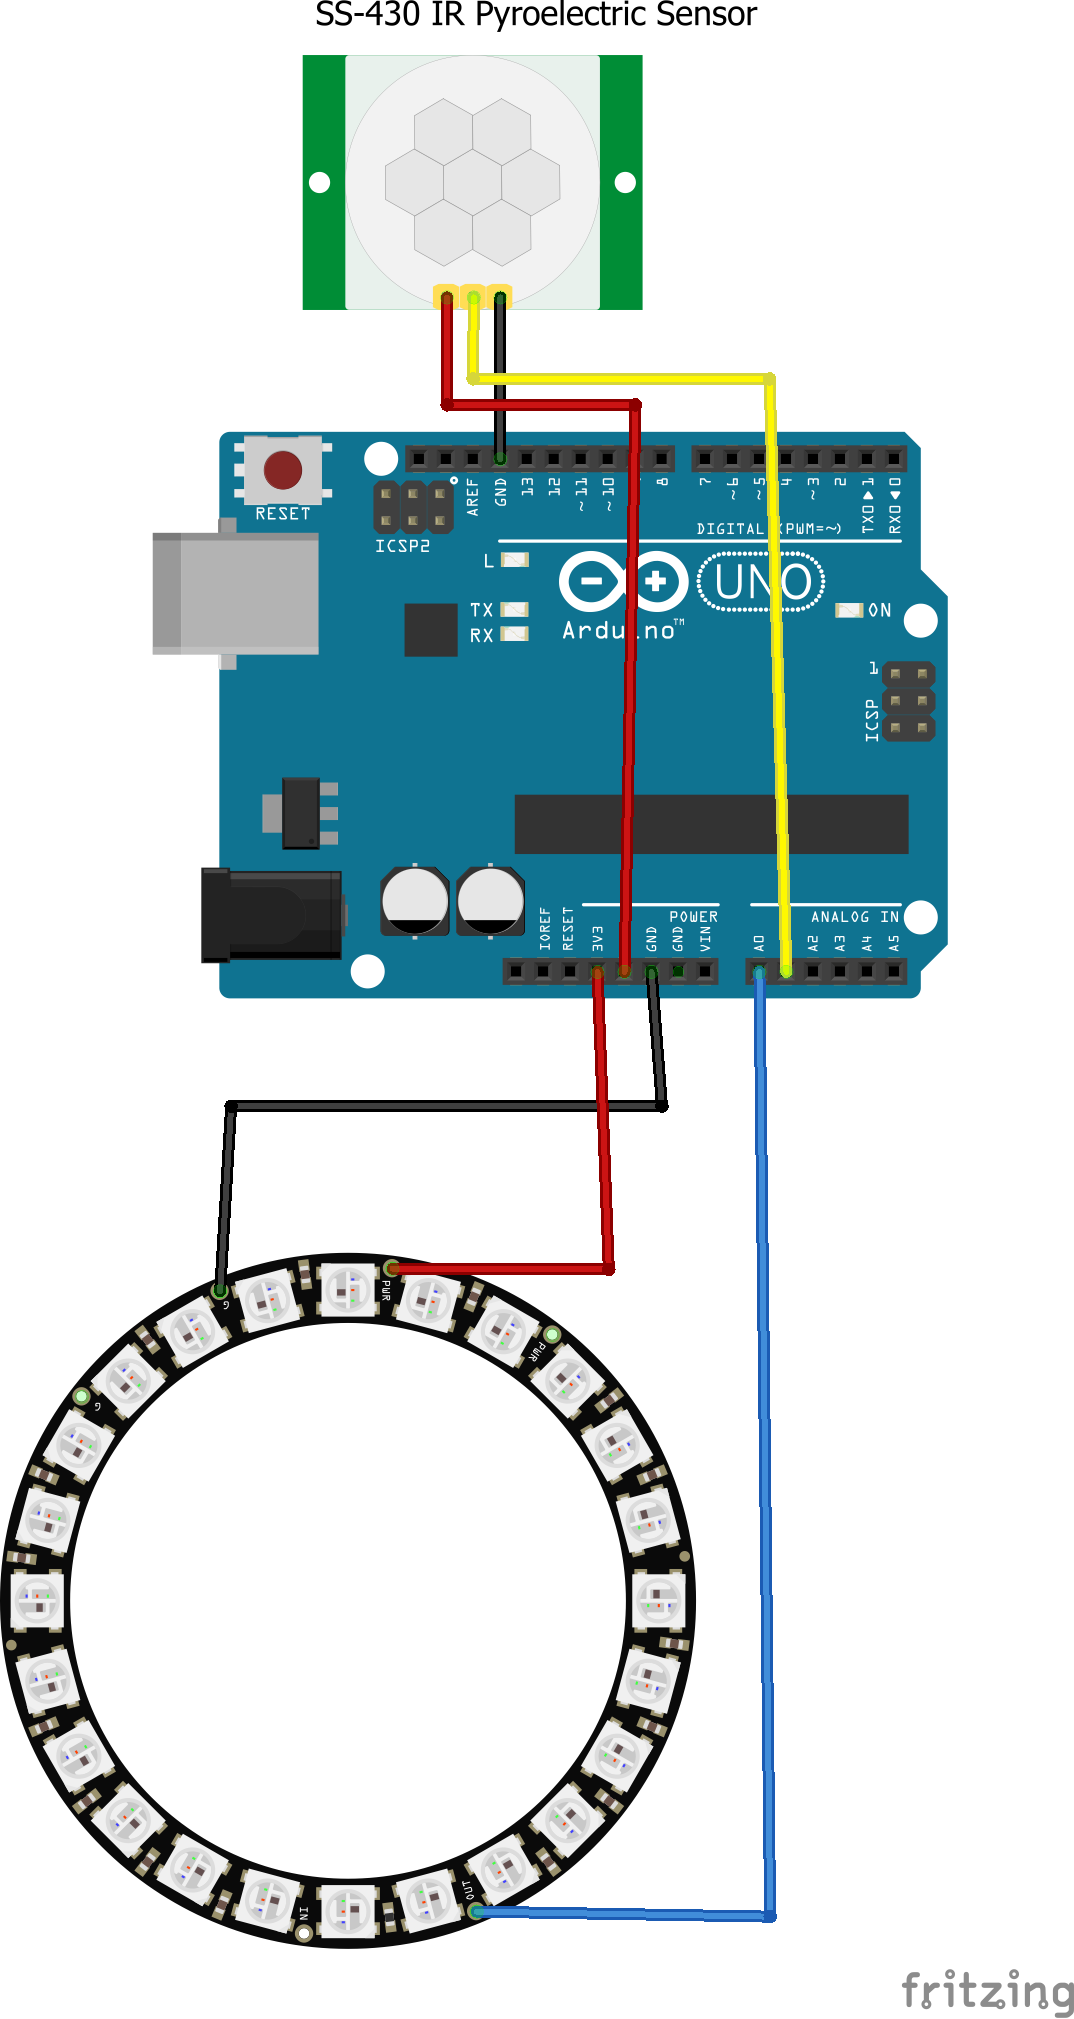
The wiring for this project is simple. The Neopixel input pin going be connected to the the Arduino pin A0 and A0 going to serve as an output to send command to control the Neopixel. The Neopixel VCC pin going to be connected to the Arduino 3.3V pin. For the SS430, the sensor Vout Pint going to be connected to the Arduino A1 pin. SS430 VCC going to be connected to the Arduino 5V pin. Below is a chart to help better visualize the connect between the Arduino and its peripherals.
Hardware
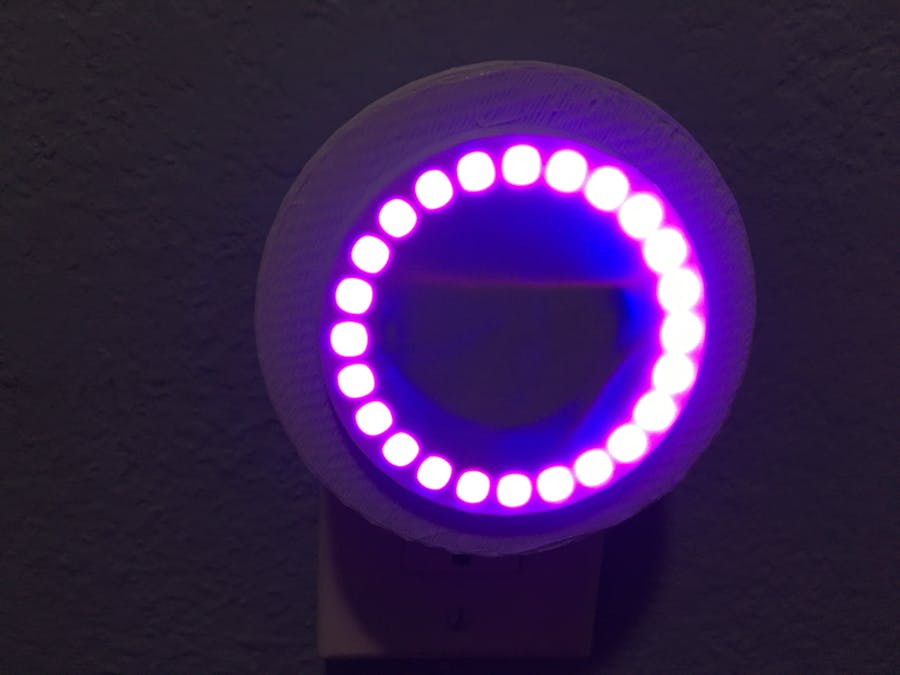
For the hardware design , I decided with a simple circular shape with that can be easily mounted on the wall socket. The enclosure is 3D printed and the STL files can be found below.
The Arduino going to be connected directly to USB wall charger. All of the component , going to be fitted inside the bottom enclosure as show below.
Next, the Neopixel going be fitted nice in the top enclosure. Once the Neopixel inside the top enclosure, put the SS430 on the stand and then put it into the top enclosure as show below.
Connect all the the component as show in the schematics and attach the top enclosure to the bottom enclosure.
Software
In this section, I won't try to explain my whole code but rather my earlier prototype code that i eventually built on to make a whole working system.
First I started with the SS430 and the process is rather simple. Read in the high pulse from the SS430 Vout pin. Make sure that the high pulse must be at least 200 ms long. Below is the sample code.
int Pyro = A1;
int counter = 0;
unsigned long PyroRead = 0;
unsigned long IR_threshold = 198000;

// Note: SS-430 has two pulses of 200msec per detection.
// IR_threshold is in microsec (usec), therefore 198msec threshold
int IR_sensed = 0;

void setup() {
	....
	pinMode (A1,INPUT); // IR Sensor connected to A1
	....
}

void loop() {
  PyroRead = pulseIn(A1, HIGH); //Measure trigger point
  if(PyroRead > IR_threshold){ //Make sure trigger is over 198msec)
	  Serial.println("Detection")
  }
}
Next, I work on the BLE and making an app for Illuminate. For this app i am going to use Blynk to make the process simple and efficient
//#define BLYNK_USE_DIRECT_CONNECT
#include <BlynkSimpleCurieBLE.h>
#include <CurieBLE.h>
char auth[] = "KgvVFbtQXaUkINbxWslpJMObn8Fw2X4L"; //auth key

void setup(){
 Serial.begin(9600);

 blePeripheral.setLocalName("Kemet");
 blePeripheral.setDeviceName("Kemet");
 blePeripheral.setAppearance(384);
 Blynk.begin(auth, blePeripheral);
 blePeripheral.begin();
}

void loop(){
  Blynk.run();
  blePeripheral.poll();
}


BLYNK_WRITE(V4) //read slider value for red
{
  int pinValue = param.asInt(); // assigning incoming value from pin V4 to a variable
  // You can also use:
  // String i = param.asStr();
  // double d = param.asDouble();
  Serial.print("red Slider value is: ");
  Serial.println(pinValue);
  red = map(pinValue, 0, 1023, 0, 255);
}
To use Blynk, you must first sign up and received an authentication key. Once you had this key use it in the Blynk.begin(key,ble object). In void setup, we see the program assign the device name and initialize the BLE process. In void loop , the program keep polling BLE signal and make an interrupt if there is a command. BLYNK_WRITE(V4) is your interrupt function .When a button in the Blynk app with the name V4 is pressed, BLYNK_WRITE(V4) will get executed.
#define PIN        A0
#define NUMPIXELS 2
#include <Adafruit_NeoPixel.h>
#define BLYNK_PRINT Serial
#define MAXIMUM_BRIGHTNESS 255
#define MEDIUM_BRIGHTNESS  130
Adafruit_NeoPixel pixels = Adafruit_NeoPixel(NUMPIXELS, PIN, NEO_GRB + NEO_KHZ800);
void setup(){
    Serial.begin(9600);
    pixels.begin();
    pixels.setBrightness(10);
    pixels.show();
}
void loop(){
    colorWipe(pixels.Color(106, 13, 173), 50); // White
}
For Neopixel, make sure you have the Adafruit Neopixel library and setup as show above. The above function simply initialize the Neopixel and then set the color of the Neopixel to white in the void loop.
That all you need to know to started on creating the software for this project. A complete version of the code can be found below.
Demo


_baVEVgguW1.jpg?auto=compress%2Cformat&w=48&h=48&fit=fill&bg=ffffff)


Comments