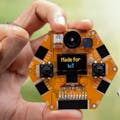
In this tutorial, we are going to learn to connect the Magicbit device(or you can use any other ESP-32 development board) to the AWS IoT through MQTT.With this, we can send any arbitrary information, such as sensor values, into the AWS IoT Core while also being able to receive commands.
What You Need- magicbit board (Magicbit is an integrated development platform based on ESP32 for learning, prototyping, coding, electronics, robotics, IoT and solution designing.)
- DHT11 sensor
- You should have an AWS IoT account. For learning purposes, you can use the free option offered by AWS. It will be enough for this project.
First, you should go to the AWS iot and sign in. For learning purposes, you can use the free option offered by AWS. It will be enough for this project.
Step 1-setup hardware on magicbitThis is very simple since you are using a magic board! Plug the sensor module into the Magicbit. Here we are connecting it to the D32 pin on the board. Then connect the Magicbit to your computer using the micro-USB cable.
Step 1-In the AWS IoT console, click “Create thing.”
Step 2-choose to create a single thing. and click “next”.
Step 3-Name the new thing "Magicbit.” Leave the remaining fields set to their defaults. Choose “Next”.
Step 4-Choose to “Auto-generate a new certificate.” and click "NEXT.”
Step 6-In the AWS IoT console side menu, choose Security >Policies and create a policy.
Step 7: Name the policy "ESP32Policy” and choose the ”JSON” tab.
Step 8: Download the code below and replace REGION with the matching AWS Region you’re currently operating in. and Replace ACCOUNT_ID with your own, which can be found in Account Settings.
{
  "Version": "2012-10-17",
  "Statement": [
    {
      "Effect": "Allow",
      "Action": "iot:Connect",
      "Resource": "arn:aws:iot:REGION:ACCOUNT_ID:client/MyNewESP32"
    },
    {
      "Effect": "Allow",
      "Action": "iot:Subscribe",
      "Resource": "arn:aws:iot:REGION:ACCOUNT_ID:topicfilter/esp32/sub"
    },
	{
      "Effect": "Allow",
      "Action": "iot:Receive",
      "Resource": "arn:aws:iot:REGION:ACCOUNT_ID:topic/esp32/sub"
    },
    {
      "Effect": "Allow",
      "Action": "iot:Publish",
      "Resource": "arn:aws:iot:REGION:ACCOUNT_ID:topic/esp32/pub"
    }
  ]
}
Step 9: Copy and paste the given policy template here. and click "Create.”
Step 10: Then you can see the policy you created. Then again, click “Create thing.”
step 11: you can see the “device certificate”, ”privet key”, “Amozon root CA1”, Download and save them somewhere secure, as they are used when programming the MagicBit device. Choose done.
Step 12-In the AWS IoT console, choose Security > Certification. Select the one created for your device and choose Actions,Attach policy. Choose Esp32Policy, Attach.
Your AWS IoT device is now configured to have permission to connect to AWS IoT Core. It can also publish to the topic esp32/pub and subscribe to the topic esp32/sub. For more information on securing devices, see AWS IoT Policies.
Step 3-C onfiguring the Arduino IDEInclude the libraries given below.- MQTT Libaray
- ArduinoJson Libaray
The following code connects to AWS IoT Core securely using MQTT , a publish-and-subscribe messaging protocol. Download the given code and open it using the Arduino IDE.
And change the code given below. corresponding locations in the secrets.h file.
Enter the name of your AWS IoT thing, Magicbit, in the field THINGNAME
To connect to Wi-Fi, add the SSID and PASSWORD of the desired network. The AWS_IOT_ENDPOINT can be found on the Settings page in the AWS IoT console.
Copy the Amazon Root CA 1, Device Certificate, and Device Private Key to their respective locations in the secrets.h file.
Then upload the Arduino program onto your magicbit board.
Step 4- Monitoring and testingAt this stage, you can see the row data sent by magicbit. and you can display data on a magicbit display sent by theAWS IoT dashboard.
ESP32/sub
ESP32/pub
The IoT rule forwards messages on topic esp32/pub to the Topic Subscriber function.
The Topic Publisher function is invoked by the API Gateway endpoint and publishes to the AWS IoT topic esp32/sub.


Comments
Please log in or sign up to comment.