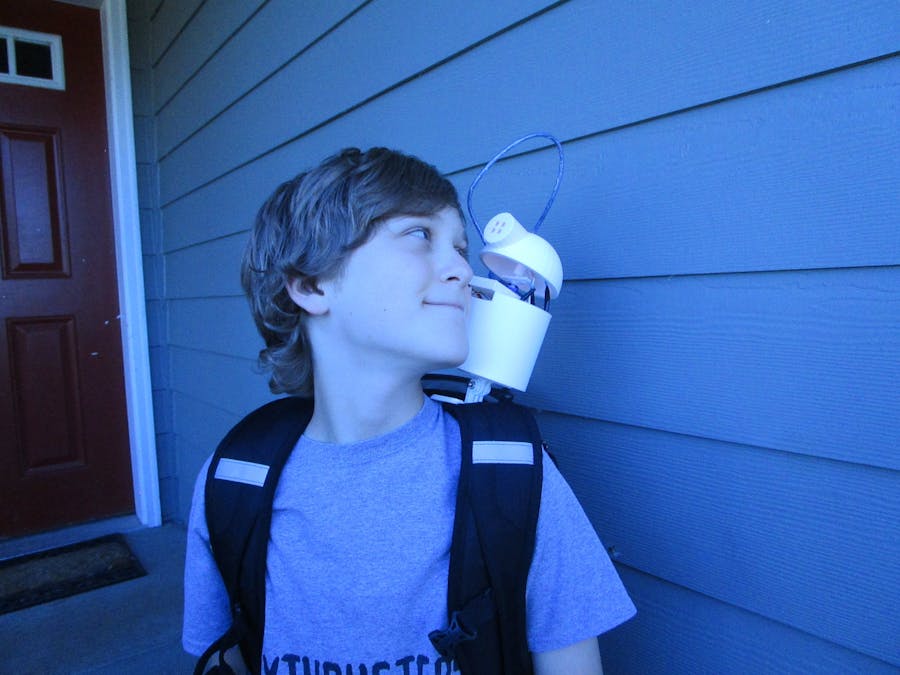
It all started when I learned about Dexter, a companion bot made by Odd Jayy in Make Magazine, issue 73. I had always been so bored with the normal line following and obstacle avoiding robots that this new type of fun robotics was a breath of fresh air.
So that evening I hot glued some things I found in my recycling bin together, and made my first "Companion bot".
It really wasn't more than a sculpture, but it kickstarted my love for companion robotics.
9 months later I had become an avid follower of the likes of Odd Jayy and Hackster, but had still not made a working companion robot. Until one day I sketched some ideas out, and one of a cupcake caught my eye.
The idea was so simple, a cupcake, siting on your shoulder, with a rotating head, and maybe a glowing led.
5 months of off and on work later I have finished my first working version of C3R (which stands for Cup Cake Companion Robot). He no longer looks like a cupcake, but I'm very happy with how he turned out.
ConstructionFirst off, you need to 3d print the parts. I used the Stupid Fast slicer setting from Makers Muse for most of this project but you can use whatever settings you want.
I would recommend printing the body first, as it is the biggest piece. If your printer is good at bridging, you can print it upside down without any supports. I have also included a bridging test that you can use to see if your printer can handle it.
Now you just have to continue to print out the rest of the parts. The head is the only part that I can think of that you will need supports for, so make sure to use those. Also, you're going to need to print a GoPro backpack mount. I used this one from Thingiverse https://www.thingiverse.com/thing:2334264 but any should work.
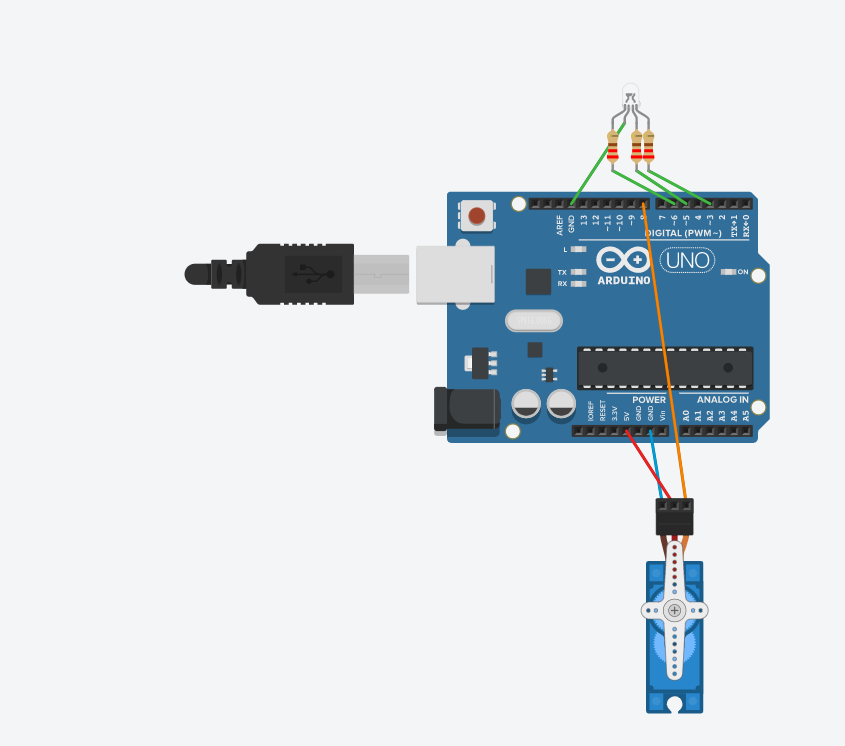
ElectronicsWhile you wait for your prints to finish, you can start wiring the electronics. Here is the circuit diagram I made in Tinkercad:
The battery I used was too big to fit into the C3R, so I ended up printing out this little "backpack" for him to wear, so he could carry it on his back:
For the eye, I took a piece of food packaging plastic, and sanded it to make it opaque. Then I hot glued it into the inside of the head piece. This helps to diffuse the LED.
Next just screw the servo adapter to the servo horn, then the servo to the cross beam and put the head on the adapter. Then put everything in like so and load up the code!
But make sure both sides of the cross beam are connected to the body, unlike the one side in the photo :)
Best of luck,
Maker Josh


_ztBMuBhMHo.jpg?auto=compress%2Cformat&w=48&h=48&fit=fill&bg=ffffff)


Comments
Please log in or sign up to comment.