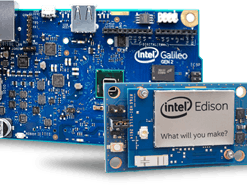
This article give some important details about Intel libraries for programming Edison and similar platform. Original content is available Github.
MRAALibmraa is a C/C++ library with bindings to Java, Python and JavaScript to interface with the IO on Galileo, Edison & other platforms, with a structured and sane API where port names/numbering matches the board that you are on. Use of libmraa does not tie you to specific hardware with board detection done at runtime you can create portable code that will work across the supported platforms.
The intent is to make it easier for developers and sensor manufacturers to map their sensors & actuators on top of supported hardware and to allow control of low level communication protocol by high level languages & constructs.
NodeJS example
var m = require('mraa'); //require mraa
console.log('MRAA Version: ' + m.getVersion()); //write the mraa version to the console
var myLed = new m.Gpio(13); //LED hooked up to digital pin 13 (or built in pin on Galileo Gen1 & Gen2)
myLed.dir(m.DIR_OUT); //set the gpio direction to output
var ledState = true; //Boolean to hold the state of Led
function periodicActivity()
{
myLed.write(ledState?1:0); //if ledState is true then write a '1' (high) otherwise write a '0' (low)
ledState = !ledState; //invert the ledState
setTimeout(periodicActivity,1000); //call the indicated function after 1 second (1000 milliseconds)
}
periodicActivity(); //call the periodicActivity function
Python example
import mraa
import time
x = mraa.Gpio(8)
x.dir(mraa.DIR_OUT)
while True:
x.write(1)
time.sleep(0.2)
x.write(0)
time.sleep(0.2)
The UPM repository provides software drivers for a wide variety of commonly used sensors and actuators. These software drivers interact with the underlying hardware platform (or microcontroller), as well as with the attached sensors, through calls to MRAA APIs.
Programmers can access the interfaces for each sensor by including the sensor’s corresponding header file and instantiating the associated sensor class. In the typical use case, a constructor initializes the sensor based on parameters that identify the sensor, the I/O protocol used and the pin location of the sensor.
C++ interfaces have been defined for the following sensor/actuator types, but they are subject to change:
- Light controller
- Light sensor
- Temperature sensor
- Humidity sensor
- Pressure sensor
- Gas sensor
- Analog to digital converter
NodeJS example
// Load Grove module
var groveSensor = require('jsupm_grove');
// Create the Grove LED object using GPIO pin 2
var led = new groveSensor.GroveLed(2);
// Print the name
console.log(led.name());
// Turn the LED on and off 10 times, pausing one second
// between transitions
var i = 0;
var waiting = setInterval(function() {
   if ( i % 2 == 0 ) {
       led.on();
   } else {
       led.off();
   }
   i++;
   if ( i == 20 ) clearInterval(waiting);
   }, 1000);
Python example
import time
import pyupm_grove as grove
# Create the Grove LED object using GPIO pin 2
led = grove.GroveLed(2)
# Print the name
print led.name()
# Turn the LED on and off 10 times, pausing one second
# between transitions
for i in range (0,10):
  led.on()
  time.sleep(1)
  led.off()
  time.sleep(1)
# Delete the Grove LED object
del led


Comments
Please log in or sign up to comment.