

Hardware components | ||||||
 |
| × | 1 | |||
 |
| × | 1 | |||
 |
| × | 1 | |||
 |
| × | 1 | |||
 |
| × | 1 | |||
 |
| × | 1 | |||
 |
| × | 1 | |||
 |
| × | 1 | |||
Software apps and online services | ||||||
 |
| |||||
| ||||||
In today's era, IoT is booming at a huge rate. We can use it to control the intensity of the light glowing in your room, moreover we can control the speed of a fan, and even more better the lights can control itself automatically according to the light actually needed in the room because your room is already getting some light from the sun and other reflecting sources, In that case we want a light intensity in room that is actually required from the LED's .
We can also Switch on and lights with full brightness and also to turn it off with your mobile device rather than go to switch board.
What are the benefits?1) This will not only make your room lights smarter but is very beneficial to SAVE! Electricity Consumption.
2)This is very suitable for street-light control.
First to control light intencity
HARDWARE CONNECTIONSLogin to https://cloud.boltiot.com. And if you haven't generated API key click on generate API key and make sure to enable it then copy and paste it somewhere safely your API key may look like this :- XXXXXXXX-XXXX-XXXX-XXXX-XXXXXXXXXXXX
you can see your code by clicking on the API option on the left side of your bar then you click on the eye option to see your code (first click on the enable option to enable your API key) just right to the the eye option you get an option for copying your API key to desired location.And You will be able to find your bolt ID easily on the dashboard it may look like it :- BOLT1234567 copy it too.
Step 3: Creating Your Control URLFOR LED
Since LED is a digital output device, we will need to get a Digital Write command that can be sent to Bolt over the Internet to switch on the LED.
Click here Bolt Cloud go to Docs Tab -> API Documentation -> GPIO Commands API -> Write Digital Output, to understand how to create a API command link to turn on or turn off a pin of the Bolt.
The structure of the command is:
https://cloud.boltiot.com/remote/API_KEY/digitalWrite?pin=PIN_NUMBER&state=HIGH/LOW&deviceName=DEVICE_ID
The parameters that you need to replace are:
API_KEY: You can get it from API tab on cloud dashboard.
PIN_NUMBER: Pin to which you have connected the LED. Values can be either 0,1,2,3 or 4
HIGH/LOW: This value indicates if you want to turn on/off the LED. HIGH will turn it on, LOW will turn it off.
DEVICE_ID: The id of your device. You can get it from cloud dashboard.
The sample command to turn the led ON connected to device having ID BOLT13819450 to PIN 0 is:
https://cloud.boltiot.com/remote/XXXXXXXX-XXXX-XXXX-XXXX-XXXXXXXXXXXX/digitalWrite?pin=0&state=HIGH&deviceName=BOLT1234567
FOR BUZZER
We will be using analogWrite command in this if you want to see the documentation for this command you can visit:https://docs.boltiot.com/docs/write-analog-output-pwm
The structure of the command is like this:
https://cloud.boltiot.com/remote/API_KEY/analogWrite?pin=PIN_NUMBER&value=0-1023&deviceName=DEVICE_ID
NOTE: You will have to put your bolt API key which you have generated in the previous step in place of API_KEY, in place of PIN_NUMBER you will have to write the GPIO pin number in which you have connected the positive terminal of your buzzer, in value you will have to provide any one value which will decide the frequency of the sound of buzzer ranging from 0-1023 where 0means buzzer off no sound and 1023 is the maximum frequency at which it can buzz and finally in place of DEVICE_ID you will have to put device id of your bolt wifi module which you got in the previous step.
Final URL may look like this :- https://cloud.boltiot.com/remote/XXXXXXXX-XXXX-XXXX-XXXX-XXXXXXXXXXXX/analogWrite?pin=1&value=245&deviceName=BOLT1234567
Similarly, connect LED to Pin 1 and buzzer to Pin 2 of the Bolt IoT module.
(Don't directly copy this, as it is my own generated URL yours might be different)
Make sure that you change the API Key to your own API Key and device ID which you got in the previous step.If you have connected the LED and BUZZER to any other pin then then make a suitable change in the pin no in your code.
Step 4: Setting Your IFTTT AccountGo to ifttt.com by clicking this URL :- https://ifttt.com. Create your account on it and then click on create new applet or use this URL :- https://ifttt.com/create
Login using your Gmail account. Make sure you use same account which you'll be using on your mobile to interact with Google Assistant.
Click on '+This' to create the trigger.
Choose Google Assistant -> Say Specific Phrase..
Type the phrase you want to trigger the action. Make sure to specify the trigger command in different ways for example I used
FOR LED
a) Turn the lights on
b) Turn on the lights
c) Lights on
FOR BUZZER
a) Turn on buzzer.
b) Make it buzz
Click on 'Create Trigger'
Click on '+That
Select Webhooks and then Make a web request
Enter the API URL you got in the previous Step. Make sure that you change the API Key and device name.
Method will be GET.
Content type will be Application/json.
This how your screen may look like:
Click on 'Create Action' and then Click on 'Finish'.
Step 5:Steps to Turn OFF the LEDNow do the same process for a command to switch of the LED 1. Here you will change the state to LOW i.e. state=LOW in your code. Here is a sample of the code. Also, add a suitable phrase to switch off the LED.
https://cloud.boltiot.com/remote/XXXXXXXX-XXXX-XXXX-XXXX-XXXXXXXXXXXX/digitalWrite?pin=0&state=LOW&deviceName=BOLT1234567
Turn Off the Buzzer and Make It Buzz on a Different FrequencyNow that you have learned how to set the buzzer on you can be quite creative repeat the step 4 again and in the make changes in the value of URL tbo any number between 0-1023.
Now what you have to do is repeat the same above steps with a bit of changes in it like:
1. Go back to the third step, change the value (i.e buzzer frequency) to zero and copy that URL.
2. Repeat the following steps again then change the phrases of step 4 to
a) Turn off buzzer
b)stop buzzing
etc..... And then click trigger and go ahead as you have done previously.
3. In webhook you paste the now copied URL and then go as usual and finish the remaining procedures.
NOTE: If you will set the value to 0 the buzzer will turn off also if you will write any number more than 1023 the buzzer will not buzz.
HURRAY! YOU'RE DONE NOW.
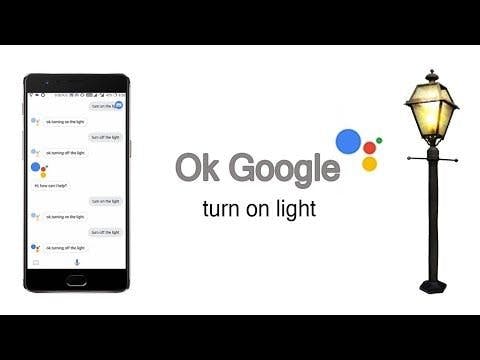
Now wake your Android phone by saying "OK Google" and say the phrase you had set while creating the trigger to see the magic happen.


Comments
Please log in or sign up to comment.