Some time ago we started to build a country house in a rural area.
There is no city water over there, but we can source the house with a water well.
Due to our interest in water conservation, we installed a rainwater harvesting system that collects water from the rooftop and stores it in a cistern.
Rainwater stored is pumped to upper tanks in attic and it is mainly used to flush toilets. We also plan to use this water for irrigation, car washing and outside floor washing.
The house is still under construction, but now we can stay there in weekends and holydays.
One problem we faced in the first long dry spell using the house was the fact cistern ran out of water. We had to rush to install a manual system to allow source upper tanks with well water. Every time this occur, someone has to go to the attic, switch the water system and deactivate cistern water pump. When it rains again and there is enough water in cistern, the reverse manual process has to be taken, so it´s not practical.
I decided to make a system to monitor and automatically switch the upper tank source water between cistern and well water.
I´ve made a draw to illustrate the scenario and solution:
Let´s see how this solution is made.
Part I : Cistern level monitoringI used the distance sensor HC-SR04 and there are lots of water level monitoring projects in the internet using this sensor. My concern here is to protect it and made it durable, as this is not a water proof sensor.
- Using a plastic box, make two holes for the sensor emitter-receiver
- Attach the sensor to the holes and seal all borders, internal and external with hot glue
- Cut a resistant plastic cup´s bottom and glue it to reinforce sensor spill protection
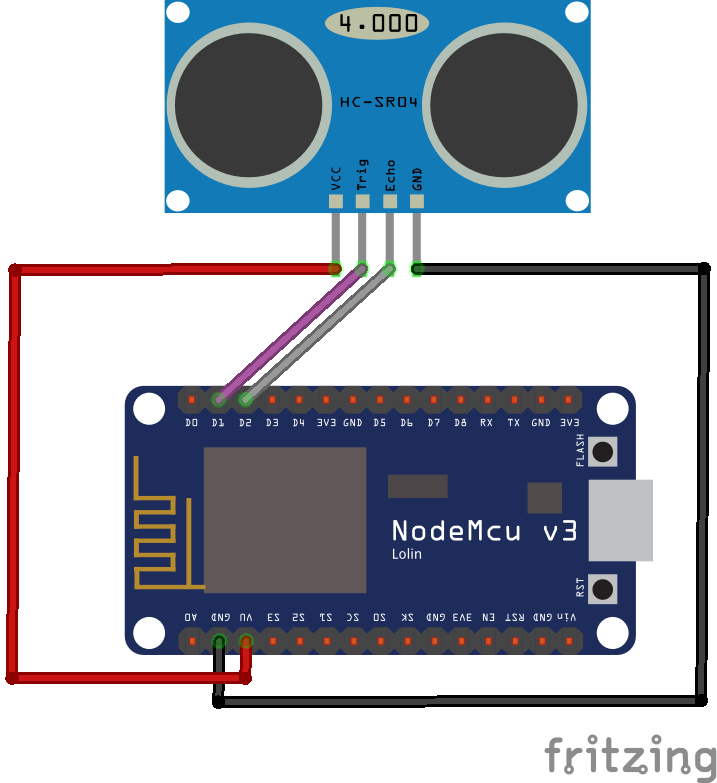
- Connect the HC-SR04 to the ESP8266 (I used one NodeMCU that I had, you can use a SparkFun Thing Dev board for this too) - refer to section "Schematics" for connection reference
- Results: all circuits protected, just emmiter-receiver exposed. (Hope this lasts for years)
- Load the code (see code section) and test
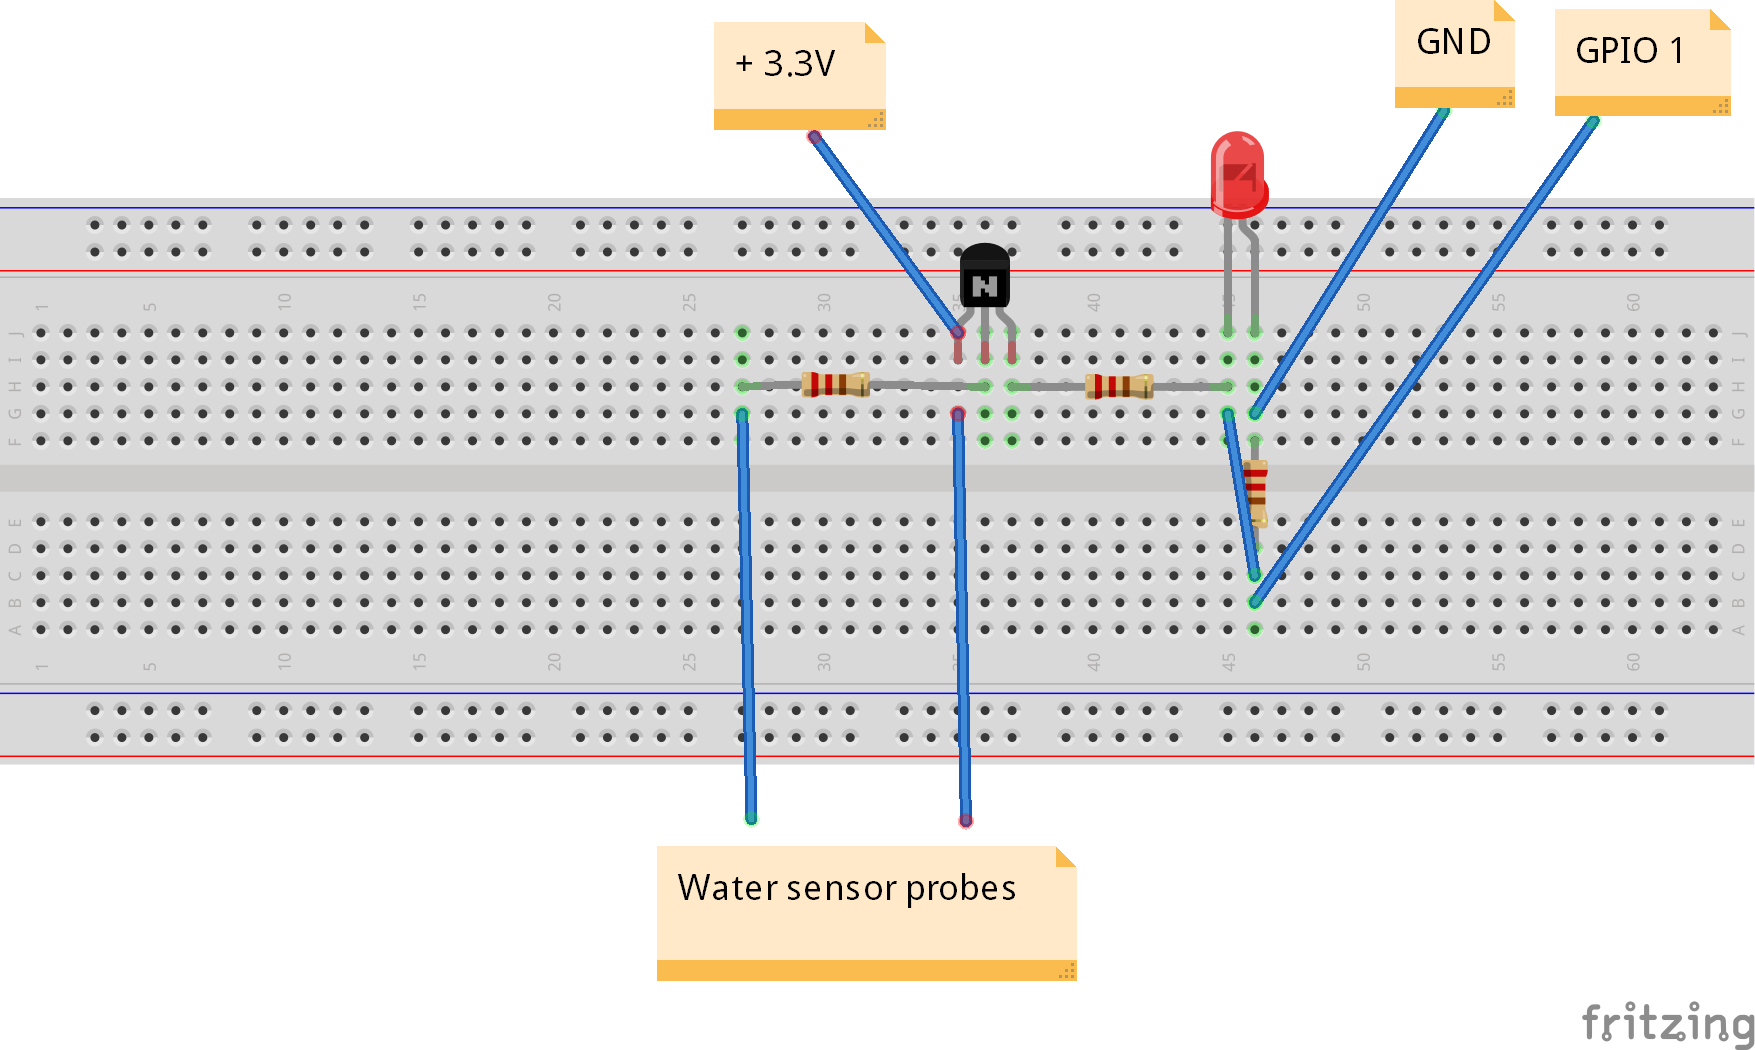
For this I decided to make my own sensor with digital output to ESP8266 gpio, just for fun. With a BC548B transistor, one Led and resistors it is simple and woks! (You can use another HC-SR04 or one Float Switch for this too).
Firstly, I've made a breadboard version:
Then I´ve moved to solder the components in a perfboard, to have a reliable sensor module:
Again, refer to section "Schematics" below for reference. For the sensor probes, I've made with cpvc tubes, caps, one "L" curve and wires:
- make 2 holes in one cap for probes, pass and glue 2 pieces of copper wire
- solder a long pair of wires to the probes
- the long tube section, I´ve adjust its length to signal when the water is lower than 25% tank capacity
- mount the set as photos below, glue it all to make it water proof!
Here we'll have the intelligence for automation and hardware for all needed actions.
- Solder pins to your SparkFun Thing Dev Board. I´ve made with male pins, and on the top of the board, in order to not use a breadboard for connections.
- There is a very good SparkFun Tutorial for this hardware: https://learn.sparkfun.com/tutorials/esp8266-thing-development-board-hookup-guide/hardware-overview
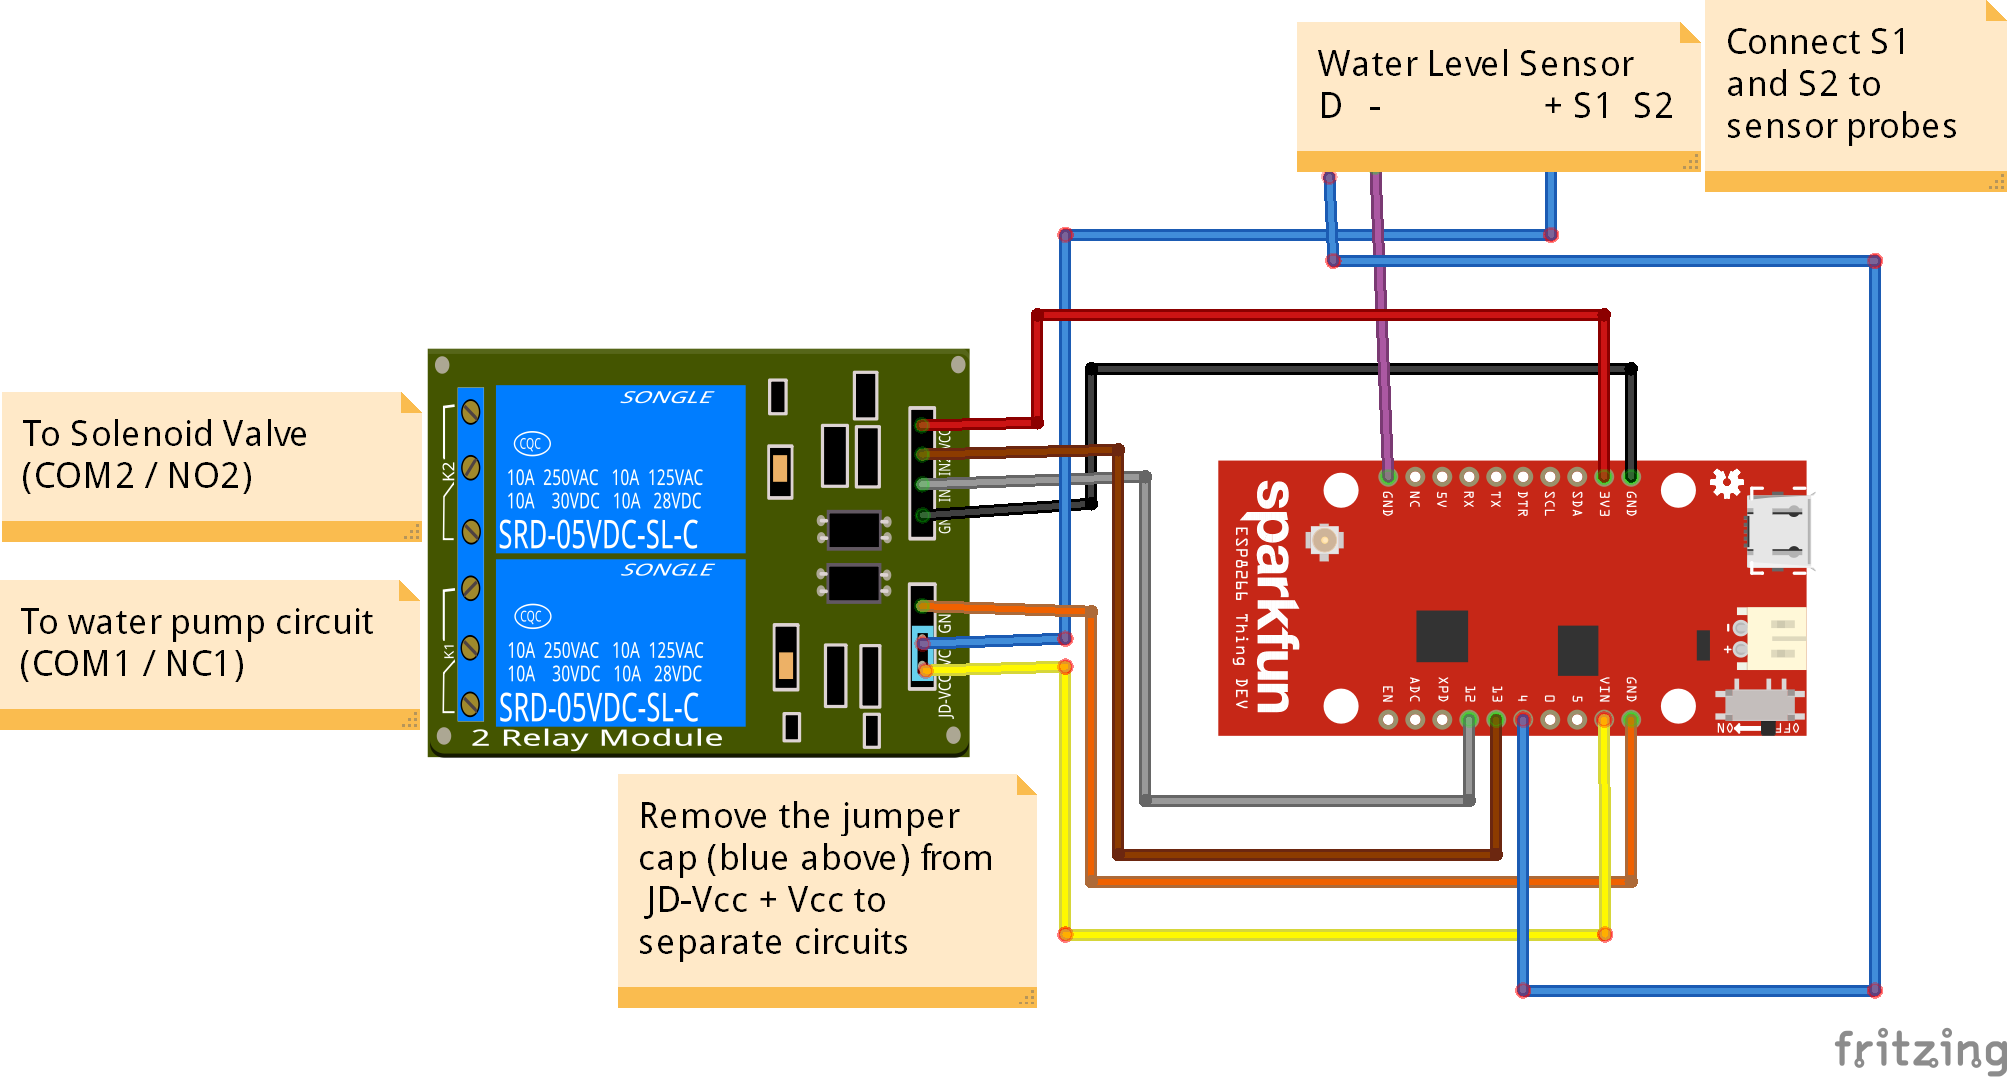
- Now you can connect all the parts (Schematics), load the code (code section)
Cayenne is the cloud platform that will provide the graphical user interface, remote access, alerts, automation monitor and manual intervention as needed.
- Get started with the platform with this link: https://mydevices.com/cayenne/docs/getting-started/#getting-started
- Install Cayenne libraries to your Arduino IDE:
- Create your (free) Cayenne account, log in and click on All Devices > SparkFun ESP8266 Thing (for the Thing) or Generic (for other ESP8266).
- Define one device to Cistern Monitor and one device to Water source switch. For each one, copy MQTT Username/MQTT Password/Client ID to paste in the codes. Insert your WiFi SSID and password in the codes too.
- Compile each source in Arduino IDE, select Sketch > Upload to upload the sketch file to each ESP8266 device.
- In Cayenne, Click Add New > Device / Widget > Custom Widgets.
- Define each Widget for Cistern Monitor as follow, check the final screen:
- Define each Widget for Water source switch:
- Click Add New > Trigger:
Definitions above will work this way: when the water line is below 125 cm from distance sensor (approx.49") it will trigger cistern low. When the water line is less than 90 cm (approx.35") it will clear the alert.
With these triggers, I´ve made the integration of the two devices via Cayenne, so water source switch central is aware when cistern monitor detects it is low on water.
VideoCurrent field implementationI'm still implementing this. All works great in the city, but in the rural area the internet is weak and unstable and WiFi signal has the distance attenuation.
I'll have to try other Internet providers, and maybe install a Wi-Fi repeater.
That's AllThanks for reading and watching!


_3u05Tpwasz.png?auto=compress%2Cformat&w=40&h=40&fit=fillmax&bg=fff&dpr=2)
Comments
Please log in or sign up to comment.