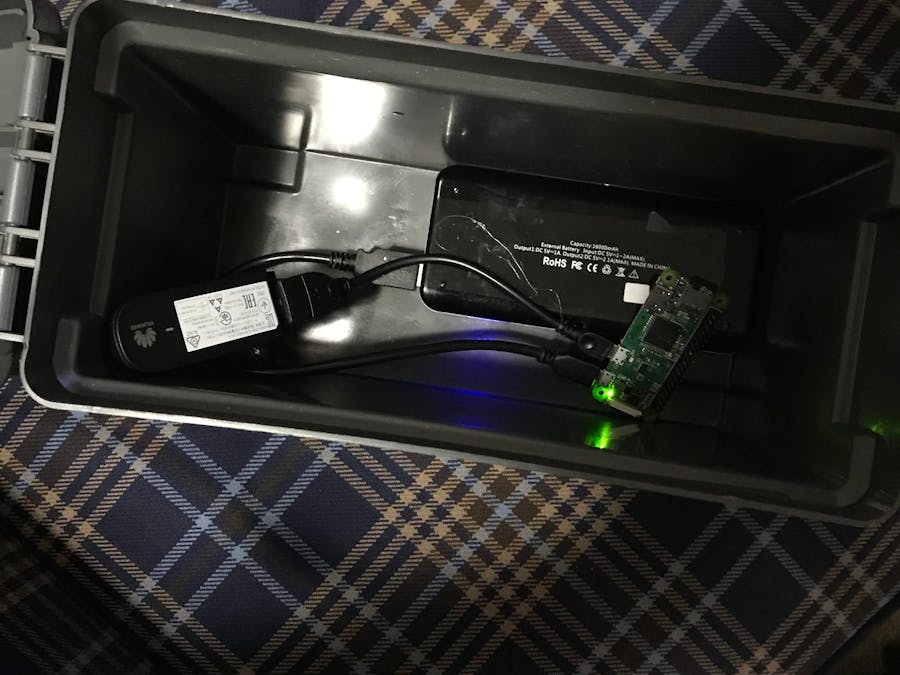
In today's world you can never be too safe with your data. So why not make your own digital safe house for it?
StepOne: Raspbian
Just like you need walls to your safe house you need a operating system to keep everything contained in your virtual safehouse
Grab Raspbian at this link
https://downloads.raspberrypi.org/raspbian_lite_latest
You will also need a program to put the OS on your micro SD card
Once you have those things downloaded open your file manager
The Raspbian and extract it, next open up etcher and select the extract Raspbian and flash it to the micro SD
StepTwo: The setup
create a file in your micro SD card called "wpa_supplicant.conf"
inside this file put
ctrl_interface=DIR=/var/run/wpa_supplicant
GROUP=netdevnetwork={
ssid="YOUR_SSID"
psk="YOUR_WIFI_PASSWORD"
key_mgmt=WPA-PSK}
Next make a file called "ssh" with no extension\
Put the micro SD card in the raspberry pi and power on the pi and wait a few minutes
connect to your pi do a scan of your WiFi, I'm using a app on my phone called "Net Analyzer"
Find the IP of your pi and ssh into "pi@<REPLACE WITH PI's IP>"
ssh pi@192.168.0.59
the password should be "raspberry"
now run the following code
passwd
change your default password for security reasons
sudo passwd
change roots password too
sudo apt-get update && sudo apt-get upgrade
update and configure the PI
StepThree: Soracom
go to soracom.io
- Make a account
- add your sim
- configure payment info
Put the sim card into the modem and plug it into the raspberry pi
Open the SSH tab again and run
sudo apt-get install nmcli
gets the software to make the sim work
sudo curl -O https://soracom-files.s3.amazonaws.com/starterkit/setup.sh
Grabs the configs
sudo chmod +x setup.sh
gives the configs permission to do their thing
sudo ./setup.sh
makes the configs do their thing
congrats you just added your PI to the Soracom network!
StepFour: Amazon web services and VPC connections
this is a rather difficult task I recommend following the tutorial here
StepFive: The box
Secure all the components in the box using hot glue If you are using a solar panel secure it to the top and drill a hole in and run the wire through and make the hole watertight make sure everything is plugged in and working.
StepSix: File transfers
when your box is out in the wild you will need to send files to it so it can protect them
For this we will be using SFTP
I recommend using Win SCP for sending files
https://winscp.net/eng/index.php
open up a SFTP to your AWS EC2 instance you created in step four and send the files you want safe to preferably in /home/<user>/transfer
now ssh into your EC2 instance
ssh -i "xxx-dev01.pem" ec2-user@ec2-52-196-xxx-xxx.ap-northeast-1.compute.amazonaws.com
make sure to replace the info in the command with your info
now open the connection to the PI
sudo sftp pi@<assigned vpc ip for pi>
now you can transfer files to your virtual safe house here is a handy cheat sheet for file transfers in command line SFTP communications
Congratulations you are now the owner of your own virtual safe house!


Comments
Please log in or sign up to comment.