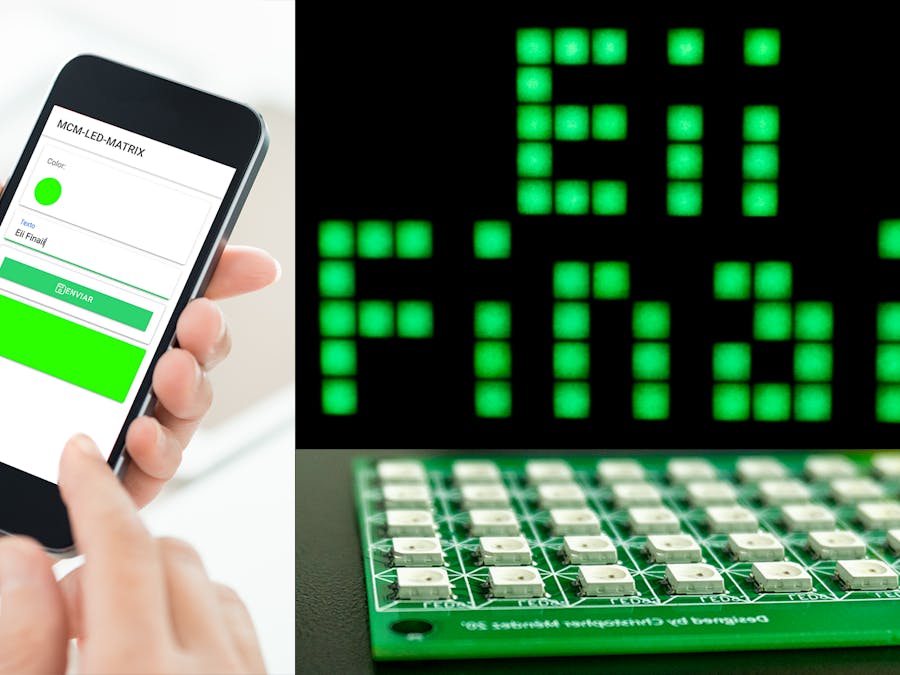
Here is my 2nd advance to a project that I am very excited to show you. It's about a DIY Smart LED Matrix that will let you show on it, data, such as YouTube Stats, your Smart Home Stats, as temperature, humidity, can be a simple clock, or just show text and animations.
In this second tutorial I will be sending text and color data through the internet. If you are a visual learner I know that a video worth more than 1000 words, so here is a Tutorial video. (I am a Spanish speaker, so please consider turning on English subtitles):
Step 1:
As you can noticed, nothing looks very difficult on this project, but you will need some basics knowings about:
-Using the Arduino IDE.
-Programming ESP8266.
-3D printing or Handcraft (for the Grid).
-Welding.
-Wiring.
Step 2: Components and Parts List
A good place I can recommend to find your components, it's MakerFocus, it's an Open Source Hardware Store!
1. PCB I really recommend to use JLCPCB SMT Services to order yours, you can choose between the No LEDs version and ADD the LED's Strips by yourself, or the one with the LED's.
4. 5v 2A Power Supply.
6. 3D Printer (Optional) You can do the parts with cardboard or something rigid.
Step 3: Circuit Diagram
Here is the Circuit diagram, you have several options to make the project. You can just create the control part of the circuit, the one shown in the first image, then attach individual LEDs Strips as shown on the 3rd image.
Yo can also, instead of LED strips, use LED Panels.
It has all the internal conections of the circuit that will allow us to create the PCB design later.I also attached the PDF of the Schematics so you can see it better.
DOWNLOAD Schematics, Code and Libraries for FREE.
Step 4:
For the implementation of a good project we need a reliable assembly for the circuit that makes it up, and there is no better way to do it than with a good PCB.
Here you can download the Gerber, BOM and Pick & Place Files, the ones you need to order your PCB on your PCB manufacturing company.
I suggest JLCPCB:
📦$2 for 5 PCBs & cheap SMT (2 Coupons)
BUY THE ALREADY DESIGNED BOARD, Gerber + Pick & Place + BOM
Step 5: Adafruit Configuration for Internet Control
- Go to Adafruit IO Page
- Create a free account.
- Look and copy the Adafruit credentials to your code.
- Go to Feeds > View all > Create new feed.
- Create the feeds down bellow.
- -mensaje.
- -rojo
- -verde
- -azul
In Adafruit API Documentation we have the info to properly communicate with the server.
We are going to be using this URL soon:
https://io.adafruit.com/api/v2/{username}/feeds/{feed_key}/data
Step 6: Programming the ESP8266 and Testing
1. Connect the USB to TTL Converter as follows:
USB to TTL -------> ESP8266
3.3v Vcc
tx rx
rx tx
Gnd Gnd
1- To program the ESP8266 we need to place the jumper on (PROG position), connect the USB to TTL converter to our PCB on it respectives pins and then to our PC, install the libraries and then upload. (Need to have the ESP8266 Packaje installed on your IDE).
2- Install the Libraries and Dependencies.
3- Restart the IDE, Open the Code.
4- Configure your WiFi Credentials and Adafruit IO Username and Password
4- Upload the sketch.
5- Jumper on USE, disconnect USB and connect the 5v power Supply.
6- Verify that all your LEDs works fine.
NOTE: Use the 3.3v of the USB-TTL convertor to power the ESP. (Will burn with 5v).
Step 7: Controlling the LED Matrix With Postman
- Go to Postman homepage and download the free software
- Create a new request by clicking of (+).
- Select the POST option.
- Paste the URL ( https://io.adafruit.com/api/v2/{username}/feeds/{feed_key}/data">https://io.adafruit.com/api/v2/{username}/feeds/{feed_key}/data) and personalize the parameters of username and feed key.]
- Go to "Headers" and add your Adafruit Key: X-AIO-Key | xxxxxxxxxxxxxxxxxxxxxxxxxxxx
- Go to "Body" and set the type to "JSON" and "RAW", then modify your feeds as the picture shows: {"value":"text"} or {"value":numbers}
- Click on "Send" if it was successful then you will see a nice message on the terminal
- Your LED Matrix will you the new text or color.
Step 8: Prototype App I Made to Test
With the concepts applied on Postman, I made an App that emulate the sends and post so I would be able to control the MCM-LED-Matrix through the cellphone and with a nicer interface.
A color pallete and a textbox for text input.
Hope you to enjoy the project, please feel free to share your remakes.


Comments
Please log in or sign up to comment.