In the world of robotics, hobbyists are crafting their own creations with interactive displays. If you're delving into OLED eye animations for Arduino robots, you've probably felt overwhelmed by online searches. But fear not! We've simplified the process.
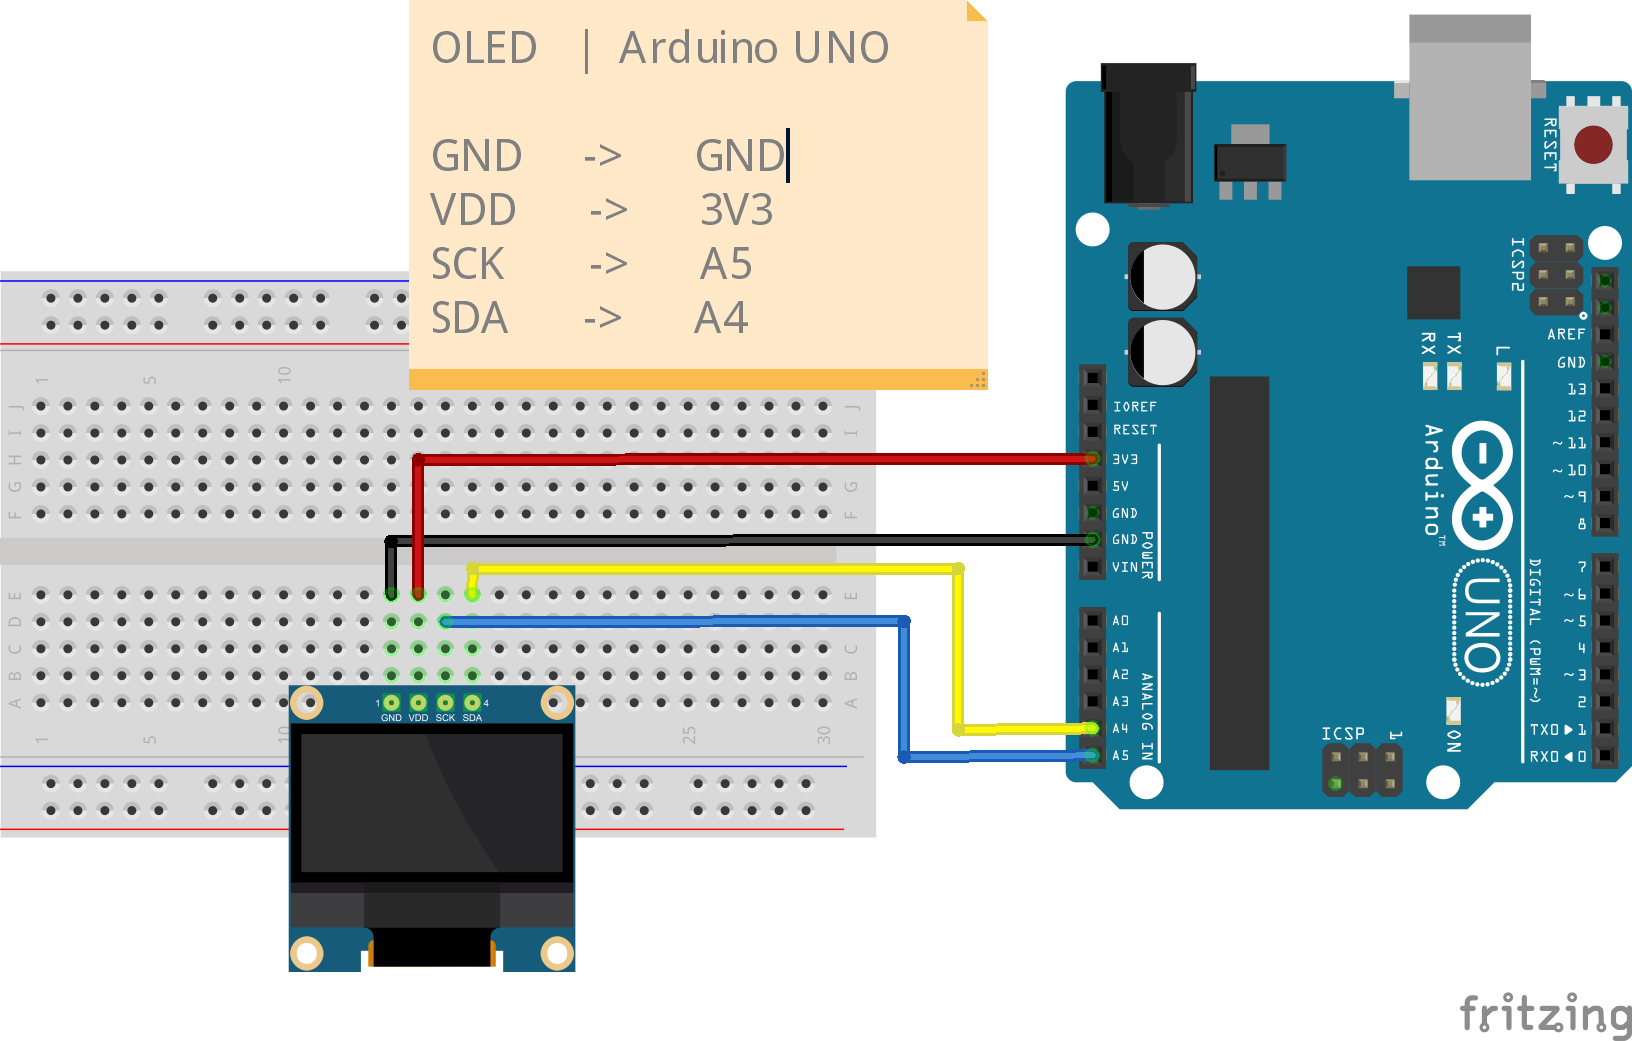
After thorough research, we've narrowed down the top five methods for creating eye-catching animations. Our blog offers a clear comparison to kickstart your project. Best part? You can build this with basic components like an Arduino Uno and an OLED display. Dive in and bring your robot to life!Here comes our selections -
Option 1: Eye Animation on OLED Display by Intellar
The first approach is by intellar. The Source code for this Eye Animation on OLED Display can be found in their git Repo. We have used the same code on our set-up and you can see the results in the GIF video below.
They introduced functions to achieve cool-looking eye animations, easily utilized by anyone out there. The code uses simple shapes to mimic eyes, featuring three moods (Normal, Sleep, Smile), multiple eye positions, and blinking. We will discuss the code functions shortly below. First, let's discuss the pros and cons.
Pros:
- It's easy to use with simple functions. Functions allow adjusting eye position in multiple directions like right, left, top, bottom, and all corners. The ability to draw and generate eyes with modifiable height and width is a standout feature.
Cons:
- There are only three moods, which might not be enough for some projects.
This second option was created by SpiderMaf. The author has posted the source code for this project in his Git repo and has also uploaded an explanation video about this Animated Eye using Arduino on his YouTube channel. You can refer to the video for the best explanation of the project.
SpiderMaf introduced the concept of circles here with interesting customizable features. These eyes even have pupils, which is an added benefit for achieving precise eye movements. Comparing with others, these functions are compact. Now let's discuss the pros and cons.
Pros:
- Everything is similar to the option by intellar, but the movement of eyes towards corners is not native. The size and position of the eye are adjustable. It has really small functions compared to others. Mainly, it has a human feel because of the eyes with pupils.
Cons:
- It's also similar to option 1 by intellar.
This offers a unique open-source robot project featuring a small OLED display as its expressive face. Unlike other options, this design uses rectangular eyes and supports various expressions using the U8g2lib library. It's lightweight and adaptable to different display types, making it ideal for small hobby robots.
Pros:
- Supports a wide range of expressions (e.g., sad, happy, angry) compared to other designs and Easy to implement on various display types, suitable for small hobby robots.
Cons:
- Lacks human-like characteristics. Limited flexibility in adjusting eye size and position.
This option, created by Mr. Vinny, features OLED Moving Eyes using Arduino. The source code is available on his Git repository, complemented by an explanatory video on his YouTube channel and a detailed blog post.
Vinny's method revolves around directly drawing bitmap images onto screens. He explains the intricate process of converting BMP images into C code, facilitating ease of use for anyone attempting this project.
Pros:- External image dependency allows rendering of custom images. Programming is straightforward; calling one function suffices for execution.
- Each BMP image converted to C data requires 1KB of memory, which is substantial. Arduino UNO can only display a limited number of images due to this constraint.
Picaio presents a sophisticated approach to robotic eye animations on Arduino UNO. The project's source code is available on GitHub, and Picaio provides detailed explanations on their YouTube channel.
Pros:- Offers a wide range of realistic eye movements and expressions, including looking up, down, left, and right, along with various moods like happiness, sleepiness, anger, tiredness, and sadness. Optimized BMP technique generates C code only for eye sections, reducing memory usage and enabling more expressions within limited space. Simulates natural eye movements during idle states, enhancing animation realism.
- Beginners may find the approach initially challenging to grasp due to its sophistication.
This method stands out for its realism and efficiency in creating diverse robotic eye animations on Arduino UNO.You can learn more about the "Arduino OLED Eyes Animation for Robotics Projects" project on our official webpage!


_ztBMuBhMHo.jpg?auto=compress%2Cformat&w=48&h=48&fit=fill&bg=ffffff)


Comments
Please log in or sign up to comment.