


Hardware components | ||||||
| × | 1 | ||||
 |
| × | 1 | |||
 |
| × | 1 | |||
Software apps and online services | ||||||
 |
| |||||
Introduction
Bluetooth Low Energy (BLE) communication is a popular choice for wireless communication, mainly due to its low-cost and low-power requirements. Typically BLE is used with a master device that many of us carry daily like smart phones, tablets, and computers, making it very easy for consumers to interact with hardware using apps. BLE is another way of referring to the Bluetooth 4.0 standard, also called Bluetooth Smart. Bluetooth has been around for awhile and the older standards, called Bluetooth Classic, allow for greater data throughput and range but at higher power consumption, making it less ideal for wearables and other battery powered hardware. There are also dual mode Bluetooth modules that can do both Bluetooth Classic and Bluetooth Smart, which gives you compatibility with older and newer Bluetooth devices. For the most part, BLE is growing as the most popular way to connect devices over Bluetooth.
The goal of this project is to show you how to write code and connect the hardware to establish BLE communication between a TI LaunchPad with a BLE module and a Bluetooth 4.0-equipped Android device, using free software tools and low-cost, off-the-shelf hardware. The path to enable iOS, Windows, and linux are somewhat similar but are different, and you can refer to other projects that explain how to enable those operating systems.
What is BLE?
Bluetooth Low Energy is a wireless personal area network technology designed and marketed by the Bluetooth Special Interest Group. It is targeted for applications in the healthcare, fitness, security, automation, and home entertainment industries.
BLE allows devices to use significantly less power than standard Bluetooth connections, while still offering most of the connectivity of regular Bluetooth, and with approximately half of the range (about 15 meters / 50 feet). Battery powered devices using Bluetooth LE can run for years without recharging or battery replacement.
Hardware
For our project, the physical sensors and controls we’ll be using come from Seeed Studio’s Grove system. Specifically, we’ll be using:
- Seeed Grove BLE
- An Android device running Android 4.3 or higher
- A Windows, Mac, or linux PC
A couple of notes about the hardware:
-
The Grove Starter Kit for LaunchPad is a great introduction to the Grove ecosystem
- I used an inexpensive HTC Android phone during development but any Android device running at least Android 4.3 with Bluetooth 4.0 support should work.
- I used my Windows 7 PC but development can also be done on Mac or Linux systems.
Software
I used several free software tools. To walk through this example, you’ll need to download and install them as needed:
- Energia IDE: http://www.energia.nu
- Android Studio: https://developer.android.com/sdk/installing/studio.html
- Android SDK: https://developer.android.com/sdk/index.html?hl=i
All of the above software is available for Windows, Mac, and Linux.
TI LaunchPad
The LaunchPad ecosystem from Texas Instruments includes modular hardware, intuitive software, and community support. The LaunchPad is a microcontroller development kit featuring a device from TI's portfolio of ultra low power and performance MCUs. The main appeal of the kits is their low-cost, starting at $10 and most under $20. You can find out more about the different ones at www.ti.com/launchpad.
Grove Starter Kit for LaunchPad
The kit is designed to simplify working and prototyping with sensors. It contains a BoosterPack with a bunch of Grove standardized four (4) pin connectors. These connectors feed to the LaunchPad headers so it is easy to attach the sensors using the included cables. This means you can build projects without needing to mess with small wires and other hassles of prototyping.
Learn more or purchase the kit here: http://www.seeedstudio.com/depot/Grove-Starter-Kit-for-LaunchPad-p-2178.html
The creator of the Grove Kit, SeeedStudio, has a number of useful resources online.
Specifically, I recommend cloning or downloading the Sketchbook Starter repo here: https://github.com/Seeed-Studio/LaunchPad_Kit
And bookmark the Grove Wiki page here: http://www.seeedstudio.com/wiki/index.php?title=Main_Page#Grove
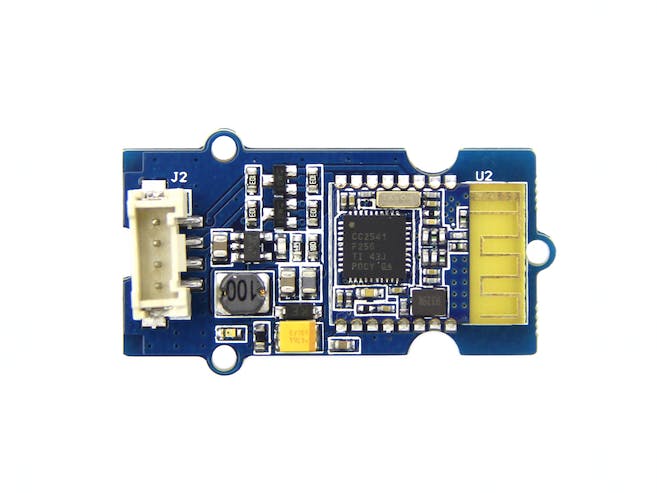
Grove BLE v1.0
We’re going to use the Grove Bluetooth Low Energy v1 module, which isn’t included in the starter kit, but is pin compatible with the Grove BoosterPack and connector cables. It’s also a relatively low cost BLE add-on, just under $20. You can find cheaper ones, but this one connects easily to the LaunchPad and includes some code examples to get started quickly
The Grove BLE v1 is based on the industry standard Texas Instruments CC2540. A number of other devices use this chip. If you have another TI CC2540 BLE module, such as the RedBear BLE Mini, you should be able to adapt the sample code with minimal effort.
Learn about the Grove BLE v1 here: http://www.seeedstudio.com/wiki/index.php?title=Grove_BLE_v1&uselang=en
Debugging on Android
BLE support was added to Android in version 4.3 (API level 18). You need a device running 4.3 or higher to communicate over BLE.
Learn more about Android BLE here: https://developer.android.com/guide/topics/connectivity/bluetooth-le.html
If you’re new to Android development, you need to enable the developer options on your phone or tablet before you can use it to run and debug your software. Open the settings app, scroll to the bottom, select “About device,” and click the build number seven (7) times to unlock the developer options.
Developer Options is now displayed under settings; be sure to check “USB debugging.”
Learn more about Android Developer Options here: http://developer.android.com/tools/device.html
Installing the Software and Coding
Energia IDE
You need to download the latest Energia IDE from www.energia.nu/download. Energia is a fork of the Arduino IDE and brings the Wiring APIs to the TI LaunchPads. If you are familiar with Arduino style development you will be very comfortable in Energia. There is also the option to use Energia inside of CCS Cloud and Code Composer Studio Desktop if you need more robust IDE options. You can also use community ports for Visual Basic and Xcode. These other IDEs can give you a richer feature set while developing.
LaunchPad drivers
Assuming this is the first time you've used your LaunchPad, you may need to download drivers if you are on Windows. You can find the drivers for your board under the instructions for your operating system.
http://energia.nu/guide/guide_windows/
http://energia.nu/guide/guide_macosx/
http://energia.nu/guide/guide_linux/
Android Studio
Android Studio is a new Java* IDE for Android development based on IntelliJ IDEA* (https://www.jetbrains.com/idea/). It’s currently in Beta, but it’s stable and fairly feature complete. If you’re comfortable using Eclipse* for Java Android development or IntellliJ IDEA, you should have no problem following the walk-through using either one.
Android Studio simplifies the installation process by including the Android SDK. Simply download, extract the contents of the zip file, and run studio.exe in the bin folder.
Learn more about Android Studio here: https://developer.android.com/sdk/installing/studio.html
Android SDK
You may need to download additional SDK packages. To do so, click "SDK Manager" on the toolbar in Android Studio. Configuring Android SDKs is beyond our scope here, but you can get additional information here:
https://developer.android.com/sdk/installing/adding-packages.html
If you previously installed the Android SDKs, you can configure Android Studio and point it to the correct path, as shown in Figure 4
In Android Studio, click on Configure -> Project Defaults -> Project Structure and set the path.
Testing the LaunchPad
Before starting the walk-through below, please make sure you’re able to run the Blink example sketch. It’s included in the Energia IDE download package in the Examples -> Basics -> Blink folder.
Make sure you select the right board under Tools -> Board and select the right COM port for UART under Tools -> Serial Port.
Android Hello World
Once you’ve installed Android Studio, make sure you’re able to create a new project and run it on your Android device.
- Connect your Android device to your PC
- Open Android Studio
- Select "New Project…"
- Select a name and location and click "Next" 3 times (API 15/Blank Activity)
- Click Finish and wait for the project to be created (this may take 20+ sec)
- Push the green Play icon on the toolbar
- Select your device and press "OK"
If everything went correctly, you should see “Hello world!” on your Android screen.
Android* Studio Hello World app
BLE works by providing short bursts of data as needed, and then powers down. This is partially how Bluetooth LE uses so little energy. Instead of the traditional pairing approach of regular Bluetooth, BLE devices link only when there’s a need to send or receive information.
BLE is strongly structured in how it communicates. Devices expose services to send and receive the data, and these services have what are called Characteristics that define what data can be shared. To get further details, Characteristics can have Descriptors that help define the data. For example, you could have a service labelled "Heart Rate Monitor" that included characteristics such as "heart rate measurement."
Most Bluetooth LE APIs allow searching for local devices and discovering services, characteristics, and descriptors on these devices.
BLE key terms and concepts
Here’s a brief summary of the key BLE terms and concepts you should understand before starting a BLE project:
General Attribute Profile (GATT)
The GATT profile is a general specification for sending and receiving short pieces of data known as "attributes" over Bluetooth Low Energy link. All current LE application profiles are based on GATT. The Bluetooth Special Interest Group (SIG) (https://www.bluetooth.org) has pre-defined a number of profiles for BLE devices. These profiles are specifications that describe how a device can be used.
Attribute Protocol (ATT)
The Attribute Protocol (ATT) is what GATT is built on. The ATT is an optimized protocol designed specifically for BLE devices. ATT communication sends as few bytes of data as possible. Each attribute has a Universally Unique Identifier (UUID), which is a standardized, 128-bit string ID used to uniquely identify information. The attributes transported by ATT are formatted as characteristics and services (defined below).
A characteristic contains a single value and 0 or more descriptors (below) to describe the characteristic's value.
Descriptor
Descriptors are defined attributes that describe a characteristic’s value. These might be human-readable descriptions, specify units or measure, or define an acceptable range of values.
Service
Services are collections of characteristics. You can find a list of existing GATT-based profiles here: https://developer.bluetooth.org/gatt/services/Pages/ServicesHome.aspx
Sending Data from Android to LaunchPad
The remainder of this document assumes you have a development system set up and configured for both TI LaunchPad and Android development. Make sure you’ve completed the following steps and review the preceding content if needed.
- Install Energia IDE
- Install Android Studio
- Install Android SDK
- Successfully upload the Blink example on the LaunchPad
- Successfully run the empty Hello world Android project
BLE in Android
You can download the completed project from GitHub here:
It is better for your learning to make your own project and run through it line by line.
Create a New Project
Open Android Studio (or your IDE of choice), create a new blank Android application, and name it BLEConnect. Make sure to set the Minimum SDK to at least API 18. Otherwise you won’t be able to use the BLE APIs.
Creating a new Android application
Next add the required permissions by opening the AndroidManifest.xml, and adding the following above the <application> tag:
Setup the UI
To keep things simple, we’ll just use the default layout, but we’ll
need to set an ID for our TextView. Open layout -> activity_main.xml,
select the TextView, and set the id to mainText so we can reference it in our code.
Set the resource id for the TextView
MainActivity
For this project, the remainder of the code goes in the MainActivity. If you’re adding the code line by line, notice that Android Studio automatically detects missing imports and prompts you to add them.
The sample code does the following:
- Checks for BLE support on the Android device
- Searches for BLE devices nearby
- Identifies and connects to the Grove BLE module
- Searches the available services for the known communication service
- Finds the transmit characteristic on the communication service
- Sends a message by writing a value to the characteristic
Let's break it down into the core concepts.
Class Level Variables and Static Values
We’ll store a number of values as we connect to the BLE module, search for services, and send our message. We’ll also add some known static values for the Grove BLE v1 (TI CC2540). You may need to change these if you’re using a different module. Specifically, I recommend defining the transmit and receive characteristics, for example:
Status helper Method
For simplicity, we show our progress on the TextView we labelled earlier. The code includes a simple helper method called statusUpdate that we use to write status messages to both the screen and the
console. It also marshals back to the UI thread so we can safely call it
from any thread.
Connect to the BLE Device
To get a reference to the Bluetooth Manager we first check if BLE is available on our device, call getSystemService to get a reference to the Bluetooth Manager (BluetoothManager), and then call the getAdapter() method to get our reference to the BluetoothAdapter object. Alternatively, you can use the static helper method getDefaultAdapter directly from the Bluetooth Manager class.
Search for Nearby BLE Devices
To search for devices, we use a timer to search for a set period of time. We call startLeScan on our Bluetooth manager object and pass in a callback object to get notified when devices are found.
The API continuously scans for devices and as a result, we’ll likely get multiple notifications in the LeScanCallback for each device, so we check to make sure the device entry is unique
before saving it off. We also check the device names for our module and
save off a reference. For this example we don’t actually need to save
the devices to the list.
@Override
public void onLeScan(final BluetoothDevice device, final int rssi, byte[] scanRecord)
{
	…
}
Find the Communication Service
Most BLE devices expose one or more services for communication/ interaction. The TI CC2540 chip in our Grove BLE has a key service with the ID “0000ffe0-0000-1000-8000-00805f9b34fb”. Next we’ll find and save a reference to that service.
First we need to connect to the device. To get notified when we’re connected or when services have been found, we need a BluetoothGattCallback object and we override onConnectionStateChanged and onServicesDiscovered.
Notice in the onConnectionStateChanged method, when we’re notified of a connection we call mBluetoothGatt.discoverServices() to search for services. Once we identify the service we want, we can go ahead and send a message.
@Override
public void onConnectionStateChange (BluetoothGatt gatt, int status, int newState)
{
	…
}

@Override
public void onServicesDiscovered (BluetoothGatt gatt, int status)
{
	…
}
A number of other methods can be overridden. See the documentation here:
https://developer.android.com/reference/android/bluetooth/BluetoothGattCallback.html
Sending a Message
In the example code there’s a sendMessage method. We identify the characteristic we want by its UDID and call setValue on the characteristic. Finally, we call writeCharacteristic on our BluetoothGatt reference, passing in the characteristic as a value to send the data.
There are several overloads of setValue,
and there’s actually an easier overload to send strings, but since most
BLE communication sends commands as bytes, this is a more useful
example.
Now it’s time to set up the LaunchPad side.
Setting up the LaunchPad with the Grove BLE
There are several ways to mount your Groves. The easiest way is to use the Grove BoosterPack if you have that handy. The BoosterPack allows you to add more sensors quickly once you get the BLE part working. If you only plan on using the BLE and maybe one or two other Grove modules, you can use these stand alone cables instead of the BoosterPack.
To connect the Grove BoosterPack, align Then connect the Grove BLE v1 to the serial UART port.
Our First Sketch
We’re going to be doing some simple serial communication between our Android device and the TI LaunchPad. But we also want to see what’s being sent and received so we’ll use the Energia IDE’s built-in Serial Monitor.
You can see a completed version of the sketch here:
Open Energia and create a new sketch. Let’s save it and give it the name “SimpleSerial.” All LaunchPads have multiple serial ports we can use. This is very useful because it allows us to communicate from our PC to the LaunchPad while it sends and receives data through the Grove BLE. The primary serial UART is accessed through the microUSB connected to your PC, and we use the UART connector on the Grove shield that’s connected to the BLE module. If you are using the pins directly, you can refer to the Energia pin maps or use the BoosterPack standard pins of 3 for RX (receive) and 4 for TX (transmit).
Our sketch automatically runs once it’s uploaded to the LaunchPad. It first runs the setup() function, and then consecutively calls the loop() function indefinitely. This allows us to read and respond to input from the serial connections.
Initialize the serial connections
The Grove BLE’s default communication speed is 9600 baud so let’s
start with that. We need to configure both serial ports to use this
speed. We also need to send a couple of AT commands to the Grove BLE to
reset it and get it into a fresh state. You can see all of this in the
sketch’s setup() function.
Notice that we’re first configuring “Serial,” which is the microUSB port UART, and then “Serial1,” which is the UART connected to the Grove BLE.
The Loop
All we do in this sketch is read data from either serial port and send it to the other. To do this, we’ll call the read() function on the serial ports, which gives us a single character and then print() on the other serial port.
The LaunchPad loops quickly enough that we’ll have no problem keeping up with 9600 baud.
Upload and test the sketch
Now click the verify button on the Energia IDE (the checkmark) and fix any typos. Once it’s verified, make sure your LaunchPad is connected to the PC and upload the sketch (right arrow). Once the transfer is complete, the sketch starts looping, and we’re ready to connect from the Android app. Now open the Serial Monitor in Energia (magnifying glass on the top right) so we can send and receive data.
Once the sketch is running, run the Android BLEConnect app. You should see the message “Hello Grove BLE” appear in the serial monitor.
If it doesn’t work, it’s most likely an issue with the Android app. Check the status display, which should tell you where it failed.
BLEConnect running on an Android* phone
Moving Forward
Creating a more complex project means putting some architecture into
both the Android code and the sketch. I’d recommend moving most of the
Android BLE code into a service to abstract it from the UI and make it
easier to use across multiple activities and multiple projects. On the LaunchPad side we can start adding sensors and passing those values to the Android app.


Comments
Please log in or sign up to comment.