


Hardware components | ||||||
 |
| × | 1 | |||
 |
| × | 1 | |||
 |
| × | 2 | |||
 |
| × | 2 | |||
 |
| × | 10 | |||
 |
| × | 1 | |||
Software apps and online services | ||||||
 |
| |||||
 |
| |||||
Wiring Project Process
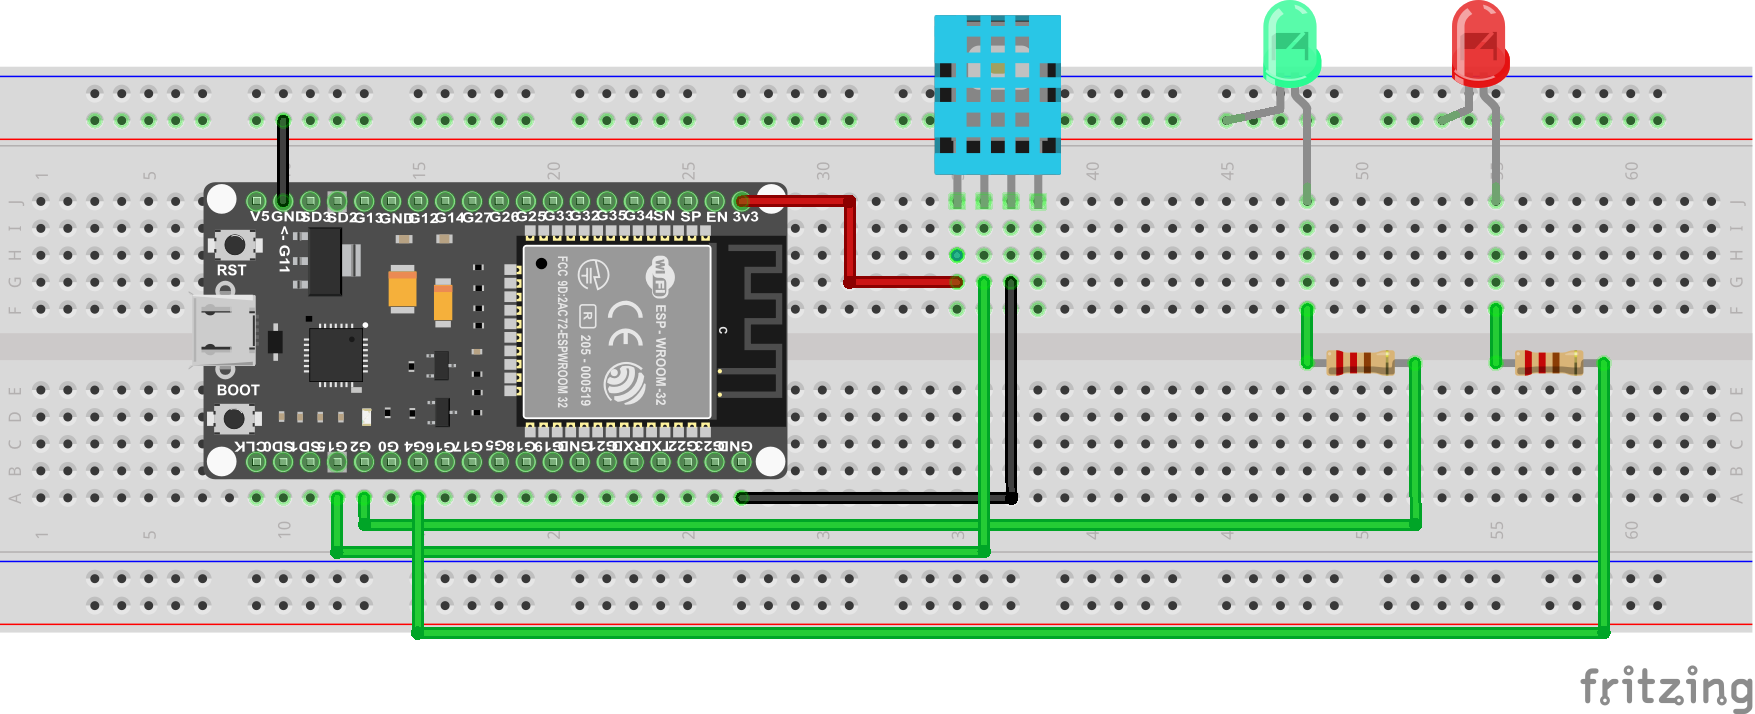
Read more- Prepare the necessary tools and materials. Install components as below.
- Where the jumper cable is connected from the VCC pin of the DHT11 to the 3.3v pin on the ESP-32.
- Then connect the DHT-11 GND Pin to the ESP-32 GND Pin with a jumper cable
- Connect Pin A0 on the DHT11 to Pin 15 on the ESP-32 with a Jumper cable
- Then Pin (-) on LED 1 (Green) to Pin GND on the ESP-32 with a jumper cable
- Connect Pin (+) on 1 LED (Green) to Pin 2 on the ESP-32 with a jumper cable
- Then Pin (-) on LED 2 (Red) to Pin GND on the ESP-32 with a jumper cable
- Connect Pin (+) on LED 2 (Red) to Pin 4 on the ESP-32 with a jumper cable
- The wiring process has been completed.
- First download NODE JS from nodejs.org then select the Windows operating system and the “.msi” installer. Install nodejs on windows.
- Open Command Prompt (CMD), then type "node -v" to check the version of nodejs installed. If it appears as shown in the picture, it means that node js has been installed.
- Then type CMD: "npm install -g --unsafe-perm node-red". Where to install the application requires an internet connection.
- If the node-red installation is complete, just type node-red at the command prompt, then node-red will be active.
- The next stage is to access Node-RED in the browser by typing "http://localhost:1880/" then the display will appear like this
- Then display the settings as below. Then enter the server data on each mqqt network in "test.mosquitto.org" and enter the topic according to the coding, for example "/Thinkitive/temp" and "/Thinkitive/hum" according to the settings. Then customize the Exit settings by giving it a name.
- In the final stage of accessing "http://localhost:1880/ui/" it will appear as below
Implementation process between wiring and Node RED with program code
- open arduino idea, open tools then select board (DEV MODULE)
- Create a program like the image below, fill in the SSID with your Wifi name and Wifi password. Connect the ESP32 network and laptop connection to the same network.
- Next, enter the program code according to the github link: https://github.com/alfanpamungkas939/Monitoring-Temperature-and-Humidity-In-Node-RED/blob/main/code
- Upload the program, then observe it on the Node-RED website. If connected, the data will come out according to the program where the temperature is <30 then LED 1 is ON and LED 2 is OFF, and if it is >30 then LED 1 is OFF and LED 2 is ON.


Comments
Please log in or sign up to comment.