Cigars, which are made from tobacco leaves, can easily dry out or become difficult to light if the temperature and humidity are not in the right range. The ideal temperature range is typically 68-72 °Fahrenheit (20-22.22 °Celsius) and 65-72% relative humidity. Cigars exposed over long periods of time to conditions outside these ranges can become unusable and damaged. Household cigar humidors are the size of a small box and typically use methods of humidifying such as moisture beads.
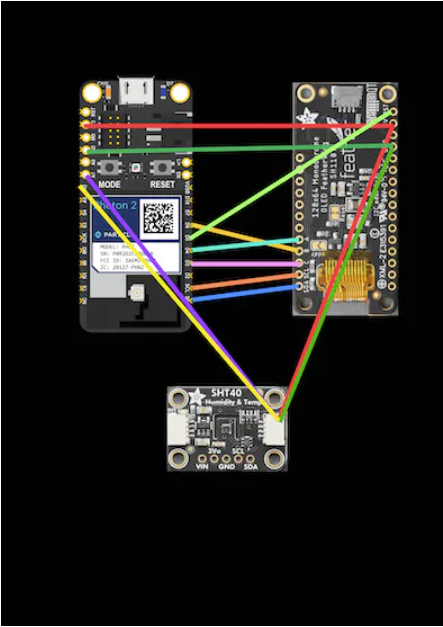
We wanted to make the most compact setup possible so that it would take as little space in the humidor as possible. We wanted to be able to access the data remotely whenever we wanted so we used the Particle app to get real time temperature, humidity, and battery data. Each of the three Photons, for three different setups, are separated by variables so that all the data is in one place.
One thing we noticed is that the temperature readings were very accurate using multiple weather apps for outdoor use and thermostats for indoor use. However, the humidity accuracy was harder to determine due to not having as many sensors like we did for the temperature. The sensor has a range of 0-100% relative humidity and -40-257°F (-40-125 °C) with an accuracy of ±1.8 %RH and ±0.2 °C.
Most of the components arrived completely assembled, but the FeatherWing doubler and the OLED display came without the connectors soldered to them. The doubler is just a board connecting the display and Photon 2 together, and it came with four rows of pin connectors which had to be soldered to the board. Having never soldered before, there was a bit of a learning curve. I even soldered one of the connector sections in the wrong spot which had to be redone, but thankfully, it was the only one that had to be done over again. The first few solders were not pretty, but they got the job done.
The next component, the OLED display was a little trickier because the soldering was happening less than an eighth of an inch from the screen, and the only protection for the screen was a thin plastic film over the top of it to protect during shipping. Fortunately, everything turned out fine, and I did not ruin the display. Since the rest of the components already had pin connectors attached, the only remaining step was to plug the Photon 2 and OLED display into the doubler and attach the SHT40 humidity sensor via the JST SH 4-Pin cable. After assembly was completed, I handed the final product off to Nick for the software side of things.
VideoComponent ImagesParticle Photon 2
Feather-Wing Doubler
OLED Display
Sensor
Cable


Comments
Please log in or sign up to comment.