To celebrate Star Trek's 50th Anniversary, I created a way to to talk to a computer just like the characters on the TV show can. After I saw that Amazon allows its voice recognition service, Alexa, to run on Raspberry Pi-- I was hooked. With this technology, we are getting closer to being able to access computers via, voice but we are nowhere near the ease-of-use in Star Trek.--so I created SAVI, or the Starlet Audio Voice Interface.
First I watched this video, posted on the Raspberry Pi site. I followed the instructions exactly, and quickly protyped a version using a spare button, some LEDs and an old USB webcam used for a mic. Unfortunately, I didn't know about this contest, so I didn't photograph this part.
After that, I decided to "Trek the Whole Thing" up. I found an old project box in my garage that had the look of something from Star Trek: The Original Series. I could have used a commercially available, or 3D printed Raspberry Pi case, but this one had the look I wanted. I did a few measurements and and got the Raspberry Pi to fit in. I had to cut holes for the ports. This went a little rougher than I would have liked. I also found some rubber feet to cover the screw holes at the corners, so the box does't wobble.
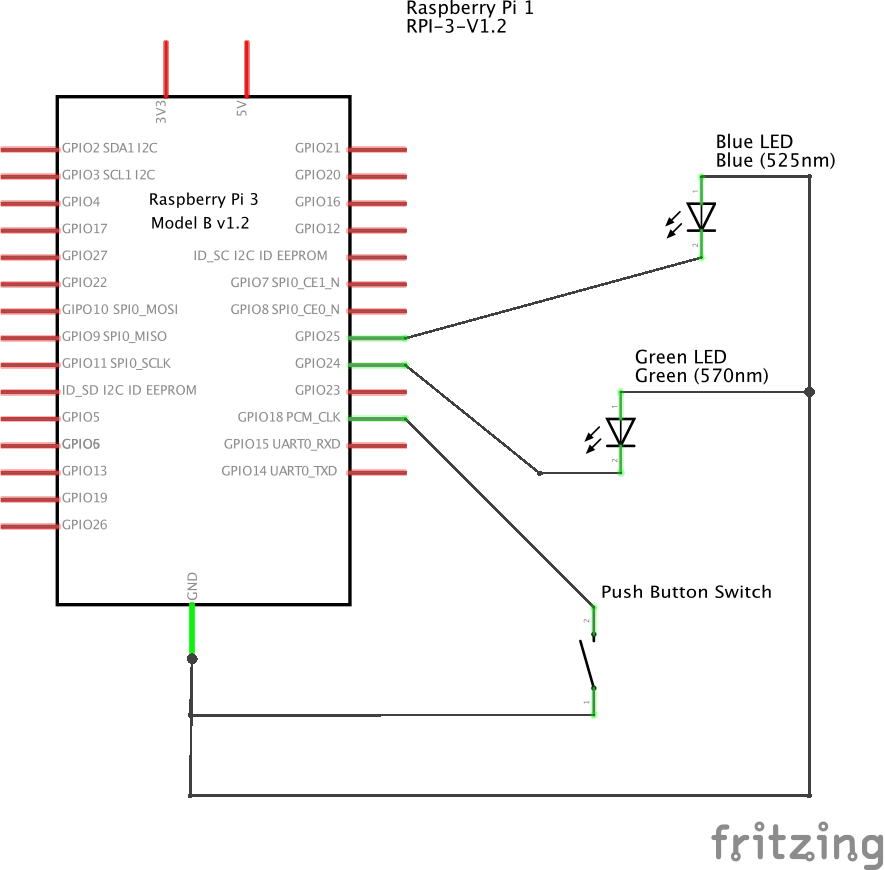
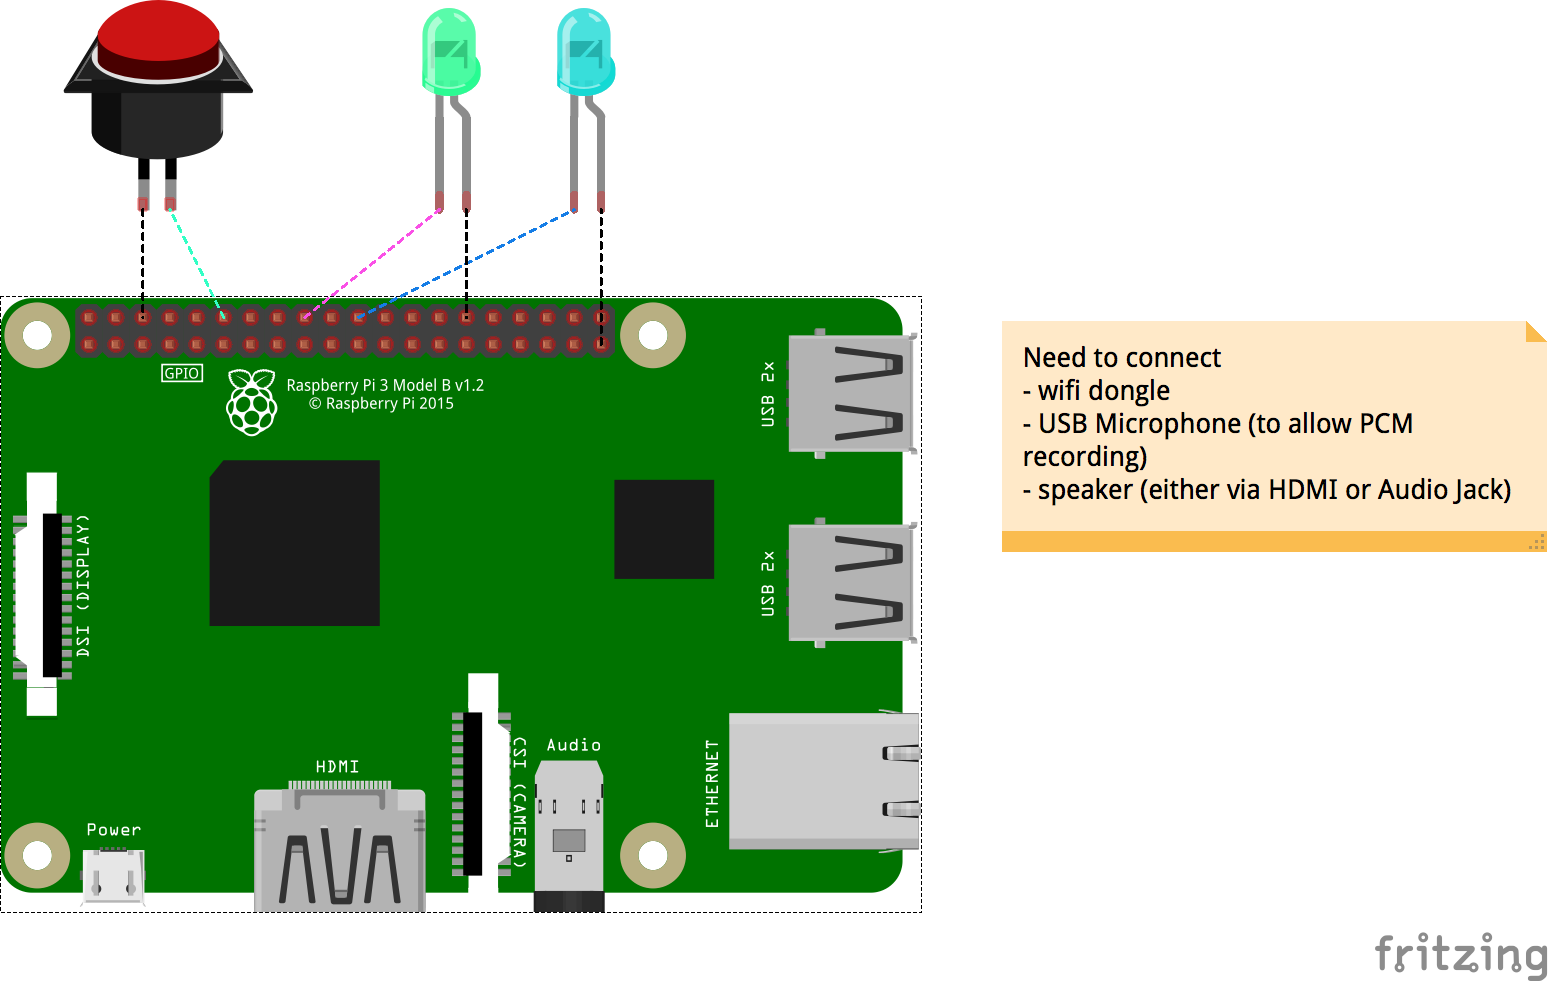
Here's a few shots of the interior with the button and LEDs wired to the Pi.
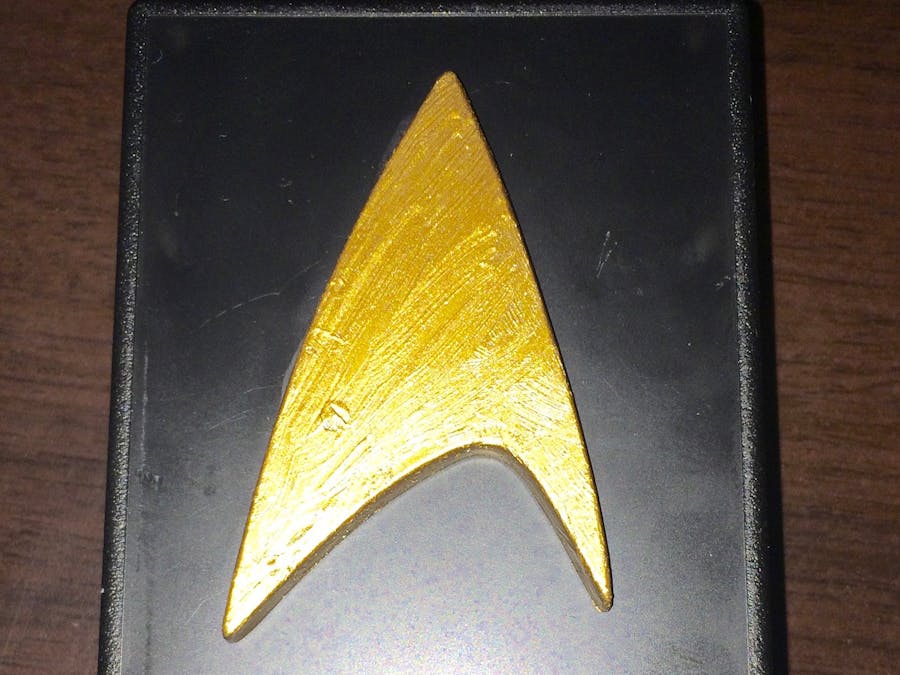
On the top, I added a Star Trek rank insignia. I found it in a box of action figures and painted it a darker gold to be more realistic.
I was lucky enough to find a USB mic shaped like ST:TOS communicator. It was a little expensive, but it gives the whole project a cool vibe. It even has ST sounds built in! You can use any sound input device.
I added some sounds from Star Trek to the AlexaPi starting sequence. I found ST sounds on this website, Trekcore.com. To play these sounds, make sure you put them in the AlexaPi folder on the Raspberry Pi. Using your favorite editor, edit the main.py file and search for the line that starts "os.system('mpg123 -q" and replace the whole line of code with "os.system('mpg123 -q {}tos-computer-01.mp3 {}tos-computer-working.mp3 {}tos-computer-04.mp3 {}tos-computer-02.mp3'.format(path, path, path, path))" This line will play these sounds when AlexPi starts, instead of its normal "hello". Note: if you use different sounds you will have to edit the added line to reflect the file names of the sounds you are using.
DemoCodeI was little disappointed that AlexaPi didn't automatically start on the Raspberry Pi's boot since I intended to have this in my living room so that I could utilize it easily. So, I put a shell script the user "pi" directory. I called it alexapilauncher.sh. Here's what I wrote:
#!/bin/sh
# alexapilauncher.sh
# navigate to Alexapi directory, then execute main AlexaPi script, the change to
home directory
cd Downloads/
cd AlexaPi/
sudo python ./main.py
cd/
So that it starts when the Raspberry Pi boots, I created a crontab by entering crontab-e in the terminal and added "@reboot bash alexapilauncher.sh ".
ConslusionsThat's it. This was a fun first Raspberry Pi project to me. Thanks to Novaspirt for posting such a great tutorial.
Incidentally, I have now purchased the bluetooth Start Trek Communicator made by The Wand Company. It would be cool to use the microphone input button to trigger AlexaPi, in addition to the mechanical button. If anyone knows how to do this-please let me know. Thanks!
Live Long and Prosper!


Comments
Please log in or sign up to comment.