


Hardware components | ||||||
| × | 1 | ||||
| × | 1 | ||||
| × | 1 | ||||
| × | 1 | ||||
| × | 1 | ||||
Hand tools and fabrication machines | ||||||
| ||||||
| ||||||
| ||||||
| ||||||
 |
| |||||
I got this idea from SparkFun and @thingsrobmade! Ever since I saw their blog post I have been excited to make one of these, and I also really wanted to make a D&D themed gift for a friend! Then when I came up with the idea to whittle the base platform, I immediately ordered parts! Thank you SparkFun for the inspiration. Also fun fact, I think this is the first project I’ve ever made that doesn’t have any code or a board!
Circuit designThere are so many rad humans out there that are creating beautiful circuit art. They inspire me so much and are the reason I wanted to make this circuit something nice to look at!
I sketched out a dozen different designs for this circuit! Some had straight lines and angles, and some had wavy lines and swoops. I tend to like straight lines, and I found the angles on this one really interesting.
This was my first time ever whittling. I bought a beginner’s whittling knife from Amazon and watched exactly one YouTube video before I started. It was so much fun and very relaxing. I decided to try it for this project for several reasons. Mostly, I’ve always wanted to whittle something! I love working with small details. I’m also not all that gifted with power tools… and I had a feeling whittling would feel more intuitive to me. (It did!) I also don’t know how to design models for 3D printing, and learning how to do that sounded more complicated than learning how to whittle. I think it’s pretty neat that I didn’t use any power tools for this project. (Our Ryobi battery-powered hot glue gun might qualify as a power tool actually…)
This gif doesn’t show it, but I also whittled out the two holes in the corners for the LEDs.
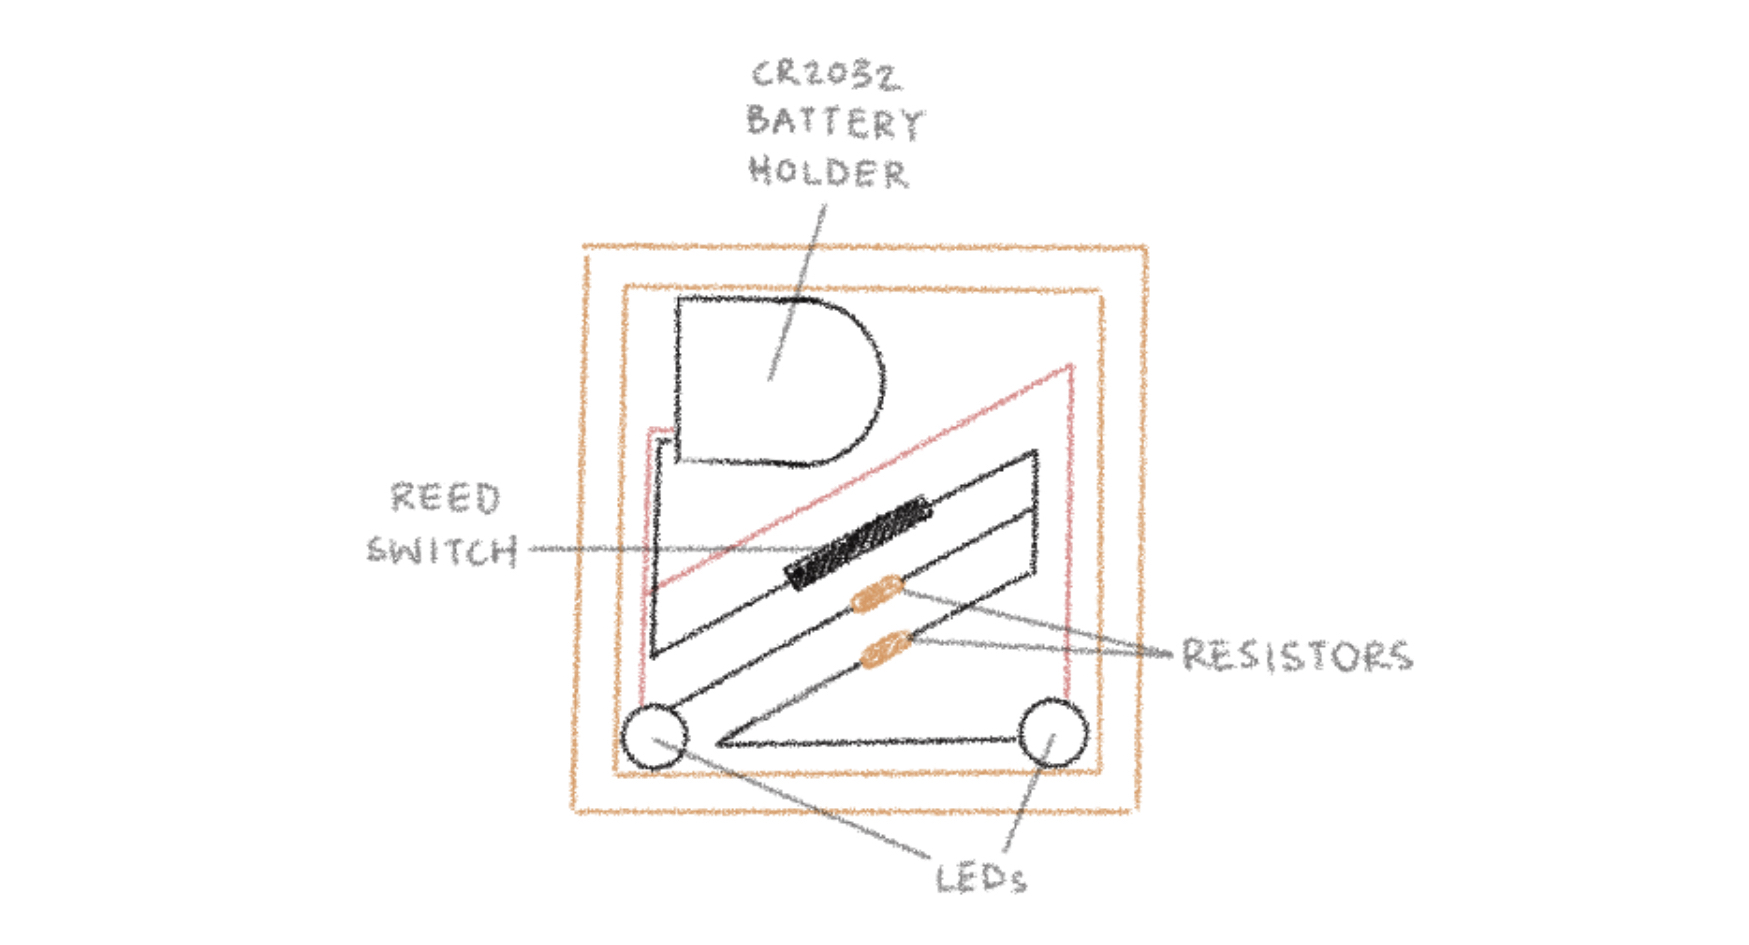
In my circuit diagram, I had planned on having the battery holder tucked into the top left corner of the wood block, but once I was placing the physical parts, I realized no one would have small enough fingers to reach the on/off switch on the side of the battery holder. So I ended up centering it, which left just enough space on each side to reach the switch and also to open and close the holder.
All of the components are hot glued directly to the wood, except for the battery holder which is mounted with 2 tiny screws. The battery holder didn’t come with mounting holes, so I drilled some WITH THIS ADORABLE SUPER TINY DRILL.
This video shows about 30 seconds of scraping off hot glue bits with an exacto knife, and another minute of soldering. This was probably one of my favorite steps in the whole project, although it’s hard to compare because this entire project was such a delight.
Funny moment at 1:07 in the video: I was trying to use a magnet to hold a wire down, but my soldering iron got stuck to the magnet and surprised me!
After soldering, I did some final cleanup to remove more bits of hot glue, and then I sanded all the nooks and crannies with the corner of a sheet of sandpaper.
More whittling! I cut out a thin slice of cedar with the whittling knife and sanded it into a coin shape. Then I glued three magnets to the bottom. I used three magnets instead of one because three seemed to engage the reed switch better.
A friend of mine painted this mini for my character in a Mad Max themed one-shot that he DMed! He’s the same friend that will be receiving this D&D Mini Platform as a gift. :)


Comments