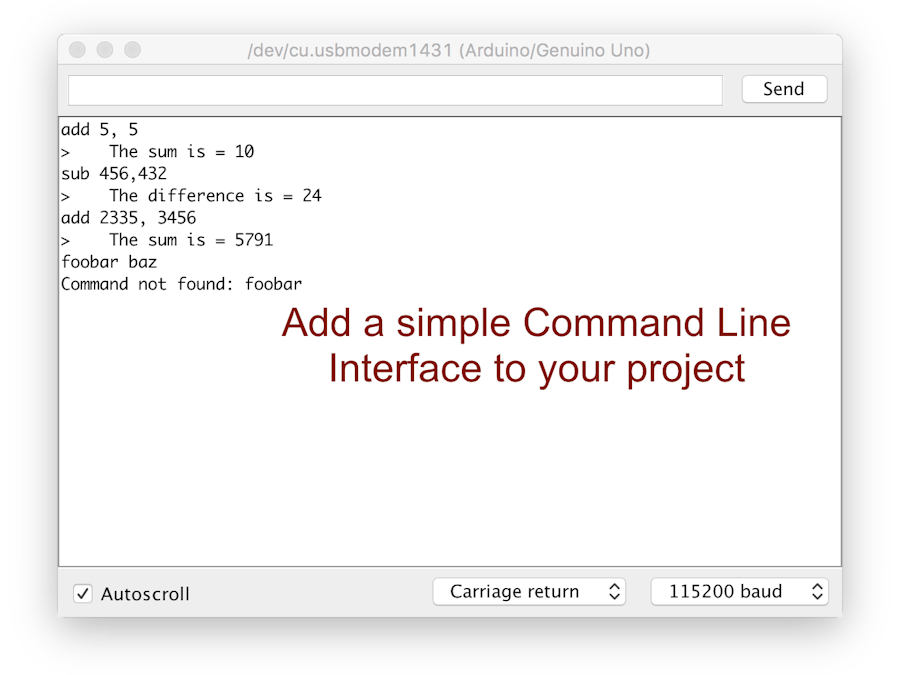
There comes a time when you need to find the value of a sensor or you want to tell your robot to do something like "move left". Maybe you need to ask your program for the runtime value of a variable, or you need to set the value of a digital potentiometer.
What you need is a command line. Yes, it's easy to get your Arduino to respond to text commands.
Here is one you can build on. It's a simple, fast, and a very memory efficient Command Line Interface (CLI) that you can cut and paste in a few minutes into your own code and be up and running. Commands consist of a name followed by multiple arguments. It even supports backspace when you are typing your commands in.
Quick OverviewEvery sketch has a loop() function. Yours could be as as simple as the one below. It calls two routines in a separate tab named CommandLine.h. I'll walk you through these two files and you'll be up and running.
What it does: Every time loop() runs it checks to see if we have a command from the serial port, calling getCommandLineFromSerialPort(). The variable CommandLine is declared in CommandLine.h but stylistically you might want to move it to the main Loop tab. When a full command has arrived to the Serial port and has been copied to the command buffer:
char commandLine[COMMAND_BUFFER_LENGTH + 1];
Then loop() calls DoMyCommand() to execute the proper command.
Now let's take a look at what's in CommandLine.h. I should point out that I put all the code into CommandLine.h, because then all you have to do is cut and paste this code into a new tab in your Arduino IDE (be sure to give the tab a name that ends with ".h"). Then include this file in your main file, i.e.
#include "CommandLine.h"
What this does is allow you to put all the command line code in one tab and yet refer to its routines elsewhere in your program without any extra code.
Looking in CommandLine.hThe file CommandLine.h is included at the end of this post. Within CommandLine.h, each line that you need to modify is marked with the comment, //Modify here. The file includes two sample commands add and sub and shows how they are called from within DoMyCommand.
For many of you, that's all you'll need. Just go through CommandLine.h. For those who would like a more detailed look, keep reading.
Within CommandLine.h we first we include <string.h>. String.h is a C standard library. If you haven't run into C libraries before do a quick Internet Search for "The C Programming Language". The C bible was written years ago by Brian Kernigan and Dennis Ritchie and has been kept up to date. Most people own a copy but you can find it online for free.
We'll only use the strtok() routine (string to token) from <string.h>. This routine reads a token, that is, a word delimited by certain characters (the second parameter of strtok). It works like this.
- When you first call it, you pass it a string
ptrand it will return the first token
- On subsequent calls, (here comes the glorious hack part) pass it NULL instead of a string
ptrand it will continue where it left off with the initial string, thus getting one token (roughly a word) at a time.
We also include <stdlib.h> from which we only use atoi() for ascii-to-integer conversion. Don't worry, the compiler will only include this one routine not the whole library but you might want to check out the other routines in these libraries as they are useful.
Next is an optional little macro I wrote called print2:
#define print2(x,y) (Serial.print(x), Serial.println(y)
I'm always wanting to print out a label and a string. You use it like this:
print2("myVar = ", myVar);
If myVar is 25 then this will print to the serial window:
myVar = 25
CommandLine.h contains getCommandLineFromSerialPort() which assembles a command line from the serial port. Each time it's called it reads from the Serial port and stores the input into the global input buffer, CommandLine[]. When it reaches a return character signifying the end of the command it returns true.
The fully assembled buffer is now passed to DoMyCommand() which figures out which function the user is requesting and calls it. With a large number of commands you can get a fairly unwieldy if-the-else statement.
If you have a truly enormous number of commands there are a lot of ways to speed things up like adopting what is called a hashing function. Alternatively you can make the commands only one character and then use that one character as the label of a switch-case statement. I find neither of these is necessary very often. A word is much easier to remember than a single character and given that this is an Arduino, how many commands can you really have before you run out of room on the chip?
Add and SubEach command function is responsible for parsing out it's own arguments. This is a simple way to do it and is easy enough to modify. An alternative to this is to read all the arguments immediately in DoMyCommand. You could put individual arguments into a global array of strings argv[].
For the purposes of this example I have defined two commands: add and sub. Both of these use numeric arguments but I've included readWord (which could be called readStringToken) to return a word. You could also modify this readStringToken to allow strings such as "this is a string". Consider it an exercise left to the reader.
If you have a main loop file as shown above, then create a new tab using the downward pointing triangle way over on the right of your Arduino IDE window, and copy CommandLine.h (below) file into it, you should be able to type add and sub commands.
Now it's up to you!


_ztBMuBhMHo.jpg?auto=compress%2Cformat&w=48&h=48&fit=fill&bg=ffffff)


Comments
Please log in or sign up to comment.