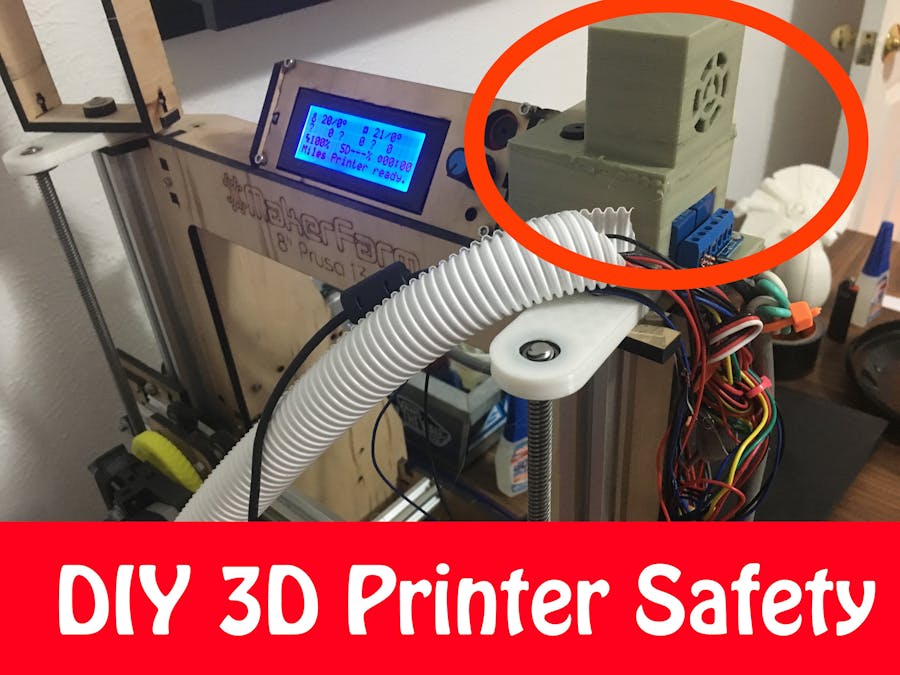
About a month ago, my 3D printer was in the middle of a print when a short circuit occurred. Two tripped wire portions touched and began to carry a dangerous amount of current between them. This got out of hand quickly and began to burn off the wires PVC shielding. Had I not been around or noticed the smoke, the printer would have caught fire. Luckily though, I was able to turn off the printer before any major damage was done.
This served as a wake up call to me, I now realize how dangerous running a 3D printer unattended is. The goal of this project is to detect, alert, and reduce the damage of any electrical fires. As well as to bring peace of mind to cautious 3D printer owners.
The Functionality3D Printer Safety is able to detect any possible hazards through the Sharp GP2Y1010AU0F Dust Sensor which can track particulate matter in the air and relay it to an Arduino. The Arduino Nano serves as the brain of the operation, it interprets the sensor data and initiates a response. If abnormal particle levels in the air are detected, the gadget turns off power to the 3D printer and sounds an alarm. The 3D printer power is controlled with a relay and the alarm is sent through a 5V buzzer.
VideoConstructionGather the materials listed in the 'Things' at the top of this guide. Please note that I will be using a different buzzer than listed because it is what I had on hand. I also suggest you purchase a pre-traced perfboard such as the one I linked to in the above list.
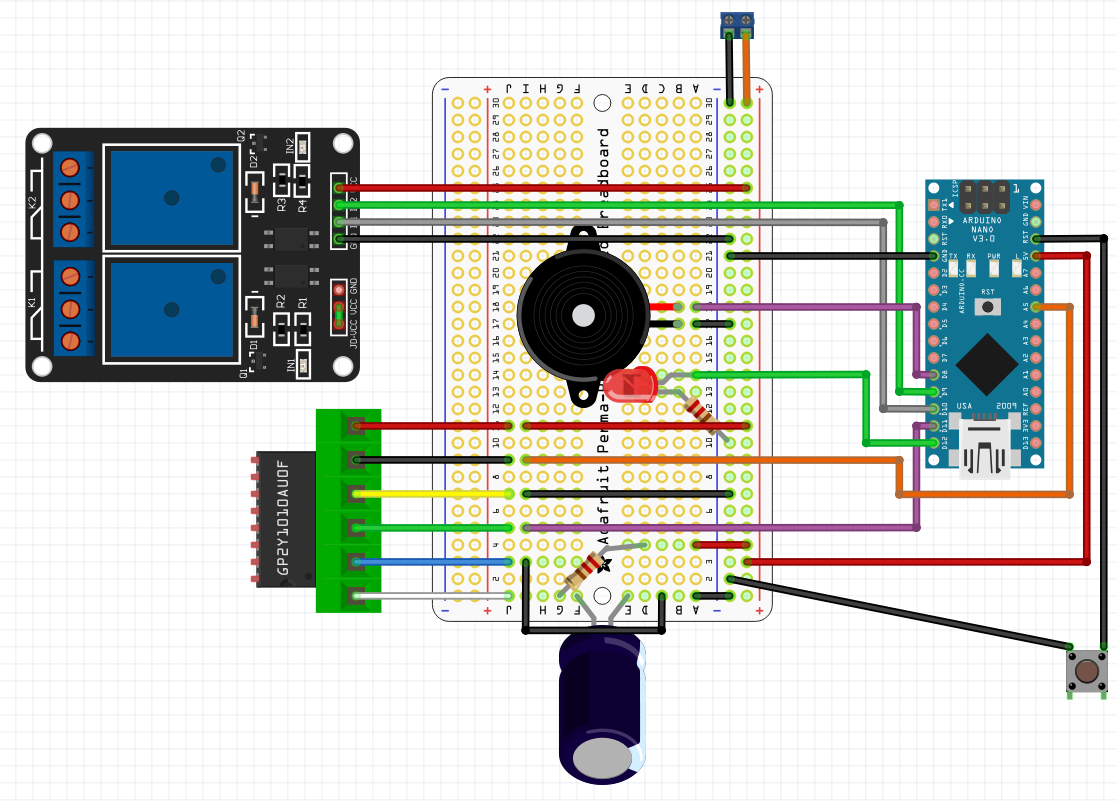
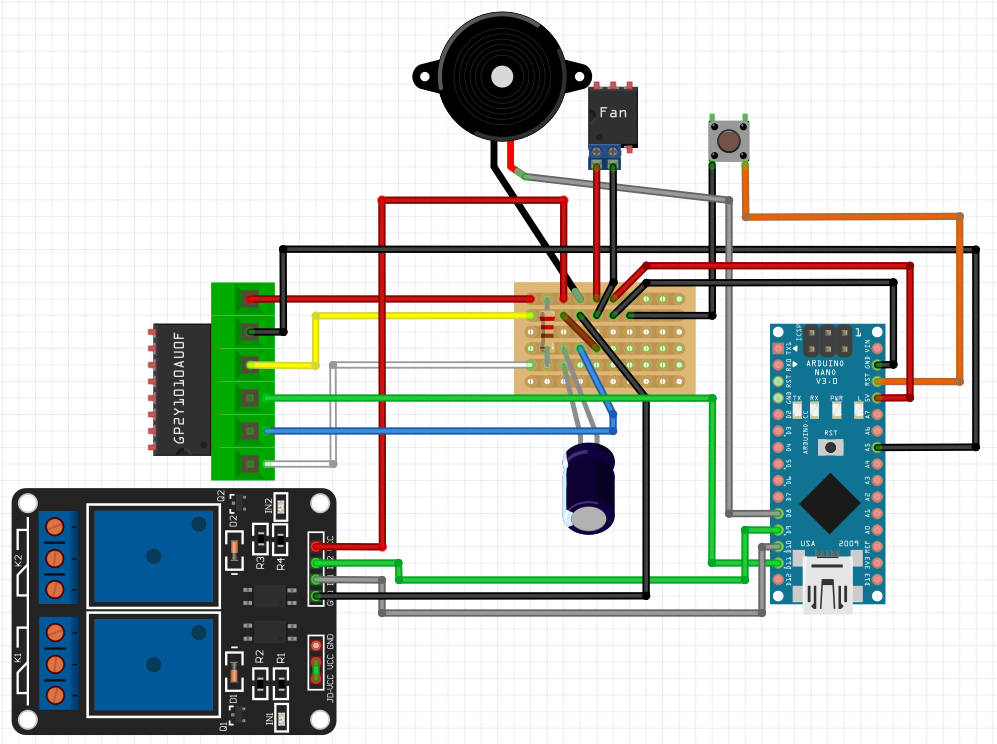
Two circuit diagrams are linked attached at the bottom of this page, one is called 'Striped Diagram' and shows how components should be connected in order to minimize space. This is important if you play on using the 3D Printed enclosure. The other diagram, called 'Expanded Diagram', is used to demonstrate the circuit in the least clustered manner. It can be used if space is not an issue, or for breadboard prototyping.
Hook up the components according to the circuit diagram above. Most of the perf board will be left unused and cut of later. The dust sensor is labeled GP2Y1010AUOF and the fan is labeled fan. The dust sensor linked to in the 'Things' list comes with a capacitor and resistor that should also be placed according to the diagram.
When hooking everything together be sure to use enough wire to allow the electronics to fit into the enclosure. Make sure that the capacitor is facing the right way( marked by the lighter stripe). Finally, make sure that the stripes on the perf board are running as they are in the picture.
Now is also the time to upload the code to the Arduino Nano. Connect the board to a PC and upload the github code linked to at the bottom of this page onto it. This can be accomplished by pasting the code into the Arduino IDE and then uploading it through the correct COM port.
EnclosureThe 3D-printed enclosure for this gadget is linked to at the bottom of this guide. The file works printed under normal print settings with optional supports and is printed in two peices.
To slim down the bulky perf board that the components are soldered to it must be cut. Cutting perfboard is a little tricky but can be accomplished by following the technique shown in this video.
Slim down the perfboard by cutting close to where all the components are soldered. There is no need to cut right next to them, so a buffer of one row/column will work.
Place the relay and Arduino into the enclosure as shown below. The components can be held in place by 3D pen or hot glue.
Place the 20 mm fan into its appropriate slot in the upper pillar of the cover. Next, slide the particle sensor into the pillar. This will be a tight fit but require no glue to stay in place. The button and alarm can be hot glued or 3D penned into place in their respective holes.
The cover will fit onto the base either direction and seal all wires and perfboard inside.
The 3D printer power wire must also be spliced into the Printer Safety Device.
First, cut and remove a portion of the outer sheathing, being careful not to damage the internal wires. Secondly, the hot or line wire (usually black) should be cut and the ends striped 1/2 of an inch back. These exposed wires should then be connected to either K1 or K2 on the relay. One wire should connect to the center terminal and the other should be connected to the normally open terminal marked by a '|__ 'instead of a '\__|'. This will ensure that if the Printer Safety Device is damaged during a fire, the printer power will not be turned back on.
The device should be mounted so that rising smoke gets near the fan opening. Do not place the device under 3D Printer electronics.
The relay has another opening which allows for another device or power strip to be turned off if smoke is detected.
Final ThoughtsIt was a blast to build this project and to help others recover their piece of mind when it comes to running printers unattended. I hope that this device helps to prevent the excessive damage caused by electronic failures that have been coming up all over the web recently.
This device will emit a loud alarm and cut power to the 3D Printer when smoke is detected. The alarm will sound for a period of time specified in the Arduino code. The button resets the Arduino but will sound the alarm again if a hazard is still present.
There is an extra relay built into this design, which could be used to turn off nearby electronics in the case of a fire by following the steps outlined earlier.
Warning: Do not use a soldering iron near your printer if it is running with the 3D Printer Safety device, it may cause the device to cut the printers power and possibly fail the print.
Warning: By no means is this device guaranteed to stop a 3D printer fire or catastrophe. Running any hobby grade electronic device such as a 3D printer means taking on the risks associated with it. This device serves only to reduce the risk and damage of a catastrophic event.
If you have any questions, comments, or concerns please comment below or send me a personal message. If you found this tutorial interesting and would like to see more of what I am creating, please respect this post and consider following me.


Comments