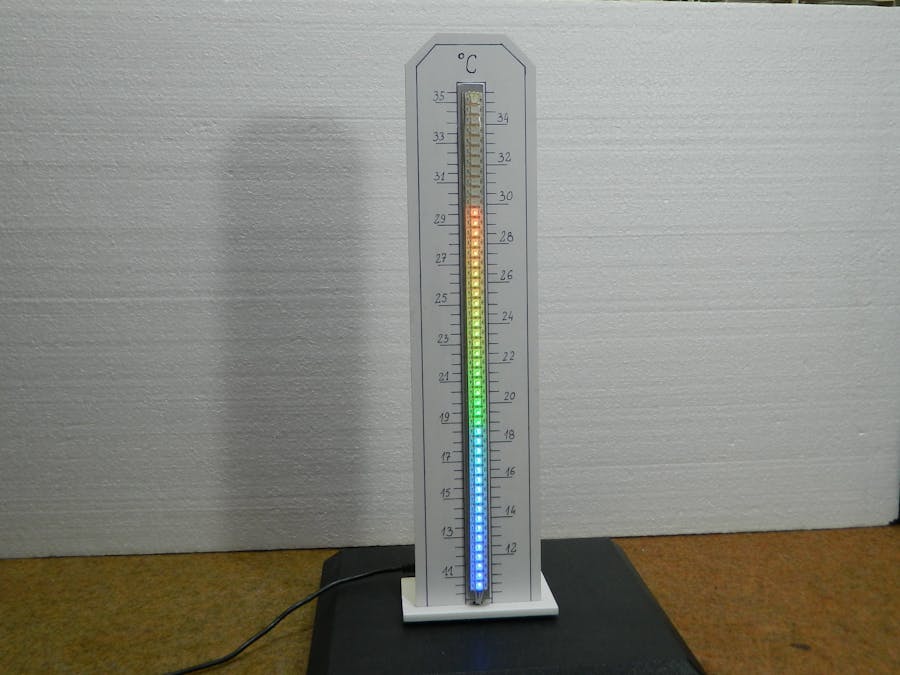
This time I will show you how to make a thermometer intended for measuring the temperature in the room where we are staying, also known as room comfort thermometer.
According to the purpose, its measuring range is from 10 degrees to 35 degrees Celsius. The thermometer has a resolution of 0.5 degrees. The temperature is displayed on WS2812 LED bar containing 50 diodes. Characteristic of this thermometer is that in addition to the scale, we can see the temperature through the color of the LED.
By changing the temperature, the color of the diode gradually changes from dark blue at lower temperatures, so next light blue, through green shades at comfortable temperatures, to red levels at higher temperatures. So with just a glance at the thermometer we can conclude whether the temperature is in the comfort zone.
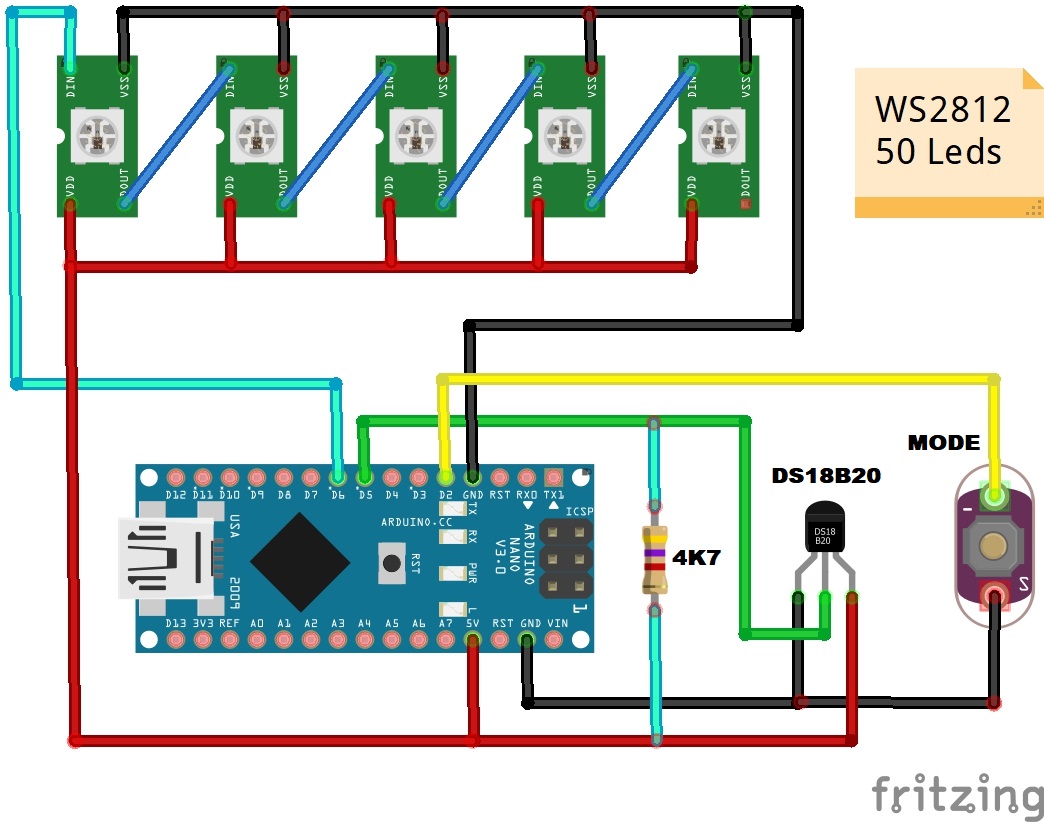
The device is very simple to build and contains only a few components:
- Arduino nano microcontroller
- WS2812 LED strip with 50 LEDs
- DS18B20 temperature sensor
- and momentary switch for changing the modes of working
When switched on, the thermometer operates in "DOT" mode and the current temperature is displayed by the illumination of one diode.
------------------------------------------------------
Get 10 PCBs only $5 https://www.pcbway.com/
------------------------------------------------------
By pressing the button, the mode of operation switches to linear. In this mode, all diodes light up from the initial to the specific temperature. The next time you press the button, the device switches to TEST mode, and now all the diodes are switched on successively one by one to the maximum and then returned. To return to DOT mode, we need press the key again.


Comments
Please log in or sign up to comment.