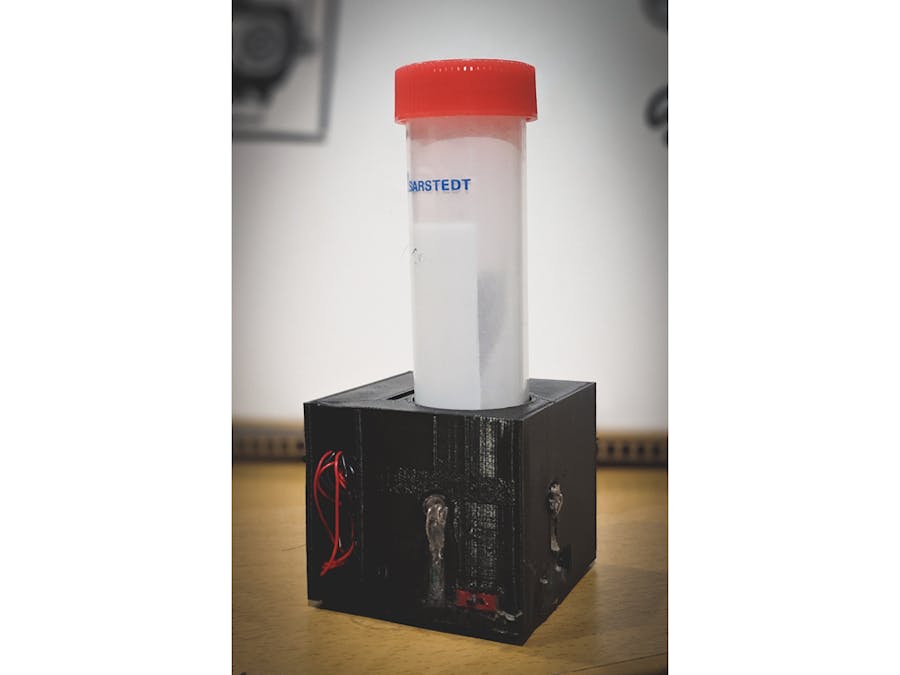
Bacteria play an important role in our lives. They could be beneficial and give us medicines, beer, food ingredients etc. Continuously monitoring the growth phase and the concentration of bacterial cells is a crucial process. This is an important routine in both industrial and academic labs. Optical density(OD) is one of the most widely used forms of representing bacterial concentration and track their growth.
Currently, continuous monitoring of bacteria growth remains unaddressed. Using the existing methods, a scientist would have to periodically check the OD of the bacterial solutions quite often. Despite being labour intensive and time-consuming, it also poses the risk of contamination and waste of plastic consumables.
To solve this, we have now made a novel continuous OD meter by hacking a low-cost generic fitness tracker, the details of the construction are outlined below
The results are published in theresearch journal and can be found with the link below:
https://pubs.acs.org/doi/abs/10.1021/acs.analchem.9b02628
A. Fitness tracker’s top view showing removable screws.
B. The device is opened with a 0.2mL hex head screwdriver to access the electronics embedded inside
C. When opened, fitness tracker looks as below.
D. The printed circuit board is then dislodged from the plastic enclosure to provide access to the contact points. Contact points for TX, RX, SWCLK, CND, VCD and SWDIO can be seen on the PCB.
E. The contact points are soldered to enable flashing of ODX firmware. The vibration motor has been removed and its corresponding contact points (circled) have been used to power the external LED.
F. All the wires are bundled to the side to reseal the fitness tracker.
G. The modified fitness tracker is resealed after the corresponding wires were labelled.
H. LED and its associated power control circuit is soldered and connected to vibration motor pins.
I. The LED and completed circuit are assembled into 3D printed enclosure.
J. All the circuitry and LED is secured using hot glue.
K. Fitness tracker can be charged by using USB powered devices. The battery in the ODX lasts around 14 hours in our experiments.
L. After charging the fitness tracker is inserted into the 3D printed enclosure.
M. The fitness tracker could be ejected easily for charging whenever required. Since the circuitry is secured with hot glue, the wires are stable.
N. The ODX is then connected the black magic probe to flash the firmware
Firmware Instructions for ODX
Note that these instructions are taken from the GitHub repository (https://github.com/sandeepmistry/arduino-nRF5) of sandeepmistry who originally provided the Arduino core for the nRF devices as stated in the ODX manuscript. Here, we provide the instructions of the firmware specifically adopted for the ODX device that contains nrf51 device using Windows PC.
4.1. Board Manager
a) Download and install the Arduino IDE (At least v1.6.12)
b) Start the Arduino IDE
c) Go into Preferences
d) Add https://sandeepmistry.github.io/arduino-nRF5/package_nRF5_boards_index.json as an "Additional Board Manager URL"
e) Add https://micooke.github.io/package_nRF5_smartwatches_index.jsonas an "Additional Board Manager URL"
f) Open the Boards Manager from the Tools -> Board menu and install "Nordic Semiconductor nRF5 Boards"
g) Select ID107 HR from the Tools -> Board menu
4.2. Flashing a Soft Device
a) cd <SKETCHBOOK>, where <SKETCHBOOK> is your Arduino Sketch folder (Windows: ~/Documents/Arduino)
b) Create the following directories: tools/nRF5FlashSoftDevice/tool/
c) DownloadbnRF5FlashSoftDevice.jar to <SKETCHBOOK>/tools/nRF5FlashSoftDevice/tool/
d) Restart the Arduino IDE
e) Select your ID107HR from the Tools -> Board menu
f) Select a SoftDevice S130 from the Tools -> "SoftDevice: " menu
g) Select a Programmer (BMP) from the Tools -> "Programmer: " menu
h) Select Tools -> nRF5 Flash SoftDevice
i) Read license agreement
j) Click "Accept" to accept license and continue, or "Decline" to decline and abort
k) If accepted, SoftDevice binary will be flashed to the board
4.3. Flashing a ODX Firmware
a) Download all the files from the from the firmware folder in the github link https://github.com/momos123/ODX/tree/master/firmware
b) Open the ODX.ino with Arduino IDE
c) Select your ID107HR from the Tools -> Board menu
d) Select a SoftDevice S130 from the Tools -> "SoftDevice: " menu
e) Select a Programmer (BMP) from the Tools -> "Programmer: " menu
f) Select the BMP port as the Port on Arduino IDE
g) Upload the ODX.ino


Comments
Please log in or sign up to comment.