


Hardware components | ||||||
 |
| × | 1 | |||
| × | 1 | ||||
| × | 1 | ||||
| × | 1 | ||||
 |
| × | 1 | |||
| × | 1 | ||||
| × | 1 | ||||
Software apps and online services | ||||||
| ||||||
Hand tools and fabrication machines | ||||||
 |
| |||||
This project will explain how to get obstacle avoidance working on the open-source modular 3d printed robot, Lily∞Bot, using the Circuit Playground Express, Crickit, 3.3V sonar and 2 DC motors. It will describe, building the robot, wiring the hardware and electronics and programmming the robot. Since this is graphical programming, the project is appropriate for elementary age kiddos, 1st - 4th grade. This same robot can grow with the user by changing the controller and programming language to Circuit Playground Express, Arduino Uno, Raspberry Pi Pico W, and more to come! Learn more about Lily∞Bot at NoireSTEMinist.com/robots and on Youtube at https://youtube.com/carlottaberry
robot robotics Adafruit sonar obstacle avoidance crickit circuit playground express MakeCode
The parts list for the Lily∞Bot With Circuit Playground Express and Crickit can be found on GITHUB and on Amazon at the following links:
https://www.amazon.com/hz/wishlist/ls/16Q4OHY4E8AF3?ref_=wl_share
Primary components are the 3d printed parts available on GITHUB
Step 1. Build the Base RobotBuild the base Lily∞Bot, open source educational robots platform with the necessary changes for the new caster wheel mount including 4 M3 5 mm self tapping pan head screws, 4 M3 washers, and 4 M3 nuts. See the following links and images for guidance.
https://www.hackster.io/berry123/lily-bot-version-2-open-source-robot-for-academics-ac6be4
Step 2. Update to attach Caster WheelsThere is a new way to attach the caster wheel to raise it a little above the point of contact for the TT wheels. Please use the following images to attach the caster wheels with 4 M3 7 mm panhead or flathead screws, 4 M3 lock washers and 4 M3 washers.
The Circuit Playground Express and Crickit can run with 4 to 5V so use either a 3AA battery pack. It can also run from the micro USB on your computer. To learn more about powering these devices visit the following links:
- https://learn.adafruit.com/adafruit-crickit-creative-robotic-interactive-construction-kit/powering-crickit
- https://www.adafruit.com/product/3333
Use the following instructions for adding the battery mount and battery pack.
Use the following images to attach the Adafruit Crickit and Circuit Playground Express to the Lily∞Bot.
attach circuit playground express to crickit with six M3 5 mm panhead screws
Step 5. Attach 3.3V Sonar with Mounting ModuleInsert the 3.3V sonar into the sonar mount with the prongs sticking up and the arrow head ticking down as shown in the following image.
Insert sonar mount into front of upper chassis so that it locks in by turning counter clockwise. The front of the robot is closest to the words Lily∞Bot.
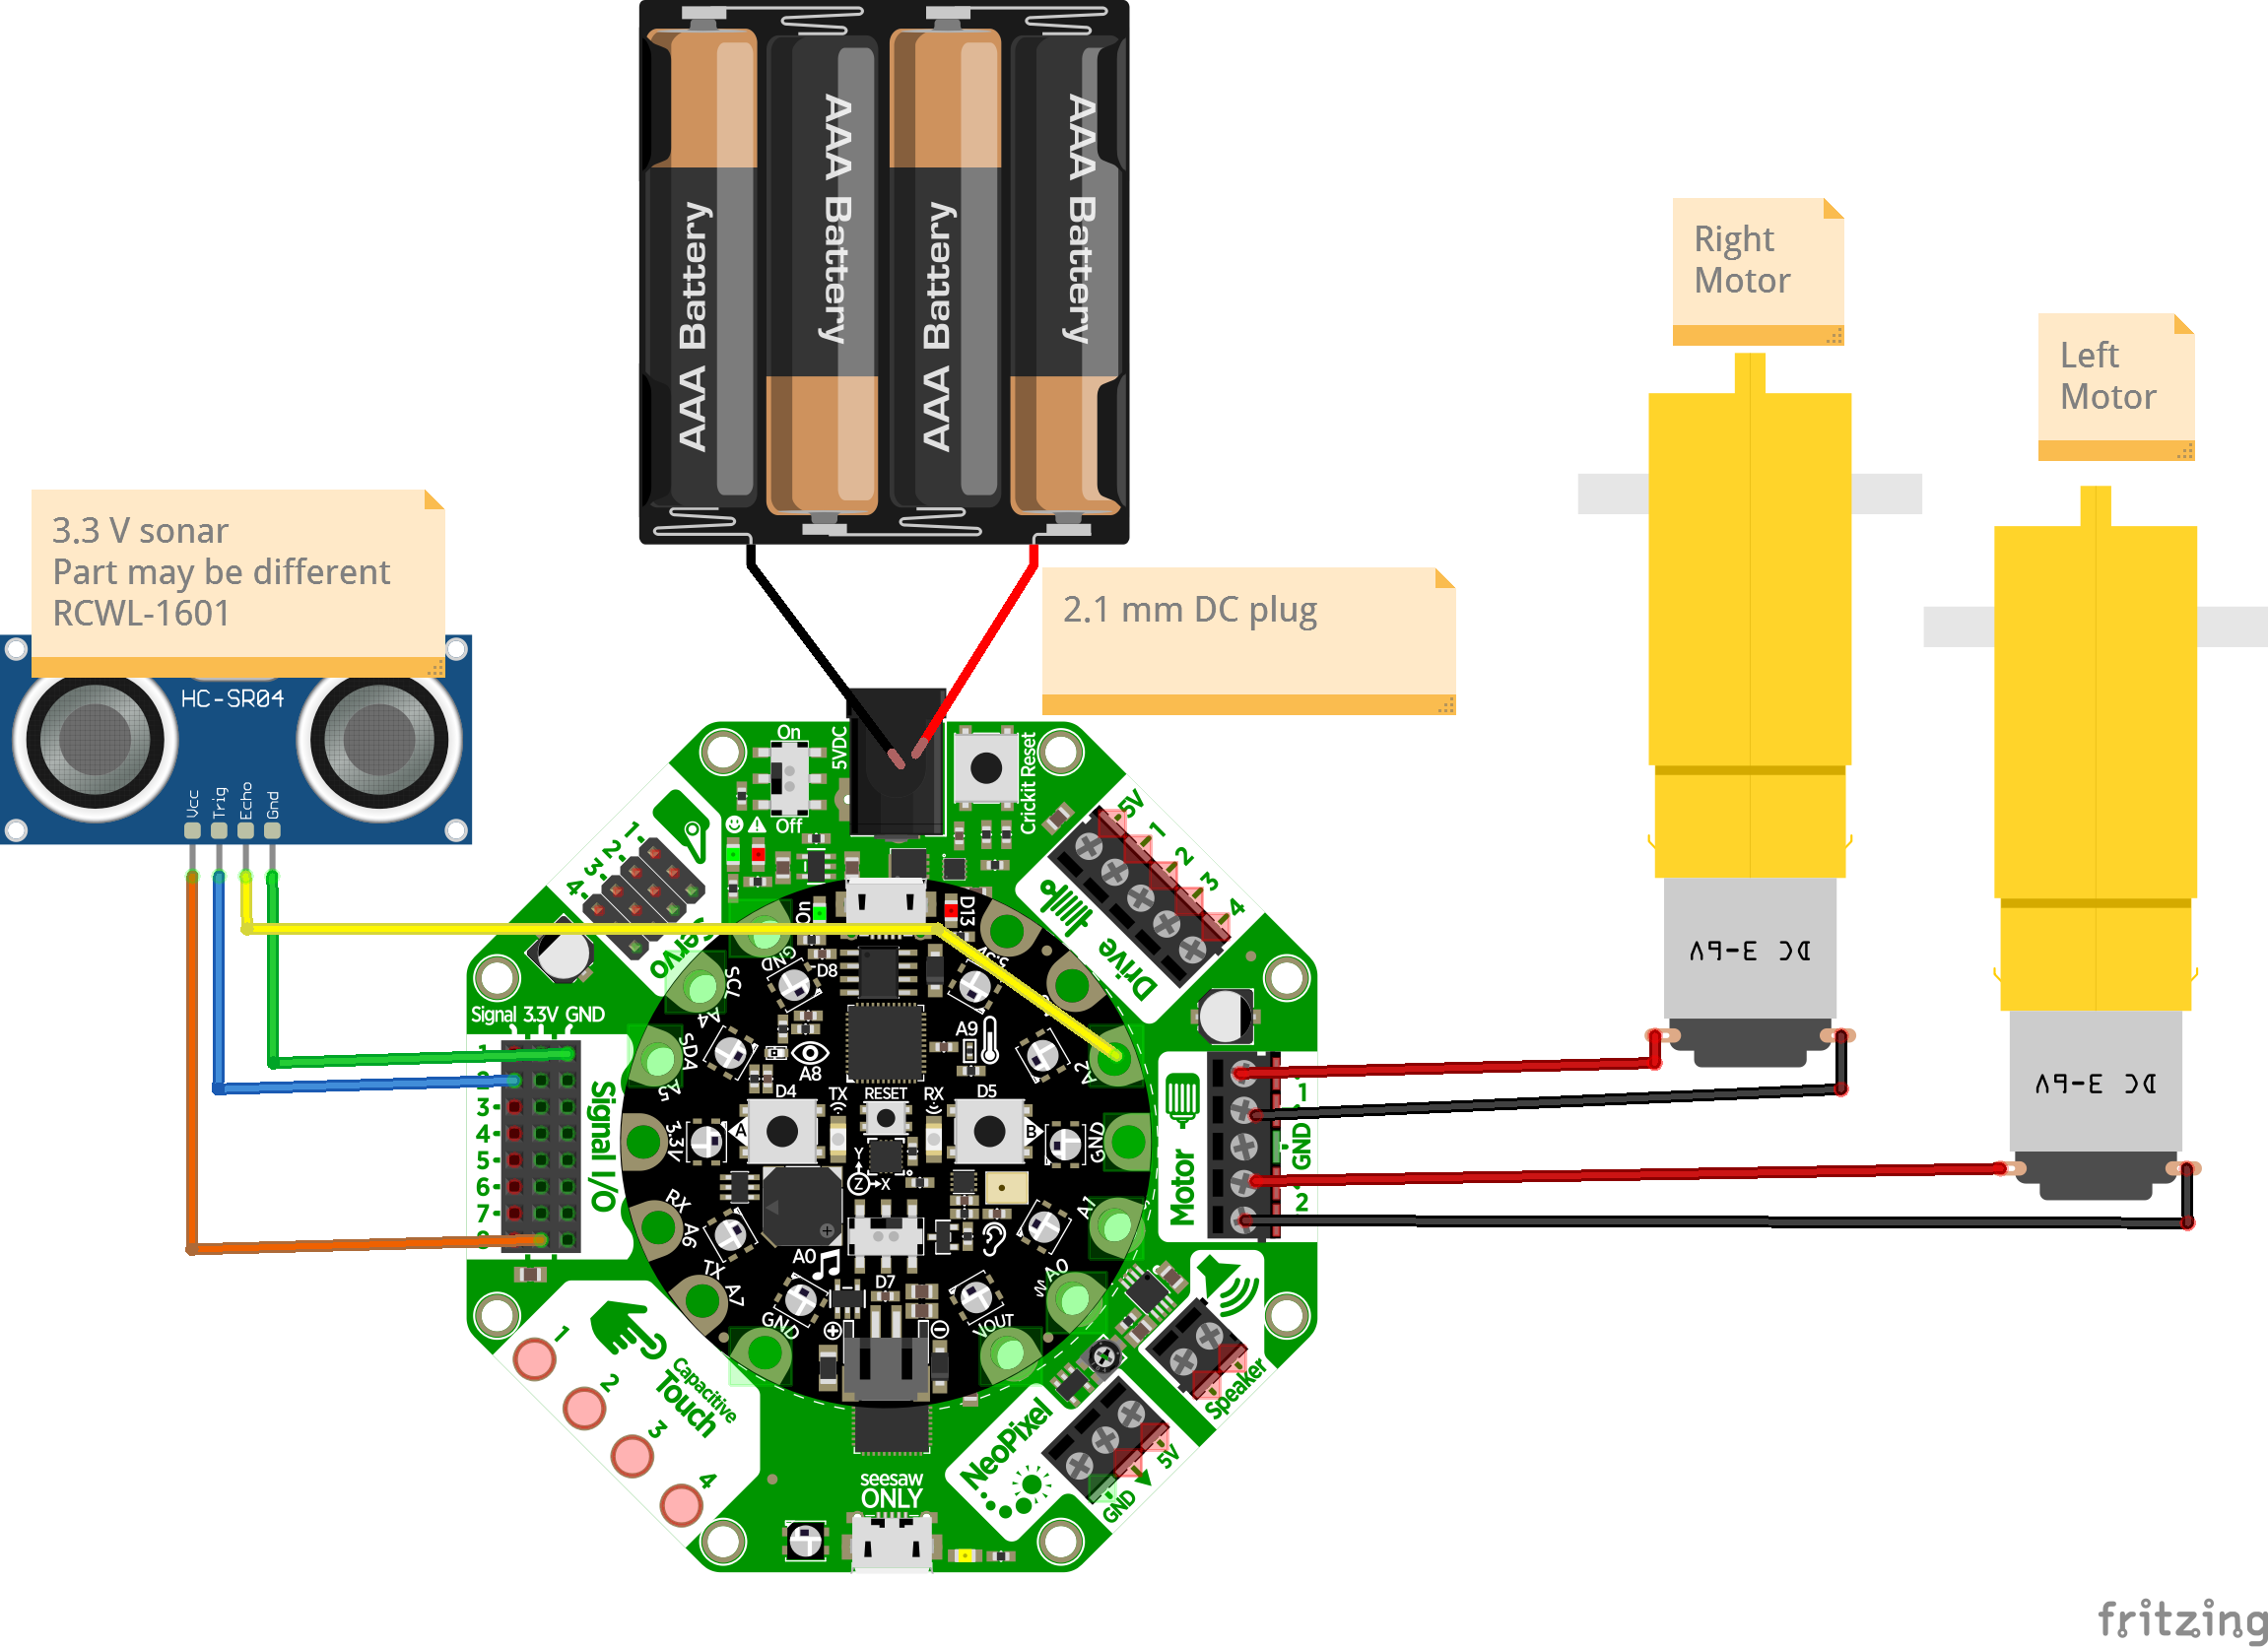
Wiring for the sonar to the Crickit and Circuit Playground Express and Motor to Crickit (see Fritizing schematic for more details)
- Sonar VCC to Crickit 3.3V Header (use male-female wire)
- Sonar GND to Crickt GND Header (use male-female wire)
- Sonar Trig to Crickit Pin 2 Header (use male-female wire)
- Sonar Echo to Circuit Playground Express Pin A3 (Use alligator-male wire)
- Connect right motor red wire to Motor 1, black wire to Motor GND
- Connect left motor red wire to Motor 2, black wire to Motor GND
Video of Lily Bot doing obstaclce avoidance. here:
NoireSTEMinist LilyBot CircuitPlaygroundExpressAdafruitCrickitRobotMobileRobotRobotFlowerBot


_3u05Tpwasz.png?auto=compress%2Cformat&w=40&h=40&fit=fillmax&bg=fff&dpr=2)
Comments