


Hardware components | ||||||
 |
| × | 1 | |||
| × | 1 | ||||
 |
| × | 1 | |||
 |
| × | 2 | |||
 |
| × | 1 | |||
 |
| × | 1 | |||
Software apps and online services | ||||||
 |
| |||||
 |
| |||||
Is it not aggravating for you to look for your device’s remote control, when your favourite show is on air? Is it delightful for you to interrupt or delay your favourite video game and spend a significant amount of time trying to find the controls on your device’s remote? Would it not be captivating for you to control your LED at home or any electronic display device at workplace on the command of your hand gestures and voice control? We know right! That is something we have all wanted to happen at some point in our lives. We bring to you the freedom to control your display devices by mere voice commands and even simpler, hand gestures.
Step One: Planning and Setting the ObjectivesThe first step in making any project valuable is to plan the project ahead and set clear and precise objectives, which saves time and proves productive. In this regard, the path was set using a conceptual diagram. A conceptual diagram serves like a mind-map and eases to convey the objectives to others. Following is the conceptual diagram:
After identifying the objectives, next step is to formulate and test the Use Cases. Furthermore, the design of the project is to be finalized. Following are one of the few Use Cases:
- Innovative Approach: An innovative approach is to be aimed at to revolutionize the concept of control for display devices.
- Resource Management: The resources are used efficiently so that the project can be replicated at the ease of availability and affordable cost, while making the best out of used resources.
- Data Management: The data is managed and transferred securely, to ensure reliability.
- Process Optimization and Efficiency: The data is gathered efficiently by controlling access to the physical range of the detecting device to make better use of physical space.
"Design is thinking made visual." -Saul Bass
The design of the device is simple yet efficient enough to allow continuous operation and make the experience worthwhile for user.
Step Three: Overview of ProcessThe process of making the device to control the display devices is simple yet technical. The process of making the project includes four main aspects:
1. Choosing and Connecting the hardware
2. Programming the hardware
3. Integration of hardware with Online Services and Hand Tools
4. Approach towards making
Choosing and Connecting the hardware: The choice of right hardware is the first step towards making any great project. The hardware should be user-friendly and efficient. The list of hardware is mentioned in the section above. However, IR Receiver was initially used for analysis purposes. It is considered optional.
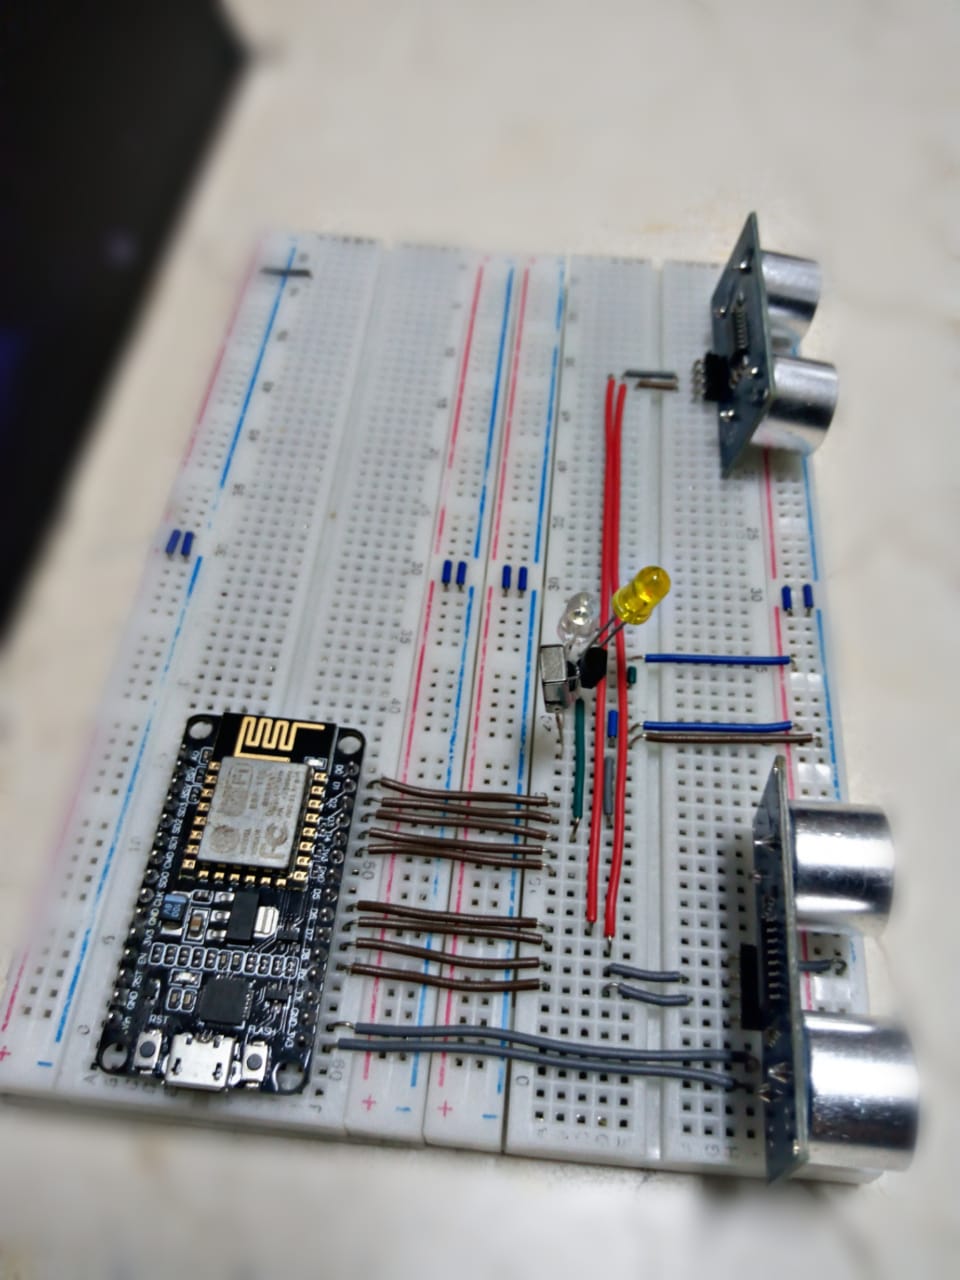
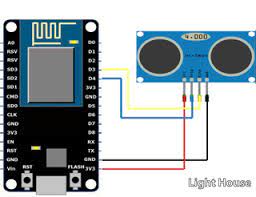
The hardware is connected as follows:
Programming the hardware: The hardware is programmed using ArduinoIDE, which is an open-source, cross-platform and easy-to-use platform to program the board or microcontroller.
Integration of hardware with Online Services: The Online Services such as Google Home and Google Assistant are used to implement the voice control feature. Furthermore, IFTTT(If This Then That) is implemented to connect the devices and services in order to achieve automation. The platform allows a trigger to set a specific data value. Moreover, Grandeur provides effective interaction with the data.
Approach towards making: The approach varies for gesture and voice control, except for the common use of ESP8266 and software. The gesture control uses Ultrasonic sensor and IR Transmitter LED, whereas voice control uses a series of operations, which are explained in detail in coming steps.
Step Four: ImplementationThe implementation is based on the four main aspects as discussed in previous step. The roadmap of implementation is visualized as follows:
Voice Control: The voice control makes use of the following:
- Google Assistant
- Google Home
- IFTTT
- Grandeur
- ESP8266
- IR Transmitter LED
The voice command being received by Google Assistant uses Google Home; which is connected using the same account with IFTTT, which in turn sends the data to Grandeur. Grandeur interacts with the data and through its services of interaction with data, provides guaranteed delivery of data to receivers; which in this case is ESP8266, which in turn transmits data to IR Transmitter LED. The software code is uploaded to the ESP8266 microcontroller. The IR Transmitter LED communicates with the display device as commanded.
Following is the tutorial to set up and integrate IFTTT and Grandeur to manipulate the commands from Google Assistant.
Gesture Control: The gesture control is made possible by the following:
- Ultrasonic Sensor
- IR Transmitter LED
- ESP8266
The motion is detected by the ultrasonic sensors, which measure the distance or displacement using ultrasonic waves by calculating the time difference between emission and reception, with significant efficiency.
Initially, the object; which in this case is hand, is detected. After 10 milliseconds, the position of the hand movement is calculated. If the movement is upwards, the velocity is positive; otherwise negative. The limit of 0.001 meter per second is set for the changing of channel and changing the levels of volume. One ultrasonic sensor is used for changing the channel, while the other is used for volume control. Then, the data is passed to the IR Transmitter LED to execute the command, via ESP8266.
For changing the channel, if the hand is moved up, the device changes to previous channel and if the hand is moved downward, the the device changes to next channel. Similarly, analogous to this, the volume increases on upward hand movement and otherwise for downward hand movement.
Step Five: Calculations Involved and their ImplementationThe calculations are only involved for the gesture control in which displacement and velocity are measured to detect the gesture direction, to distinguish among the commands.
VerticalVelocity: The vertical velocity is calculated separately in a unique function.
double verticalVelocity(int sensorNo)
{
  currentDist[sensorNo] = verticalDistance(sensorNo);
  currentTime[sensorNo] = millis();

  if(currentDist[sensorNo] > 3 && currentDist[sensorNo] < 50 && currentDist[sensorNo] != previousDist[sensorNo])
  {
    interval[sensorNo] = previousTime[sensorNo] - currentTime[sensorNo];
    if(interval[sensorNo] < 1000)
    {
      velocity[sensorNo] = ( double(previousDist[sensorNo] - currentDist[sensorNo]) / interval[sensorNo] ) / 10;
      previousDist[sensorNo] = currentDist[sensorNo];
      previousTime[sensorNo] = currentTime[sensorNo];
      return velocity[sensorNo];
    }
    else
    {
      previousDist[sensorNo] = currentDist[sensorNo];
      previousTime[sensorNo] = currentTime[sensorNo];
      return 0;
    }
  }
  return 0;
}
HorizontalVelocity: Similarly, the horizontal velocity is also handled as follows:
double horizontalVelocity()
{
  int distA = distanceSensorA.measureDistanceCm();
  int distB = distanceSensorB.measureDistanceCm();

  if(timeNA == false && timeNB == false)
  {
    if(distA < 50 && distA > 0)
    {
      timeA = millis();
      timeNA = true;
    }
    else if (distB < 50 && distB > 0)
    {
      timeB = millis();
      timeNB = true;
    }
  }
  else if(timeNA == true && timeNB == false)
  {
    if (distB < 50 && distB > 0)
    {
      timeB = millis();
      timeNB = true;
    }
  }

  else if(timeNA == false && timeNB == true)
  {
    if (distA < 50 && distA > 0)
    {
      timeA = millis();
      timeNA = true;
    }
  }
  else
  {
    timeNA = false;
    timeNB = false;
    double inter = double(timeB - timeA) / 1000;
    if(abs(inter) > 0.075 && abs(inter) <= 0.450)
      return (0.107 / inter);
  }
  return 0;
}The most important step before deployment of any project is to test it on various conditions and record the observations. The Smart Control for Display Devices was also tested rigorously.
Voice Control Testing
Gesture Control Testing
Grandeur Canvas
In a nutshell, the article provides a deep understanding about the Smart Control for Display Devices. Moreover, it also delineates the complete procedure of how you can make it, even with a little previous knowledge about electronics.
The general opinion about technology is that it has made life easier and human relationships difficult. However, we believe that technology, if used smartly; can restore the essence in human relationships. The project can be used on various platforms ranging from educational to entertainment purposes. Furthermore, the future for this device seems exquisite, if used on a large scale for the greater good


Comments
Please log in or sign up to comment.