Hardware components | ||||||
| × | 1 | ||||
| × | 1 | ||||
| × | 1 | ||||
| × | 1 | ||||
In this tutorial, we are going to learn to interface Arduino UNO with OLED 128x64 I2C monochrome display and display images.
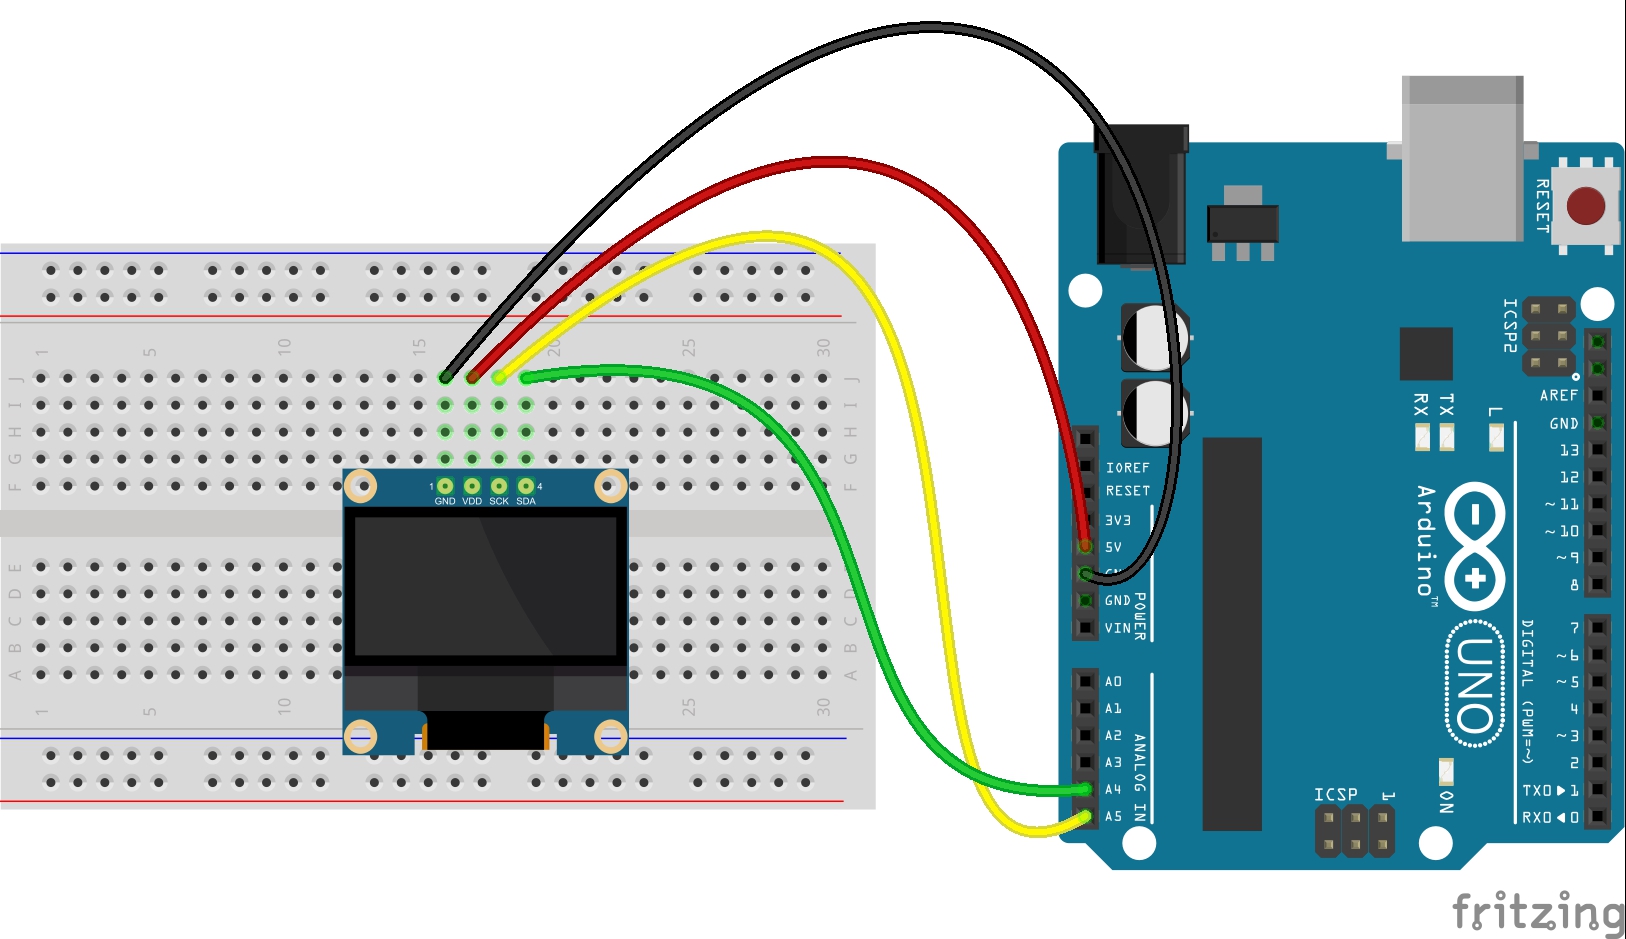
CircuitConnect the pins of OLED with the following pins of Arduino UNO, as shown below.
Arduino UNO OLED
5v--------------------VCC
GND-----------------GND
SDA/A4--------------SDA
SCL/A5---------------SCL
Install Required Libraries- Adafruit_GFX.h https://github.com/adafruit/Adafruit-GFX-Library
- Adafruit_SSD1306.h https://www.github.com/adafruit/Adafruit_SSD1306
- Wire.h this library will be installed by default
Either you can download the libraries from Github and add the ZIP file in Arduino IDE using add.zip library option.
Or you can install the libraries directly from Arduino IDE from Manage Libraries.
Follow the below steps to install.
Open manage library from sketch -> include library -> manage libraries
Then Search for AdafruitSSD1306 and click on the install button.
Then Search for the AdafruitGFX and click the install button. Now we have successfully installed the required libraries for this project.
Adafruit Example CodeLet's upload the adafruitSSD1306 library example program and test our setup.Open the example program from File -> Examples -> Adafruit SSD1306 -> ssd1306_128x64_i2c, because We are using OLED display with I2C interface with the screen size of 128x64.
Go to tool menu -> Boards select Arduino UNO, then from Port select the port to which the Arduino is connected
To display an image on OLED display first We need to convert the image to HEX code, for that purpose We need to use a converter like image2cpp by javl Image2cpp
Converting Image to Bitmap HEX CodeStep 1: Open Converter
Click on the image2cpp button and open the application in a new tab.
Step 2: Choose Image File
Click on choose files and choose the image file which you need to display in the OLED.
Step 3: Image Settings
Below is the screenshot of the default settings when We open the facebook logo.
Here We need to change at least the canvas size, scaling, and brightness threshold to get a proper output in our OLED display.
Canvas Size: it is the size of our OLED display in my case its 128x64 is you are using any other OLED display then change the settings accordingly
Brightness Threshold: It is for adjusting the intensity with respect to the background, You can understand it correctly with using the application.
Scaling: It is for adjusting the image size with respect to the Canvas Size.
Below is the screenshot after updating the settings.
Now We got our nice looking facebook logo, I have to change the canvas size to "128 x 64", brightness threshold to "185", scaling to "scale to fit, keeping proportion". The other settings like center, background color and invert image colors are for tweaking, play with it to understand :).
Step 4: Generate Code
From code output, formate dropdown menu selects the Arduino code and click on the Generate code button.
Now We have successfully generated the HEX code for our image, Let's move to Arduino coding.
Arduino CodingCopy the code below to a new Arduino sketch, then copy the above-generated HEX code just above the void Setup() function in the Arduino code.so it will look like this.
Now select the board and port from the tools menu and upload the code, that's it now Our OLED will start displaying the image.
Comments