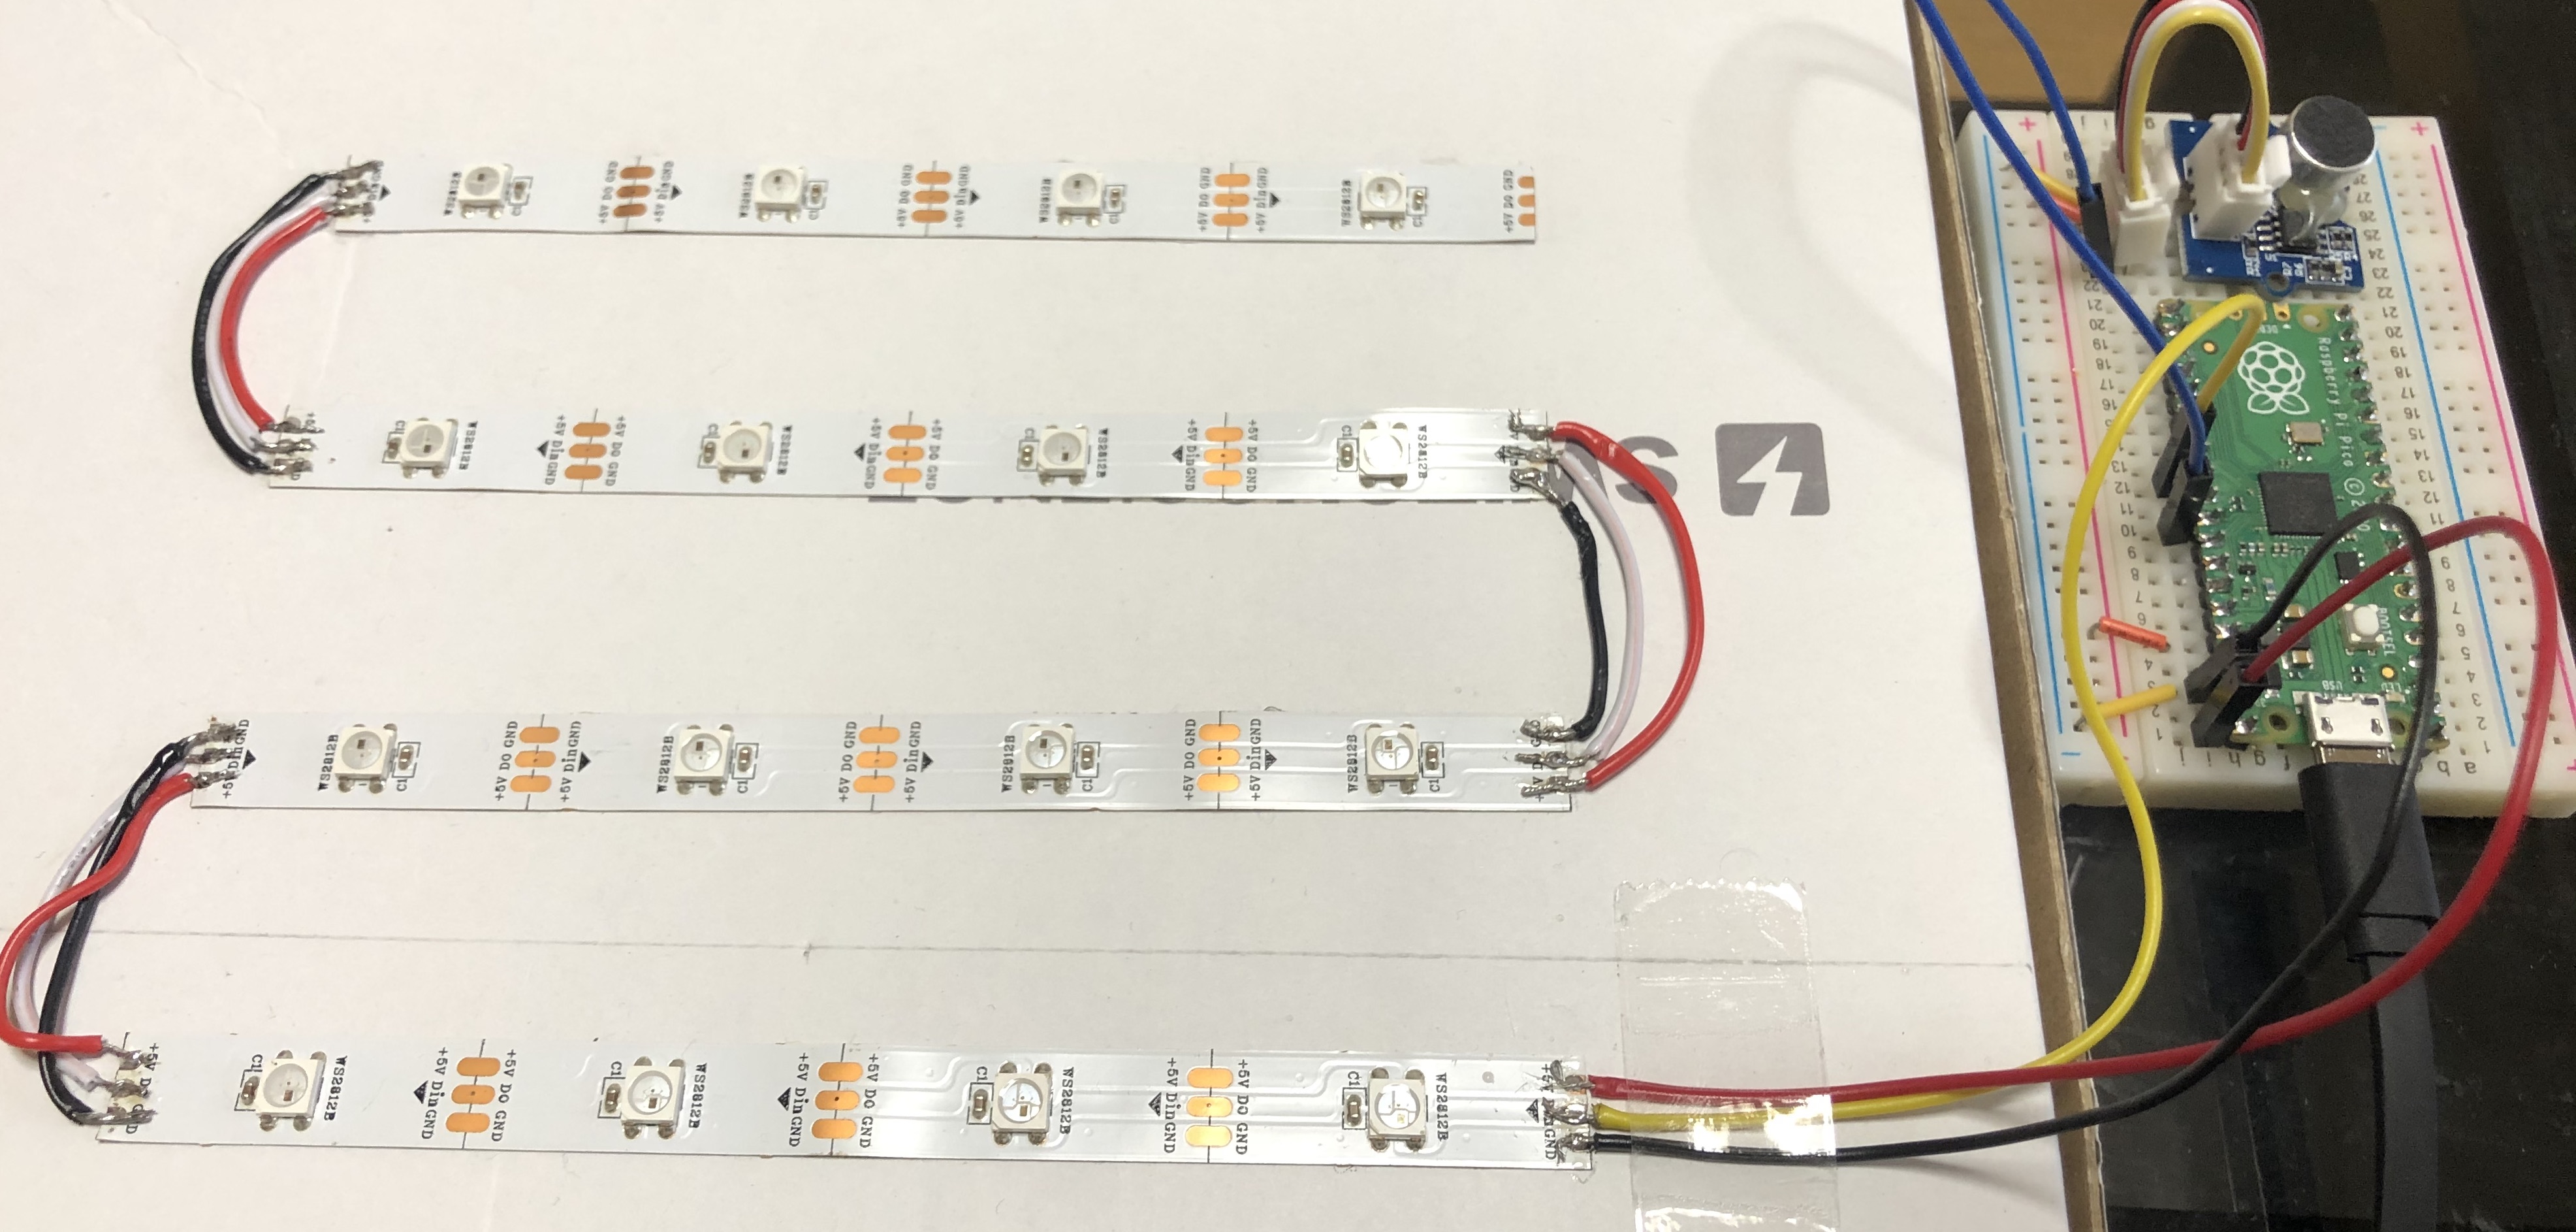
This is a fun project to demonstrate programmable I/O hardware using PIO to control RGB LED (WS2812 Neopixels) movements activated by a connected sound sensor.
What is PIO?Programmable I/O (PIO) is a new piece of hardware developed for RP2040 (the chip on the Raspberry Pi Pico). It allows us to create new types of hardware interfaces on Raspberry Pi Pico.
Please refer to the blog post https://www.raspberrypi.org/blog/what-is-pio/ to know more about it.
ConnectionPi Pico ------- RGB LED Strip
VBUS ------- +5V
GND. -------- GND
GP22 (pin #29) ------- DIN
Pi Pico ------- Grove Sound Sensor
3V3(OUT). ------- VCC
GND. -------- GND
GP26 (pin #31) ------- SIG
The RGB LED strip is cut into 4 smaller strips each having 4 Neopixels which are fixed to a cardboard using adhesive and re-connected in parallel as shown below to make it a 4x4 matrix.
Please follow steps in the https://datasheets.raspberrypi.org/pico/getting-started-with-pico.pdf document to install C/C++ SDK and run the commands below to build it.
$ git clone https://github.com/metanav/pico_ws2812_sound.git
$ cd pico_ws2812_sound
$ mkdir build
$ cd build
$ cmake ..
$ makeWe can upload the generated pico_ws2812_sound.uf2 binary file to the Raspberry Pi Pico by following the steps below.
1. Push and hold the BOOTSEL button and plug the Raspberry Pi Pico into the USB port of your computer. It will mount as a Mass Storage Device called RPI-RP2.
2. Drag and drop the pico_ws2812_sound.uf2 binary onto the RPI-RP2 volume.
After flashing the binary the Raspberry Pi Pico will reboot and the program will start running.
DemoThe second demo is showing the LED matrix covered by a wax paper to display the lights pleasing and a bit bigger.
I hope you enjoyed the colorful demo!


Comments
Please log in or sign up to comment.