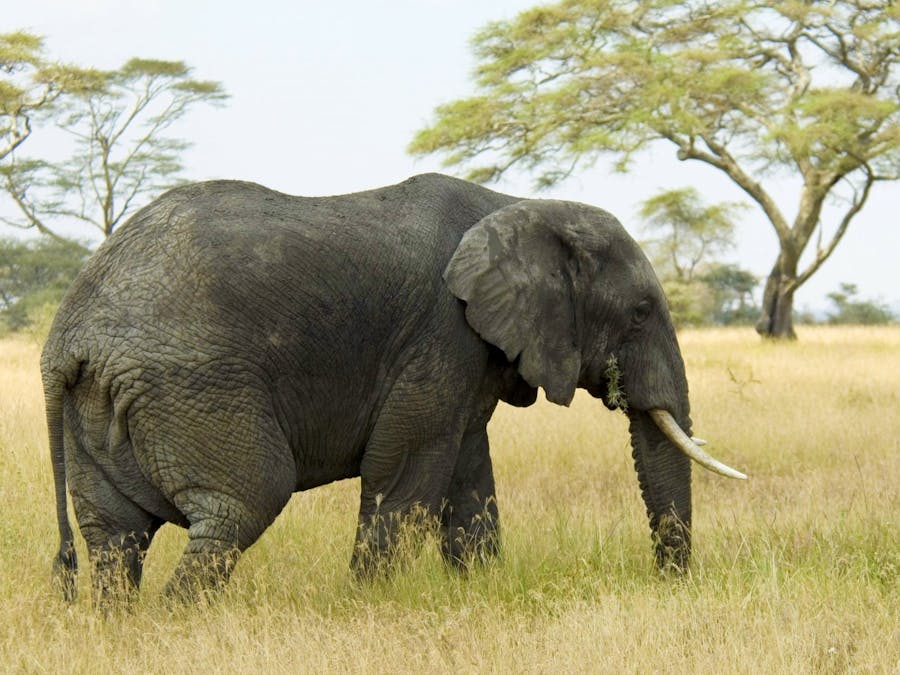
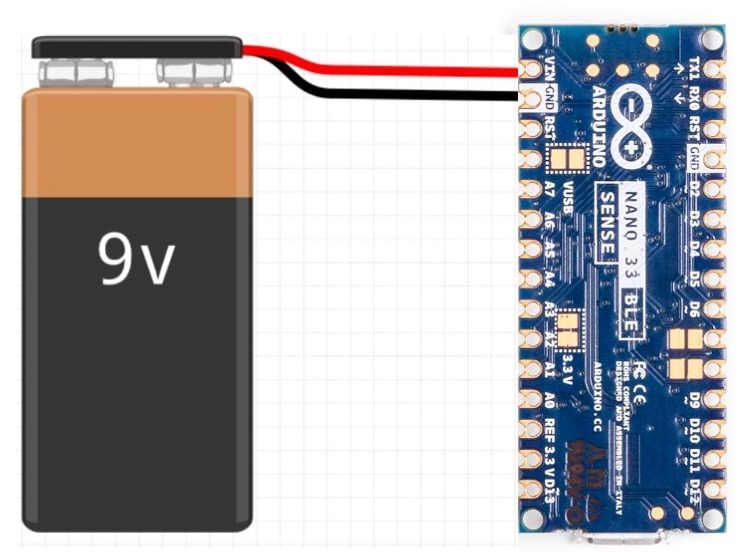
In this project I have created a deep learning model using Edge Impulse Studio to detect elephant activity. For the training 3-axes accelerometer and 3-axes gyroscope data are used. The final model is deployed to the Arduino Nano 33 BLE Sense and the inferencing result is displayed using mobile app over BLE connection.
Data CollectionI could not find any elephant activity/motion/orientation data available in the public domain to use freely. I used a Goat Sheep Dataset to train a model which can be downloaded freely and can be used with citing the following paper:
Jacob W. Kamminga, Helena C. Bisby, Duv V. Le, Nirvana Meratnia, and Paul J.M. Havinga. Generic online animal activity recognition on collar tags. In Proceedings of the 2017 ACM International Joint Conference on Pervasive and Ubiquitous Computing (UbiComp/ISWC’17). ACM, September 2017
Please see the paper above for the dataset links.
They collected this dataset that comprises multiple sensor data from four goats and two sheep. These animals differ in size, weight, and age but belong to the same sub-family Caprinae. They randomly placed the sensors in various orientations on each individual animal. The sensors were always placed around the neck. The collars were prone to rotation around the animal’s neck during the day. All sensors were sampled with 200 samples/sec. They collected following motion sensors: 3-axes accelerometer, 3-axes high-intensity accelerometer, 3-axes gyroscope, 3-axes magnetometer, temperature, barometric pressure.
I have used 3-axes accelerometer and 3-axes gyroscope data only. Since I was planning to deploy the model to the Arduino Nano 33 BLE Sense (which has default sampling rate for accelerometer and gyroscope is 119 Hz) I have to drop alternate rows to keep data only at 100 samples/sec.
The activities that were observed during the day are : Lying, Standing, Grazing, Fighting, Shaking, Scratch-Biting, Walking, Trotting, and Running.
I have only chosen following 5 activities which is relevant for elephants.
Lying: The animal is lying on the ground.
Standing: The animal is standing still, occasionally moving its head or stepping very slowly.
Grazing: The animal is eating fresh grass, hay from a pile or twigs on the ground.
Walking: The animal is walking.
Running: The animal is galloping.
Data SampleThe data for running activity was very less in comparison of other activities. It arises problem of imbalance dataset for training. I have combined the Trotting (walking very quickly) activity with Running to overcome this issue.
I have created a Jupyter Notebook to clean, filter and generate data acquisition format json files to upload data to the Edge Impulse Studio.
Example Json file (File: running.S2_605.json)The file name is generated to make the label for the example, in this case running.
{
	"protected": {
		"ver": "v1",
		"alg": "HS256",
		"iat": 1603881609.210776
	},
	"signature": "13b115654acabe82e12872097c66cbdaf46a3acce4c5eb863a0c50b171fa5a80",
	"payload": {
		"device_name": "<mac address>",
		"device_type": "ARDUINO_NANO33BLE",
		"interval_ms": 10,
		"sensors": [{
				"name": "accX",
				"units": "m/s2"
			},
			{
				"name": "accY",
				"units": "m/s2"
			},
			{
				"name": "accZ",
				"units": "m/s2"
			},
			{
				"name": "gyrX",
				"units": "d/s"
			},
			{
				"name": "gyrY",
				"units": "d/s"
			},
			{
				"name": "gyrZ",
				"units": "d/s"
			}
		],
		"values": [
			[
				1.03669,
				3.9241,
				-4.20182,
				-16.9512,
				-4.87805,
				-43.7195
			],
			[
				0.567426,
				4.97515,
				-3.44286,
				-14.878,
				-10.7927,
				-47.8659
			],
			[
				0.292093,
				5.95199,
				-2.9329,
				-16.2195,
				-14.939,
				-49.1463
			],
			[
				0.141258,
				6.84502,
				-2.6575599999999997,
				-17.8049,
				-18.3537,
				-45.0
			],
			[
				0.23702600000000001,
				7.62074,
				-2.73418,
				-17.2561,
				-22.561,
				-34.6341
			],
			[
				0.5841850000000001,
				8.22887,
				-3.4811699999999997,
				-13.1098,
				-26.3415,
				-20.7317
			],
			[
				1.13006,
				8.781930000000001,
				-4.69264,
				-3.04878,
				-24.6341,
				-7.195119999999999
			],
			[
				5.18345,
				6.75404,
				-7.54413,
				-99.2073,
				26.2805,
				-17.5
			]
		]
	}
}To upload the data to the Edge Impulse there are several ways but I have used the CLI which I find very convenient. But first of all we need to create an account at Edge Impulse Studio and need to copy HMAC KEY which can be find at Dashboard > Keys tab as shown below.
$ npm insall -g edge-impulse-cliChange directory to the path where generated json files resides and execute the following command. The command line has a parameter --category split which automatically splits the data into training and testing datasets.
$ edge-impulse-uploader --category split *.jsonAfter uploading the data successfully we can see them in the Edge Impulse Studio's Data Acquisition tab as shown below.
Training data (4h 19m 34s):
Testing Data (56m 8s):
The data is balanced (80% training vs 20% testing) so we do not need to anything otherwise we can manually split the data and can move to either side.
Impulse DesignIn the Edge Impulse studio, before starting the training we have to design a Impulse which is a sets of preprocessing blocks and Neural network classifiers. I have designed the Impulse using Signal Analysis as preprocessing block which generates feature from the raw data and a Deep Neural Network Classifier as shown below.
To generate the feature we have to go to the Spectral Features tab and we can configure many options available there. In the beginning I chose the default configuration and after each training iteration based on the achieved model accuracy I had to go back to this tab and reconfigure the options and re-generate the feature. Below is the configuration for my final model. I have chose Low pass filter with 9 Hz cut-off frequency and 256 FFT length with 6 peaks and 0.2 peaks threshold.
After setting the parameters above the page automatically redirects to the generate feature page where we can start a job to do the task. After completion we can use the Feature Explorer to see the data in the different 3D orientation by dragging the image using mouse pointer. Below is the image of the generated features diagram for the final model.
Now we need to make a neural network classifier in the NN Classifier tab. We can either use the default Visual mode to add multiple layers of the Deep neural network or we can use the Expert mode to directly write the code to create a Keras model. I used the Expert mode because the model I wanted to create needed some layers which were not available in the Visual mode and also I included some custom code to configure learning rate and print some debug message. Below is the screenshot of the Classifier page:
The model has 1 input layer, 12 Fully Connected Dense hidden layers and 1 output layer. Each hidden layers has Activation, Dropout and BatchNormalization layers. Below is the model summary taken from the Edge Impulse final training session.
Model: "sequential"
_________________________________________________________________
Layer (type)                 Output Shape              Param #
=================================================================
dense (Dense)                (None, 64)                6592
_________________________________________________________________
batch_normalization (BatchNo (None, 64)                256
_________________________________________________________________
activation (Activation)      (None, 64)                0
_________________________________________________________________
dropout (Dropout)            (None, 64)                0
_________________________________________________________________
dense_1 (Dense)              (None, 64)                4160
_________________________________________________________________
batch_normalization_1 (Batch (None, 64)                256
 _________________________________________________________________
activation_1 (Activation)    (None, 64)                0
_________________________________________________________________
dropout_1 (Dropout)          (None, 64)                0
_________________________________________________________________
dense_2 (Dense)              (None, 64)                4160
_________________________________________________________________
batch_normalization_2 (Batch (None, 64)                256
_________________________________________________________________
activation_2 (Activation)    (None, 64)                0
_________________________________________________________________
dropout_2 (Dropout)          (None, 64)                0
_________________________________________________________________
dense_3 (Dense)              (None, 64)                4160
_________________________________________________________________
batch_normalization_3 (Batch (None, 64)                256
_________________________________________________________________
activation_3 (Activation)    (None, 64)                0
_________________________________________________________________
dropout_3 (Dropout)          (None, 64)                0
_________________________________________________________________
dense_4 (Dense)              (None, 64)                4160
_________________________________________________________________
batch_normalization_4 (Batch (None, 64)                256
_________________________________________________________________
activation_4 (Activation)    (None, 64)                0
_________________________________________________________________
dropout_4 (Dropout)          (None, 64)                0
_________________________________________________________________
dense_5 (Dense)              (None, 64)                4160
_________________________________________________________________
batch_normalization_5 (Batch (None, 64)                256
_________________________________________________________________
activation_5 (Activation)    (None, 64)                0
_________________________________________________________________
dropout_5 (Dropout)          (None, 64)                0
_________________________________________________________________
dense_6 (Dense)              (None, 32)                2080
_________________________________________________________________
batch_normalization_6 (Batch (None, 32)                128
_________________________________________________________________
activation_6 (Activation)    (None, 32)                0
_________________________________________________________________
dropout_6 (Dropout)          (None, 32)                0
_________________________________________________________________
dense_7 (Dense)              (None, 32)                1056
_________________________________________________________________
batch_normalization_7 (Batch (None, 32)                128
_________________________________________________________________
activation_7 (Activation)    (None, 32)                0
_________________________________________________________________
dropout_7 (Dropout)          (None, 32)                0
_________________________________________________________________
dense_8 (Dense)              (None, 32)                1056
_________________________________________________________________
batch_normalization_8 (Batch (None, 32)                128
_________________________________________________________________
activation_8 (Activation)    (None, 32)                0
_________________________________________________________________
dropout_8 (Dropout)          (None, 32)                0
_________________________________________________________________
dense_9 (Dense)              (None, 32)                1056
_________________________________________________________________
batch_normalization_9 (Batch (None, 32)                128
_________________________________________________________________
activation_9 (Activation)    (None, 32)                0
_________________________________________________________________
dropout_9 (Dropout)          (None, 32)                0
_________________________________________________________________
dense_10 (Dense)             (None, 32)                1056
_________________________________________________________________
batch_normalization_10 (Batc (None, 32)                128
_________________________________________________________________
activation_10 (Activation)   (None, 32)                0
_________________________________________________________________
dropout_10 (Dropout)         (None, 32)                0
_________________________________________________________________
dense_11 (Dense)             (None, 32)                1056
_________________________________________________________________
batch_normalization_11 (Batc (None, 32)                128
_________________________________________________________________
activation_11 (Activation)   (None, 32)                0
_________________________________________________________________
dropout_11 (Dropout)         (None, 32)                0
_________________________________________________________________
y_pred (Dense)               (None, 5)                 165
=================================================================
Total params: 37,221 Trainable params: 36,069 Non-trainable params: 1,152
Now we can click on the Training button and wait until it is completed.
Validation Accuracy on Training DataI got 95.2% accuracy on the training validation data.
I got 85.64% accuracy on the test data which is quite promising.
I have deployed the created model using Arduino library to the Arduino Nano 33 BLE Sense. The Edge Impulse Studio creates Arduino library bundle which can be downloaded and import into Arduino IDE. I used one of the accelerometer (continuous) example and customized it to read accelerometer and gyroscope data. I developed a mobile app using Flutter which is used to connect the Arduino Nano 33 BLE Sense over BLE connection and display the inferencing results.
Inferencing DemoConclusionAfter many iterations and parameter tweaking the model has achieved great accuracy. Although the training data were taken from the Goat/Sheep dataset but the model is generic and surely useful for tracking elephants movements. If we can collect some more data using the elephant collar and retrain the model using the transfer learning the model can achieve much higher accuracy. All the code and instructions are provided in the GitHub repository which can be found in the code section at the end. My project at Edge Impulse is Naveen/elephant_edge_v3. I would like to thanks people from Edge Impulse who replied my questions and helped to resolve issues at the Edge impulse forum.


Comments
Please log in or sign up to comment.