


Hardware components | ||||||
 |
| × | 1 | |||
| × | 1 | ||||
 |
| × | 1 | |||
 |
| × | 1 | |||
Software apps and online services | ||||||
 |
| |||||
In this project I built an Eink photo frame which takes thermal readings using a 32x24 temperature sensor and converts into a thermal image. You can take your selfies even in dark! After taking the image the power can be disconnected and the photo stays there. The step by step instructions are given below. I am using macOS as host machine. The instructions and commands can be adapted for other operating systems.
Install Raspberry Pi OS LiteDownload Raspberry Pi Imager from here: https://www.raspberrypi.org/software/ and install Raspberry Pi OS Lite.
Headless setupWe don't like to use the photo frame with monitor/keyboard/mouse!
$ cd /Volume/boot
$ touch ssh
Create a file wpa_supplicant.conf with following contents. Please change COUNTRY CODE, SSID, and PASSWORD according to your location. For example, for USA, country code is US.
ctrl_interface=DIR=/var/run/wpa_supplicant GROUP=netdev
update_config=1
country=<COUNTRY CODE>
network={
  ssid="SSID"
  psk="PASSWORD"
}After booting up we can ssh into it.
$ ssh pi@raspberrypi.localThis is optional but everyone likes updated OS!
$ sudo apt update
$ sudo apt upgradeThe eInk display uses SPI and the thermal camera uses I2C connections. We can enable them using the Raspberry Pi configuration utility.
$ sudo raspi-configSelect Interface Options as shown below.
Choose SPI and I2C one by one and enable them in the next screen.
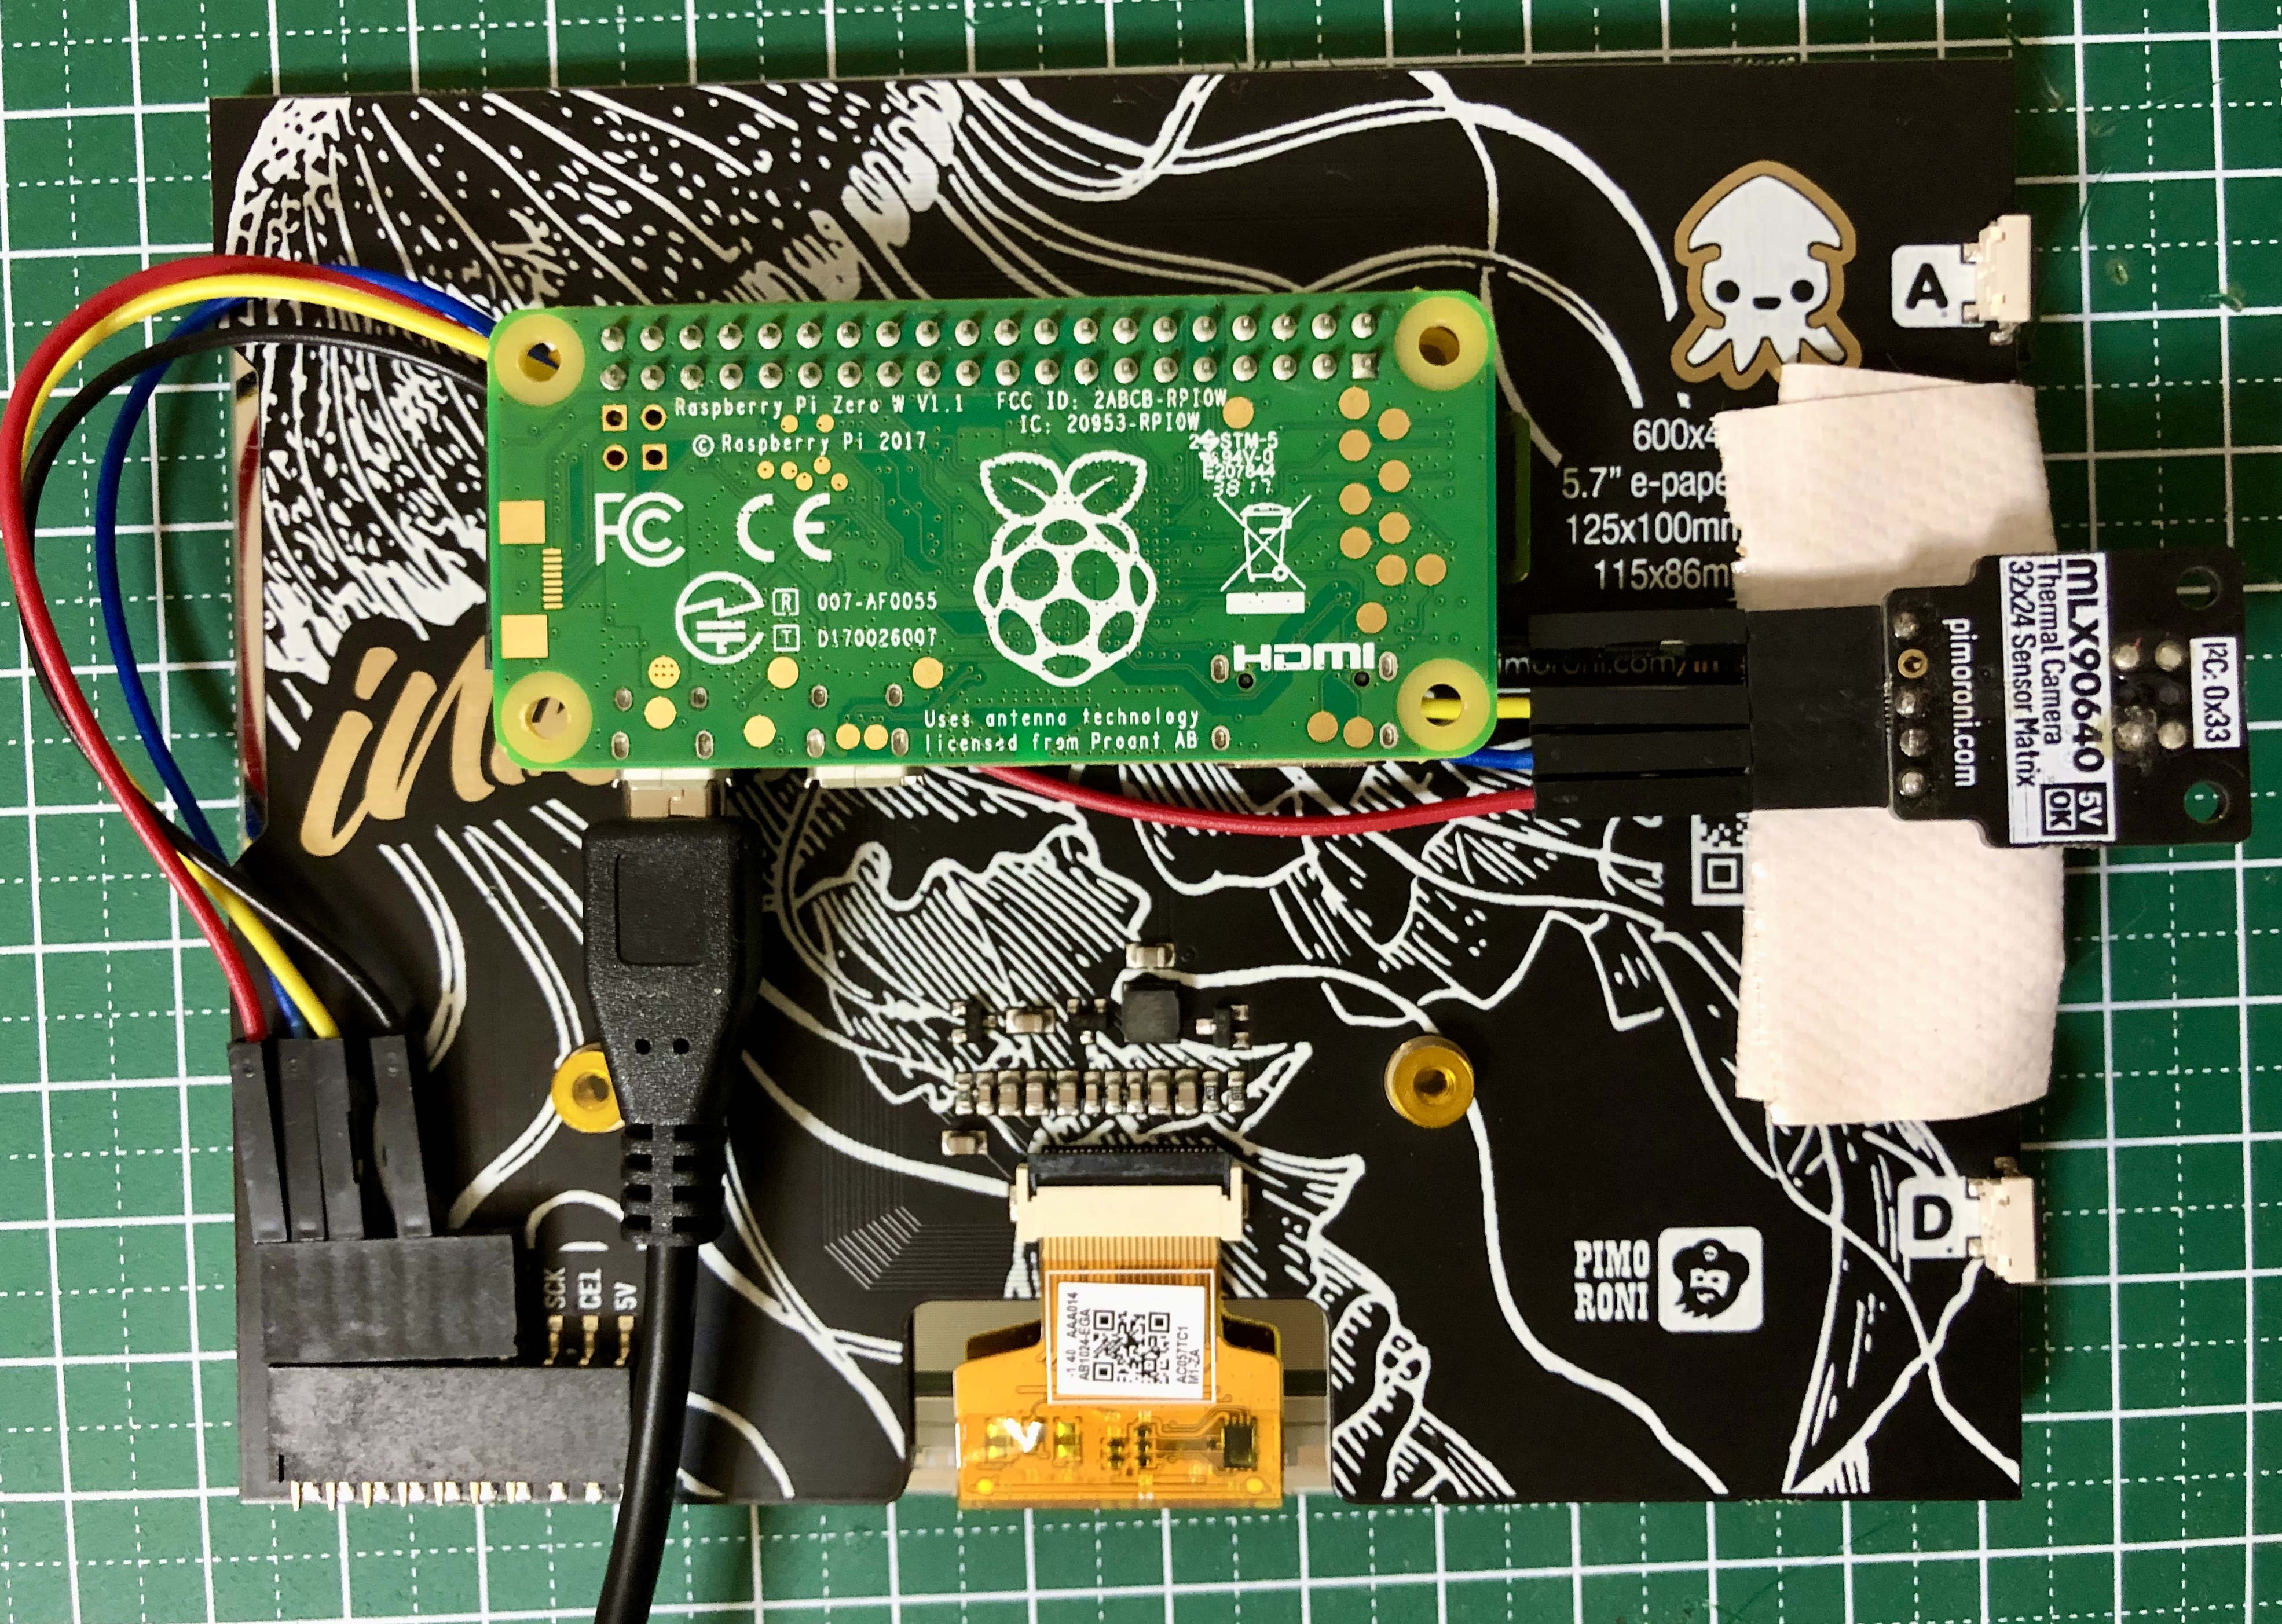
The Pi Zero is connected to the Inky Impression and the thermal camera as shown below.
$ sudo apt install python3-pip
$ pip3 install inky[rpi,fonts]$ sudo apt install i2c-tools
$ i2cdetect -y 1
0 1 2 3 4 5 6 7 8 9 a b c d e f
00: -- -- -- -- -- -- -- -- -- -- -- -- --
10: -- -- -- -- -- -- -- -- -- -- -- -- -- -- -- --
20: -- -- -- -- -- -- -- -- -- -- -- -- -- -- -- --
30: -- -- -- 33 -- -- -- -- -- -- -- -- -- -- -- --
40: -- -- -- -- -- -- -- -- -- -- -- -- -- -- -- --
50: -- -- -- -- -- -- -- -- -- -- -- -- -- -- -- --
60: -- -- -- -- -- -- -- -- -- -- -- -- -- -- -- --
70: -- -- -- -- -- -- -- --$ cd ~
$ git clone https://github.com/pimoroni/mlx90640-library.git
$ cd mlx90640-library
$ make clean
$ make I2C_MODE=LINUX
$ sudo make install$ sudo apt install swig
$ cd ~/mlx90640-library/python/library
$ make build
$ sudo make installOpen /boot/config.txt and add the line below.
dtparam=i2c1_baudrate=400000I am using an off-the-shelf photo frame backing board and just stuck behind the eInk display using a double-sided tape.
The button A at the top left of the display is configured as a photo capture button. After pressing the button the application waits for 5 seconds before capturing a frame.
Thanks for reading and watching!


Comments
Please log in or sign up to comment.