


Hardware components | ||||||
 |
| × | 1 | |||
 |
| × | 1 | |||
 |
| × | 1 | |||
 |
| × | 1 | |||
Software apps and online services | ||||||
 |
| |||||
 |
| |||||
.png?auto=compress%2Cformat&w=48&h=48&fit=fill&bg=ffffff) |
| |||||
 |
| |||||
FIRE ALARM
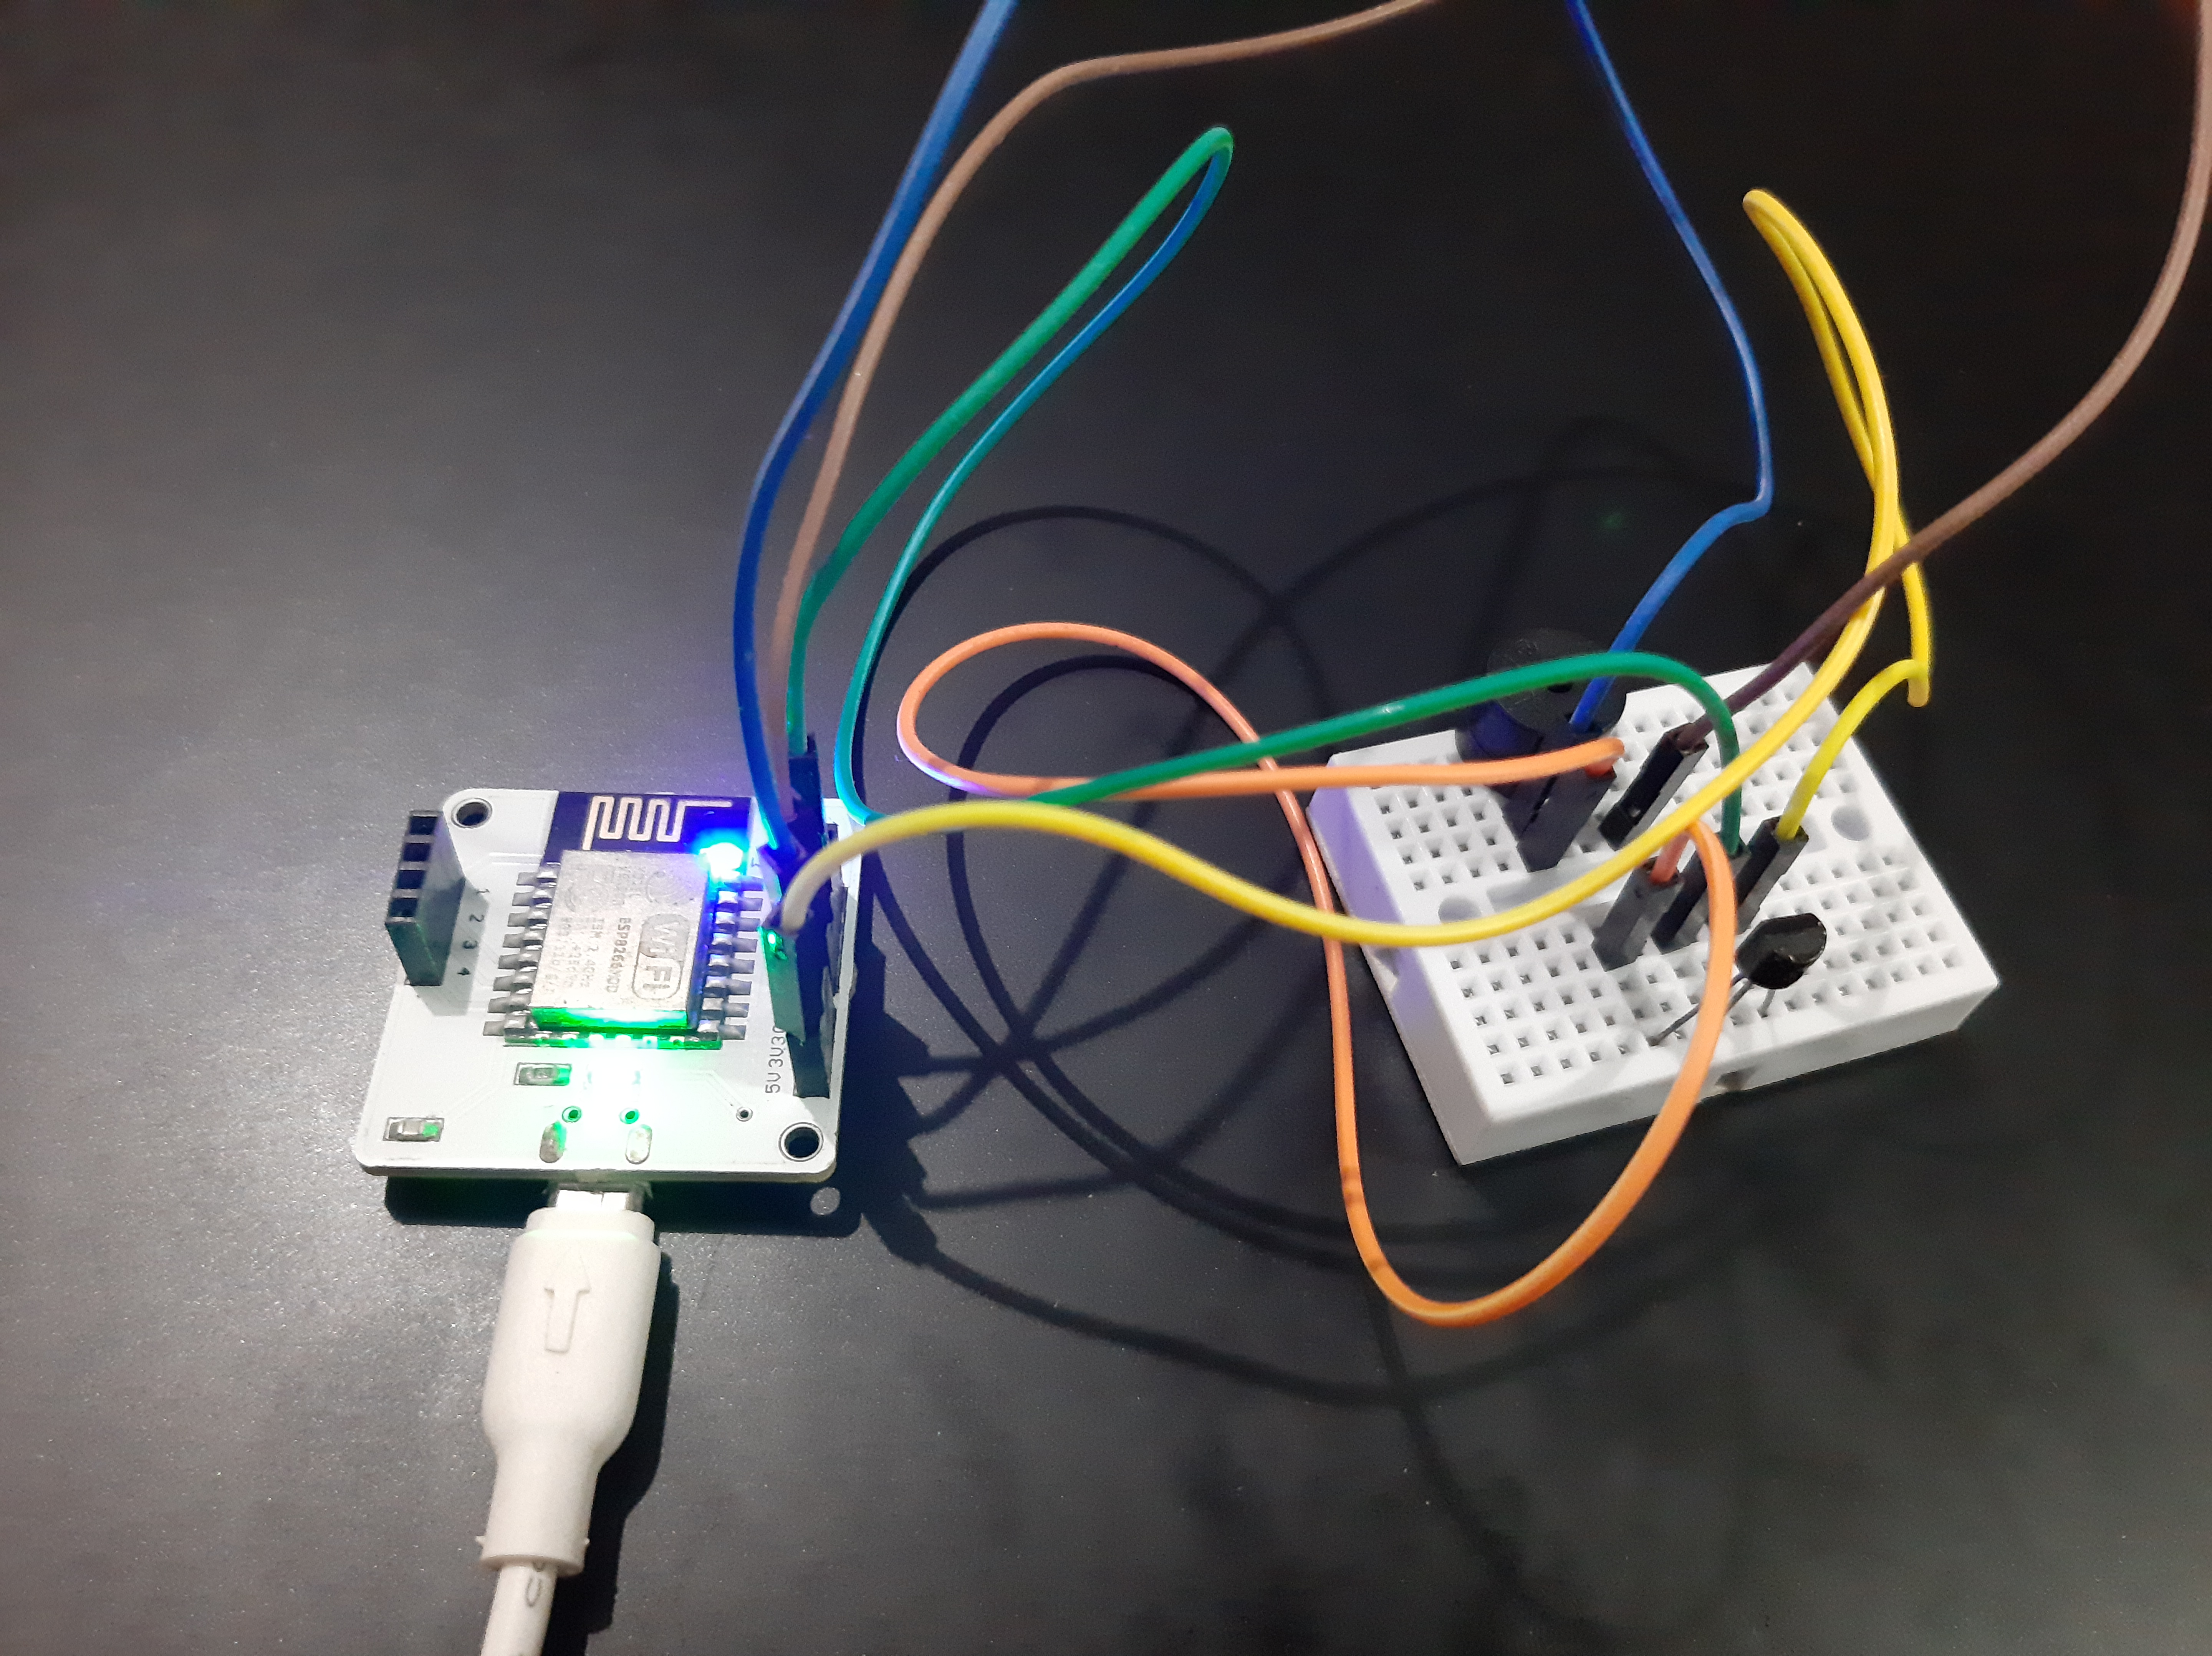
FIRE ALARMThis project is an example of a fire alarm system.Whenever the temperature exceeds the critical point then the buzzer starts and sends you the alert message and voice call about the temperature using 'Twilio'. The total project is done by using the Bolt Wi-Fi module and using the Linux system(Ubuntu).*Steps to build the project:-
*Steps to build the project:-1.Connections:-*First take buzzer, connect positive leg to '0' pin and negative one to'GND' pin.*now take the temperature sensor, it has 3 pins.From left to right connect the pins accordingly-''3vs3, 'A0', 'GND'.2.Now connect the Bolt Wi-Fi module to the power supply.3.Now open the Linux server(Ubuntu), write the code mentioned below.*Steps to create the Linux server:-
*Steps to create the Linux server:-step 1:-First open BOLT Cloud account.And open the API in it and make use of your API key and open the device, and you can find your bolt device. It looks like "BOLTxxxx".
- Step 1:-First open a BOLT Cloud account.And open the API in it and make use of your API key and open the device, and you can find your bolt device ID. It looks like "BOLTxxxx".
Next, click on the copy button to copy your API key.
Step 2:-Now install the software which I gave(VMWare and Ubuntu server) and open it.If you have difficulty with how to install the software, click on the link below:
- step 2:-Now install the software which I gave(VMWare and Ubuntu server) and open it.If you find difficulty in how to install the software click on the link below:
Step 3: Create a Python FileStep 4: Run the python codeStep 1: Login to your Ubuntu server(Digital Ocean Droplet)follow these steps to run your first Python program.Step 1: Login to your Ubuntu server(Digital Ocean Droplet)Step 2: Check Python versionStep 3: Create a Python FileStep 4: Run the python codeStep 1: Login to your Ubuntu server(Digital Ocean Droplet)
- Step 1: Login to your Ubuntu server(Digital Ocean Droplet)
First, connect to the Ubuntu server with your username and password, as we have learned in previous sections.Step 2: Check Python version
- Step 2: Check the Python version
In Ubuntu 16.04, which is the version of Ubuntu installed on your Digital Ocean droplet. Only Python-3 is available. To confirm the version of python, execute the command below on the terminal.python3 --version
python3 --version
The above command would print the version of python as something similar to, root@boltiot-learning-node:~# python3 --version Python 3.6.5
root@boltiot-learning-node:~# python3 --versionPython 3.6.5
Now we will run the "hello world" program in Python. Let see how it looks like.Step 3: Create a Python File
- Step 3: Create a Python File
First ssh into your Ubuntu server that you have deployed on Digital Ocean server and as I have mentioned in the previous section. We will use nano editor for writing the Python code because nano editor comes pre-installed with Ubuntu.The command to be typed in the terminal to create a Python file is given below, sudo nano filename.py
sudo nano filename.py
You may give any name as per your choice, however, make sure it ends with .py extension. In the below image, I am creating an empty python file with the filename "hello".
Press Enter key after you have typed the above command and it will open a nano editor for the hello.py file. You can write your Python code here.After that it will open and write the code which I gave and press CTRL+x it will save the file. STEP 3:-Now type sudo python3 hello.py and see the magic.
- STEP 3:-Now type sudo python3 hello.py and see the magic.
NOTE:-
NOTE:-before entering it the device should online(bolt Wi-Fi module).
Steps to create the Twilio account:-
Steps to create the Twilio account:-Step 1: Open https://www.twilio.com/ In browser.Step 2: Click on Get a Free API Key button to sign up.Step 3: Fill all the necessary details in SIGN UP form. Below is the screenshot of filled sign up form.https://www.twilio.com/ In browser.Step 2: Click on Get a Free API Keybu to sign up.Step 3: Fill all the necessary details in SIGN UP form. Below is the screenshot of filled sign up form.
Step 4: To verify they will ask for your phone number. Choose India as an option in the dropdown and then enter your phone number.
Step 5: Click on "Products" as shown on the screen below,
Step 6: Now enable the SMS services by clicking on two checkboxes for Programmable SMS and Phone Numbers as shown below.
Once you have done this, scroll to the bottom of the screen and click on "Continue".
Step 7: Now, you will need to give a name for your project. I have given the name as My Project. Click on "Continue" once you have entered the project name.
Step 8: Click on "Skip this step" when it asks you to Invite a Teammate.
Step 9: Your project should be created at this point. Click on "Project Info" to view the account credentials which is required for your projects.
Step 10: You can view the Account SID and Auth token on this page. The Auth token is not visible by default, you can click on "view" button to make the Auth token visible as shown below. Copy both and save them somewhere securely.
Step 11: From the drop-down menu, choose "Programmable SMS". Now click on Get Started button to generate phone number.
Step 12: Click on Get a number button.
Step 13: Then a popup will appear. Click on Choose this number button.
Step 14: Then a popup will appear which will have the final number. Copy this number and save to notepad for future references.
That's it. You have successfully created the account on Twilio. In the next lesson, we will use Bolt Python library to create our own SMS Alert system. STEP 15: Now run the python code, and run it. You will get an SMS and voice call.


Comments
Please log in or sign up to comment.