Why I built it?I created this project when my little sister (old enough to take care of the Arduino) asked me for a game with Arduino and nothing better than to use the imaginationto play and I built this project for her but I liked it so much that I decided to share it with you.
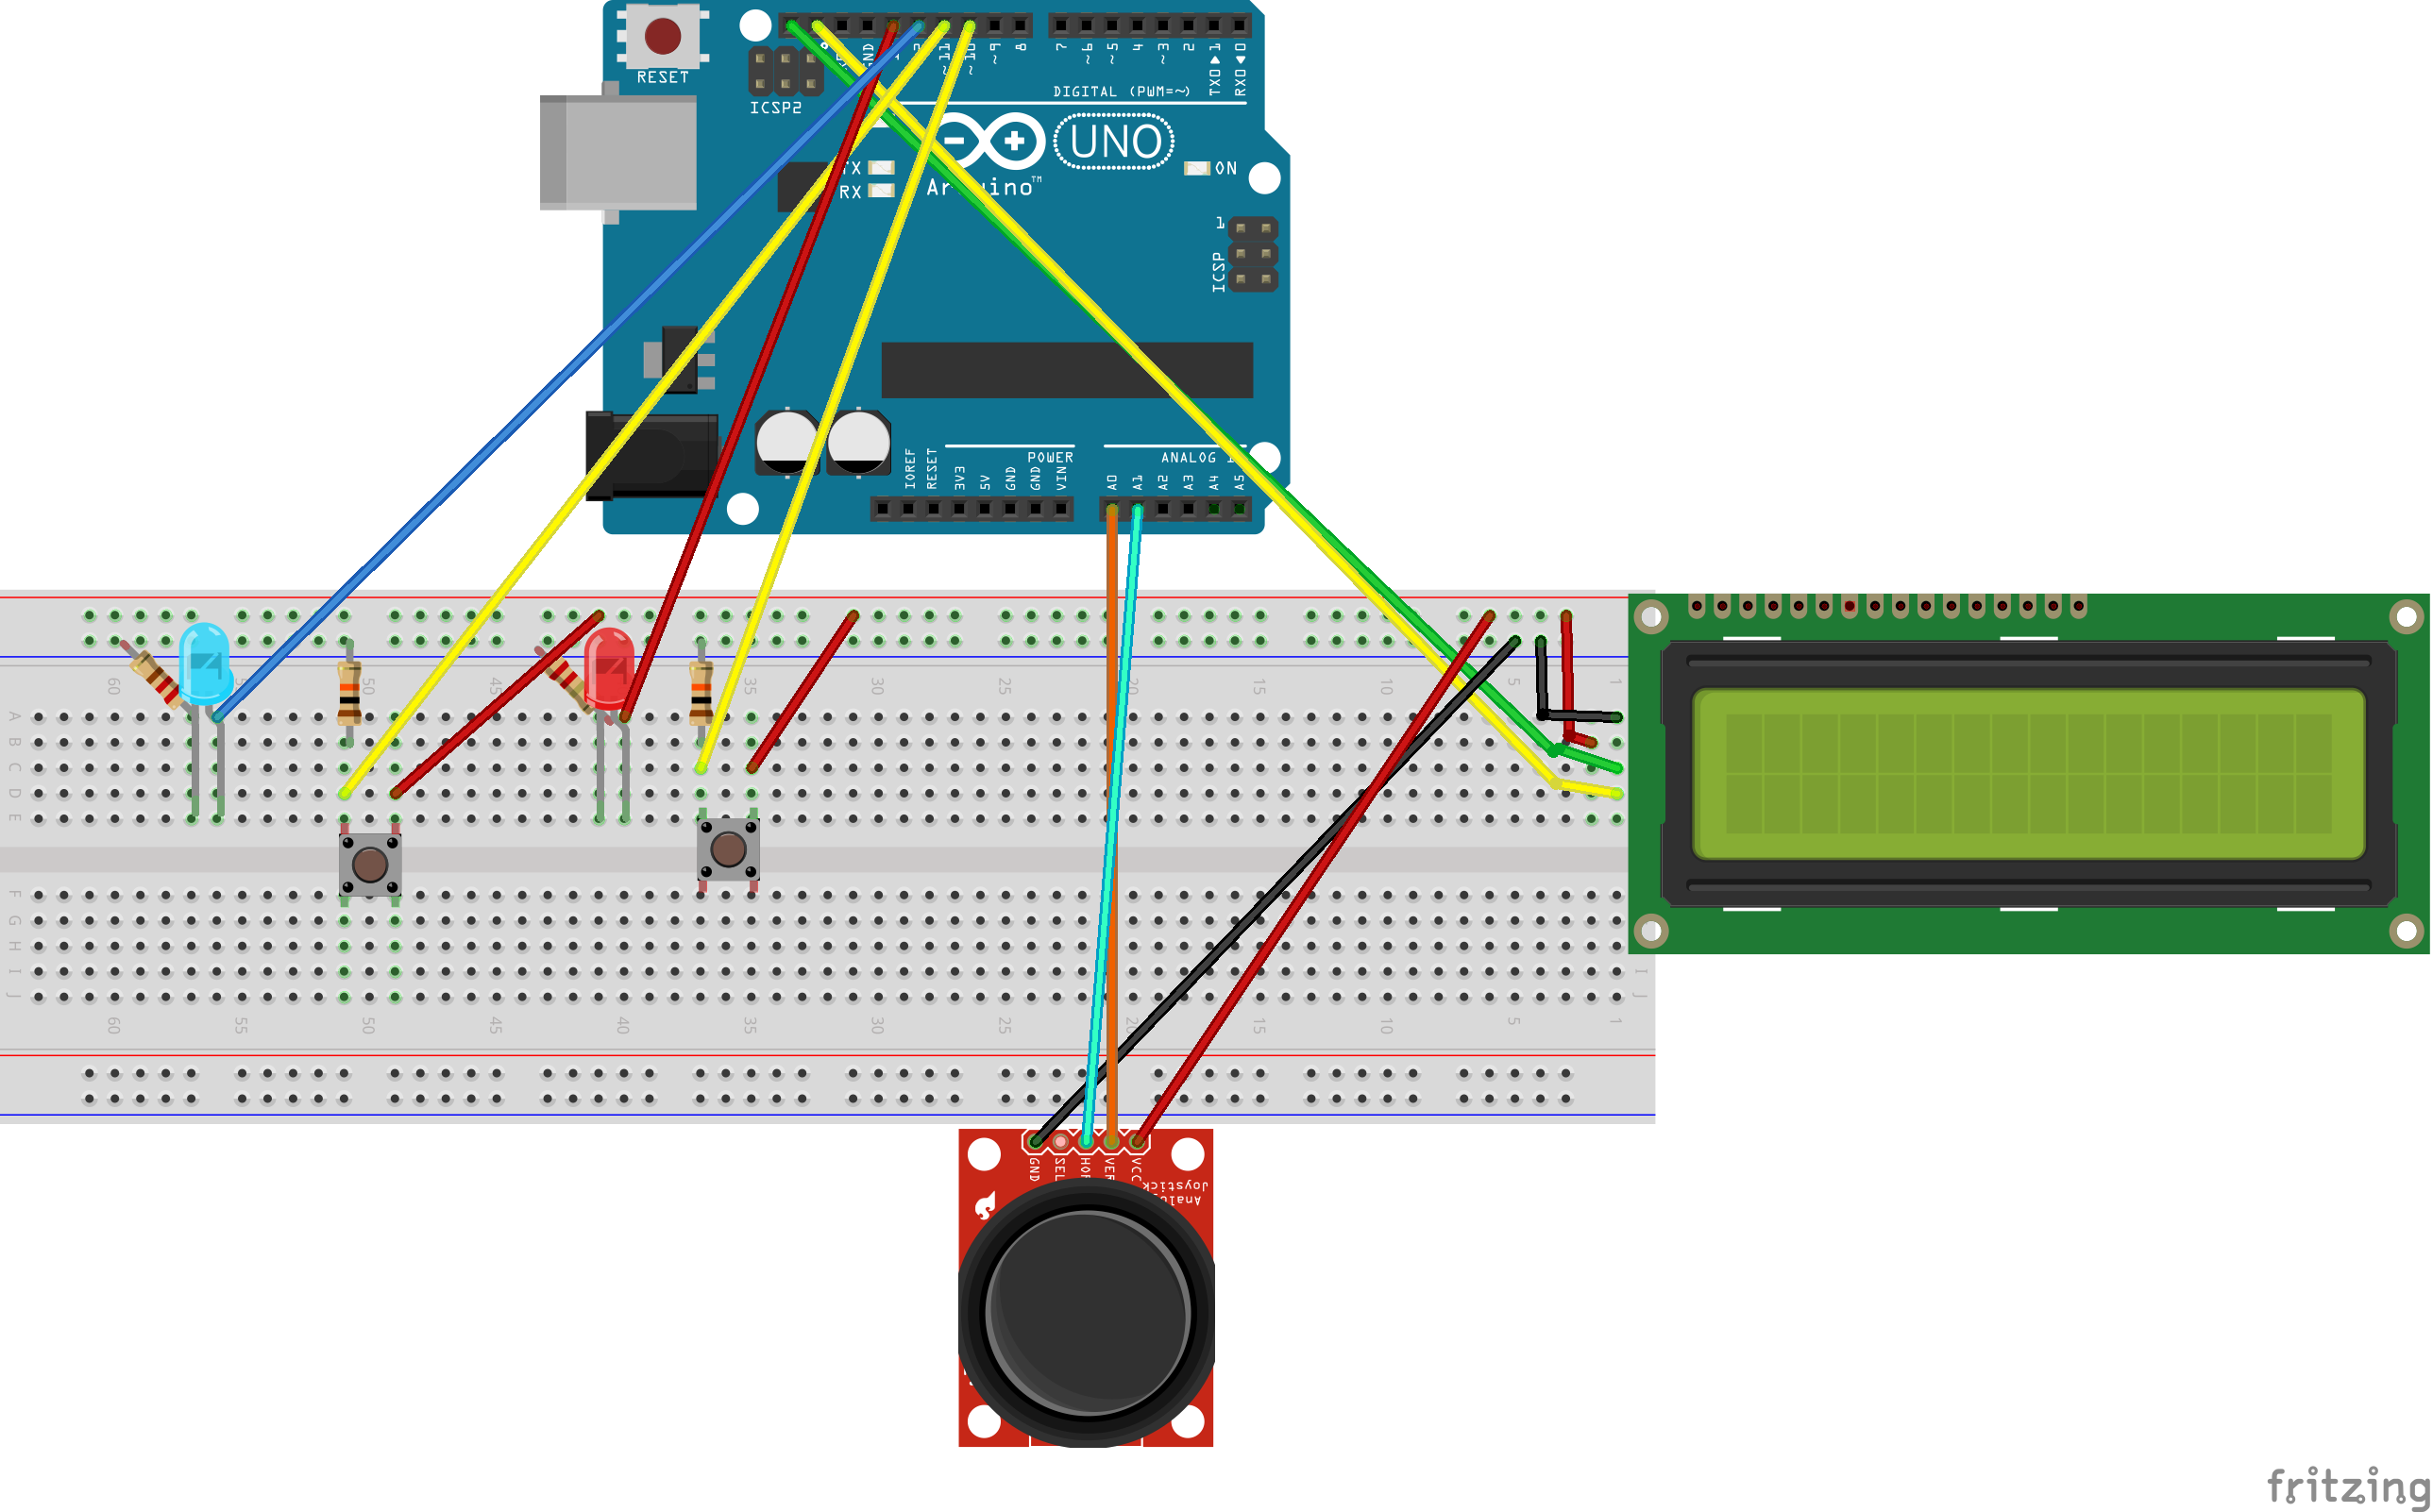
How to assemble it?First mount the buttons and LEDs, then the joystick at the other end so as not to obstruct the view and finally the I2C LCD.
Understand the code#include <Wire.h>
#include <LiquidCrystal_I2C.h>
The program begins with these two libraries. The first is to communicate with the I2C and the second is for the I2C LCD and initialize the I2C LCD library in The program begins with these two libraries. The first is to communicate with the I2C and the second is for the I2C LCD.
LiquidCrystal_I2C lcd(0x27,16,2);
We initialize the I2C LCD library in this part.
#define joyX A0
#define joyY A1
int btn1 = 10;
int btn2 = 11;
int led1 = 13;
int led2 = 12;
Here we define the pins of the components (less than the LCD I2C which is already defined).
In the void setup we define the inputs and outputs in addition to starting the LCD light and in the void loop we make the spaceship command work.
Photos
With the joystick you can steer your ship to the right and left, with the button connected to pin 10 you activate hyperspace and with the button connected to pin 11 laser beams.


_ztBMuBhMHo.jpg?auto=compress%2Cformat&w=48&h=48&fit=fill&bg=ffffff)


Comments
Please log in or sign up to comment.