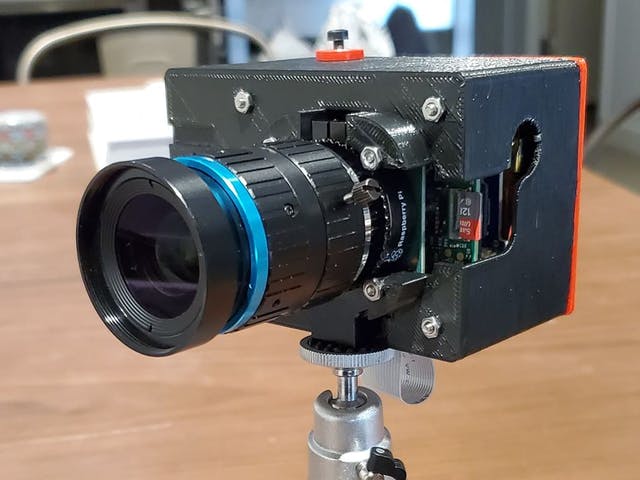
The Raspberry Pi Foundation came out with a really sweet HQ Camera Module this last May. With specs including a 12.3 MegaPixel sensor, C- and CS-mount lenses, and tripod mounting support - I got really excited to put my design skill to work to create an enclosure that could transform the new module into a standalone DSLM (Digital Single Lens Mirrorless). Something that I could charge up, and take with me to take pictures of personal projects, nature, and friends. So I took the time to design out an enclosure that employs a Raspberry Pi UPS, a 3.5" touchscreen, and a modular handgrip design so other DIY makers like myself can play with an open-source DSLM!
Start off by taking a MicroSD card and flashing the latest 32 bit Raspberry Pi OS on it. This can easily be done using the official Raspberry Pi Imager. Download it then select the correct Image you wish to flash, attached MicroSD card, and then select Write.
Additional Tips:- After I flash a new Raspberry Pi OS, I like to go ahead and enable ssh and set up wireless with just the SD card so I don't need a monitor/keyboard to set up the Raspberry Pi.
Hardware AssemblyGo ahead and download the Thingiverse files and print out them out. The design includes a few modular camera grips for users which aren't necessary to print but some users may find the camera is more comfortable with a camera grip. Feel free to design your own modular grip and let me know how it turns out!
First, place the HQ Camera Module inside the piDSLM enclosure, I secured the HQ Camera modular with M2.5 x 16mm screws. The enclosure is designed that you can place the HQ Camera Module for either a horizontal camera mount or a vertical camera mount.
Then go ahead and place the flex cable inside the HQ Camera Module.
Then go ahead and place the MicroSD card inside the Raspberry Pi, and place the Raspberry Pi inside the enclosure. use (4) M2.5 x 18mm bolts to secure it to the enclosure.
Then place the other end of the Flex cable inside the Raspberry Pi Camera connector header.
Then place the Raspberry Pi UPS HAT on top of the Raspberry Pi. Being careful to align the pins of the HAT correctly.
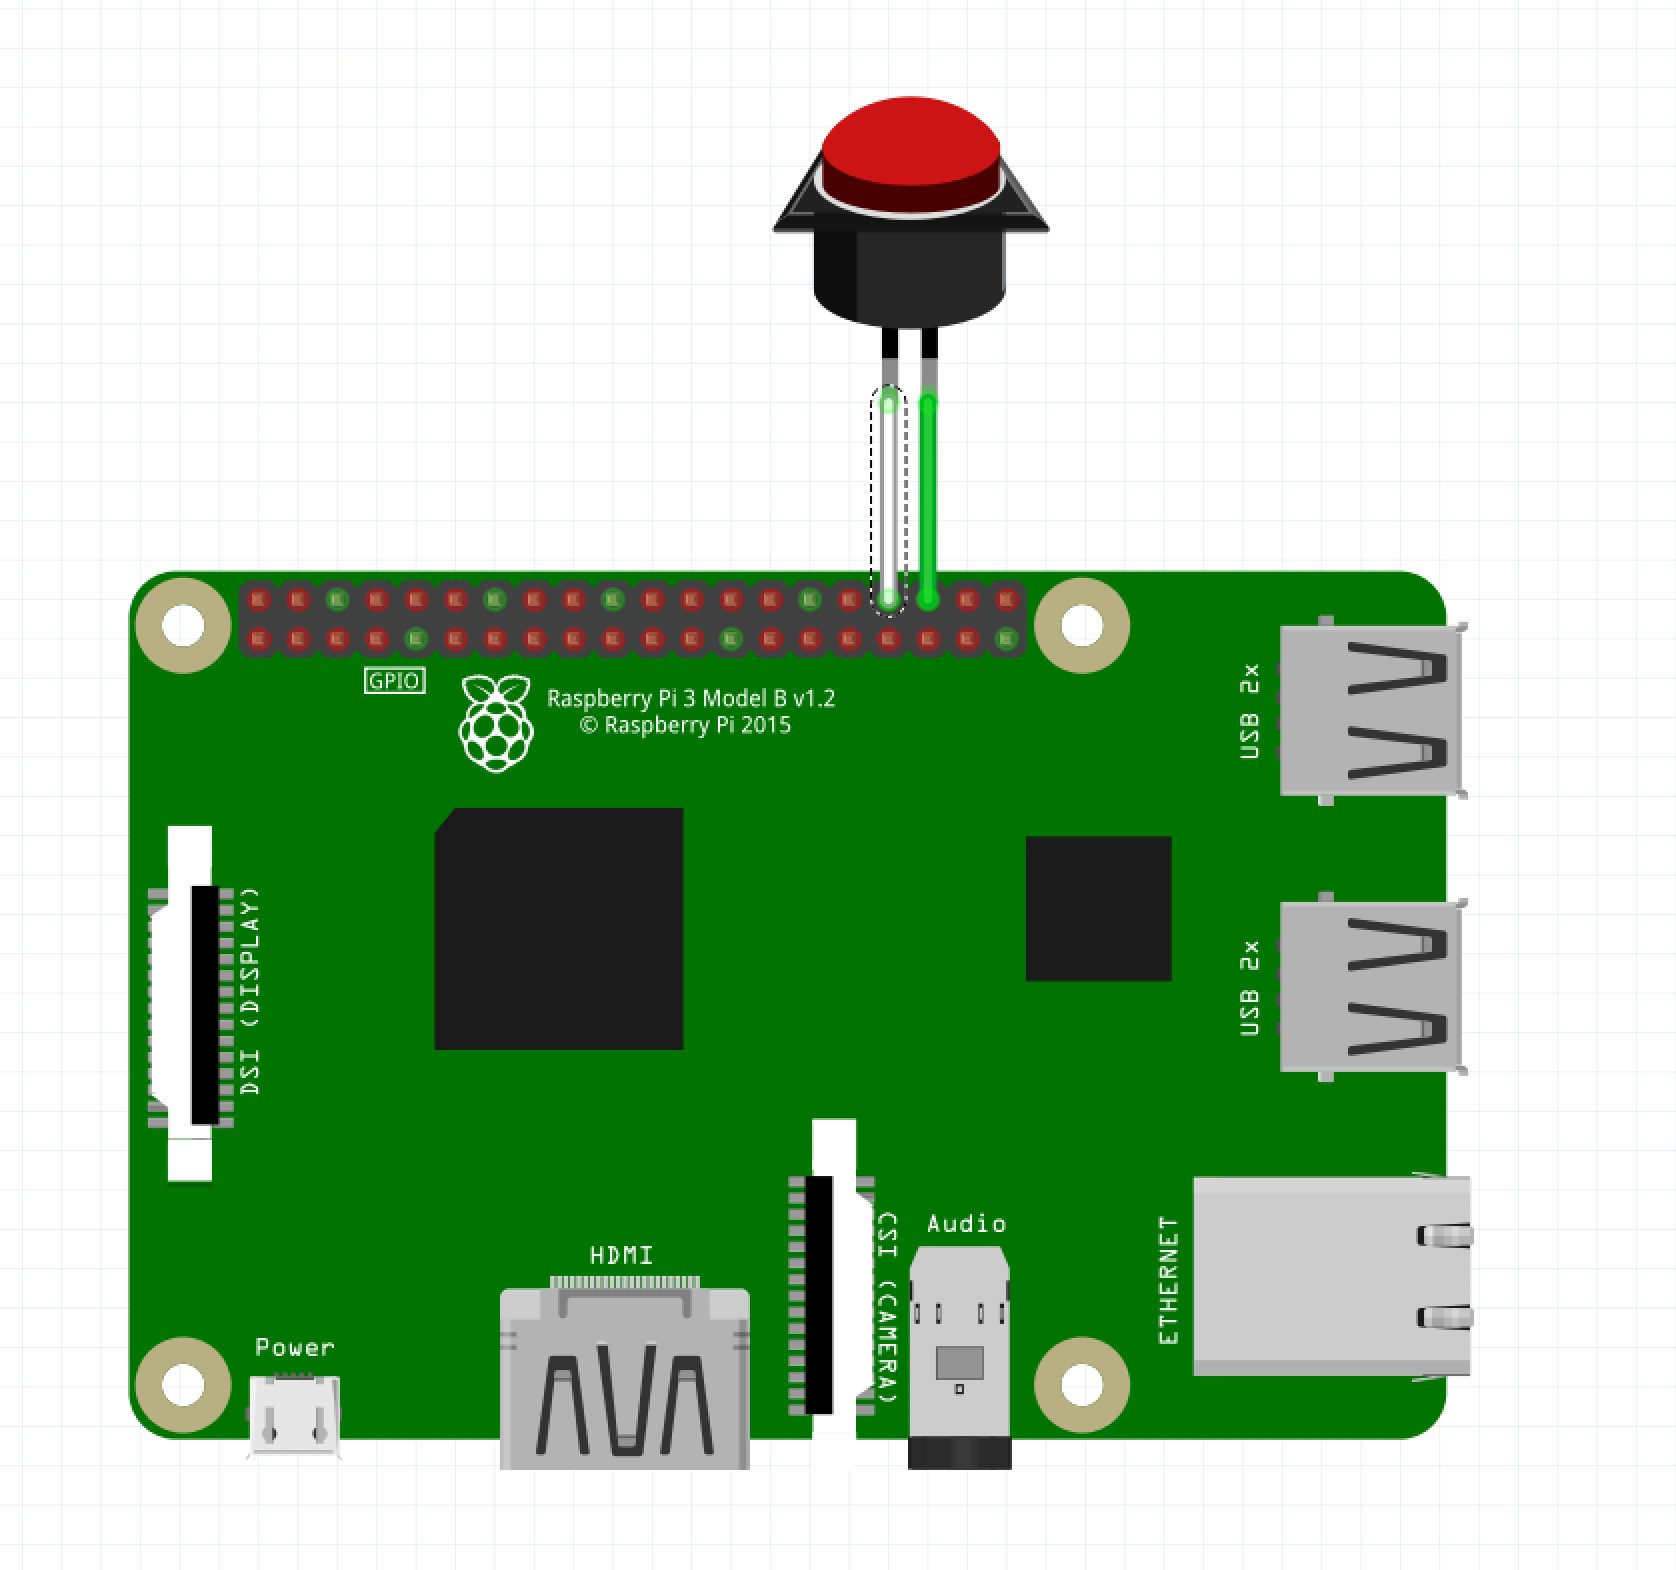
Place the push button into GPIO16(BCM) and Ground on the Raspberry Pi UPS Hat. Pin orientation doesn't matter since we are triggering the shutter button on a change. Then thread the push button/shutter button through the enclosure.
Finally, grab the 3.5" TFT Screen and place it into the TFT enclosure. After placing it inside I used scotch tape to reinforce the enclosure to make sure the TFT Screen stays in place during operation. Then Place the TFT Screen on top of the Raspberry Pi UPS HAT.
Go ahead and power on the Raspberry Pi. You will notice that the TFT Screen isn't working yet. This is because we first need to install the drivers for it. If you purchased the kuman TFT Screen that I linked above follow the instructions below, but if you purchased a different TFT Screen please follow the instructions that came with the Screen.
For the kuman TFT Screen first ssh into the Raspberry Pi then run the following commands:
git clone https://github.com/Lcdwiki/LCD-show.git
chmod -R 755 LCD-show
cd LCD-show/
sudo ./MHS35-showFor the codebase, I built the piDSLM codebase off of a forked a copy of fellow DIYer Martin Manders MerlinPi project. The piDSLM codebase is still in its infancy but it allows the user to take photos/videos, and view them in a gallery. It also allows users to bulk upload the footage to Dropbox. To begin ssh into the Raspberry Pi and run the following command:
git clone https://github.com/NickEngmann/pidslm.git
cd pidslm
You're then going to retrieve a Dropbox Access token to enable to Dropbox footage upload feature. To do this go ahead and go to the Application Developer page on Dropbox. Create an application and click the Generate Access Token button to generate your access token.
Then replace the dummy access token in Dropbox_upload.py with your new access token.
# OAuth2 access token.  TODO: login etc.
TOKEN = 'YOUR_ACCESS_TOKEN'
Finally, run the INSTALL.sh script using the following command
sudo ./INSTALL.shThe install script will go ahead and install all the necessary dependencies, start the piDSLM code on boot, and enable the camera module for the Raspberry Pi.
Take Pictures!That's it! The PiDSLM should reboot at this point and you will see the guizero splashscreen. By pressing the shutter button you will be able to take pictures but you can also press the touchscreen to access all the other features!
If you found this useful, please donate what you think it is worth to my [paypal.me](https://paypal.me/nickengman). Help cover the time of design.
Thanks, Enjoy!


Comments
Please log in or sign up to comment.