Home automation is not limited to adults! This device lets children control lights and other devices in their rooms, in a fun and easy way.
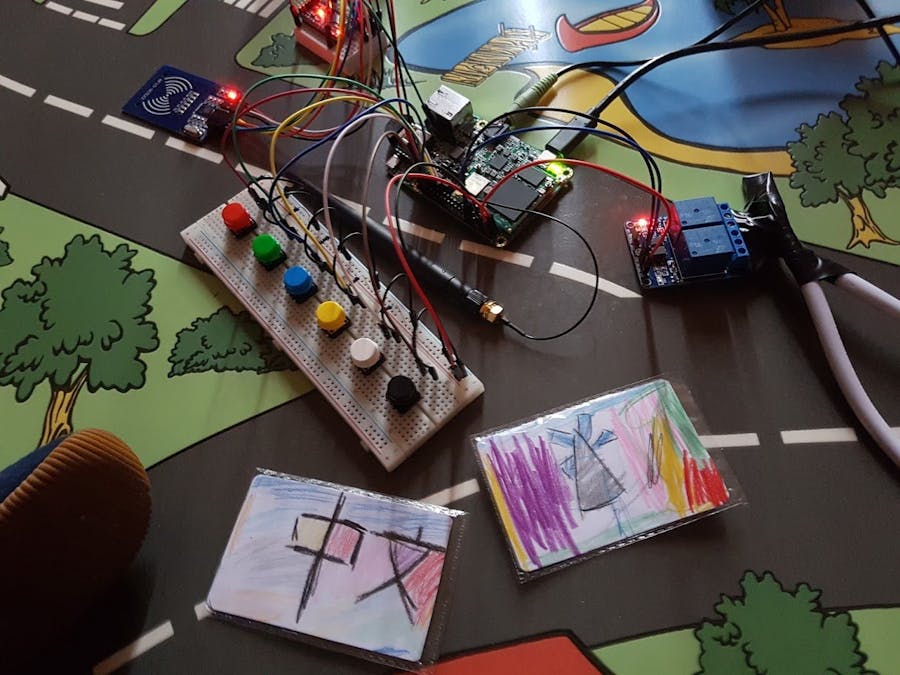
This project is a box with an NFC sensor and 6 colored buttons. When a kid places an RFID device on top of the box (such as a "toys-to-life" figurine) and presses a color button, it will have a direction action in his room, depending on the RFID device.
Among the possible actions, you can:
- Change the light color
- Control the fan
- Play some music
- Learn colors in Chinese
- Talk to the Google Assistant
Here's a video of the prototype, in action:
Children have lots of imagination. Here, controlling the light color is a fun way to imitate the police siren:
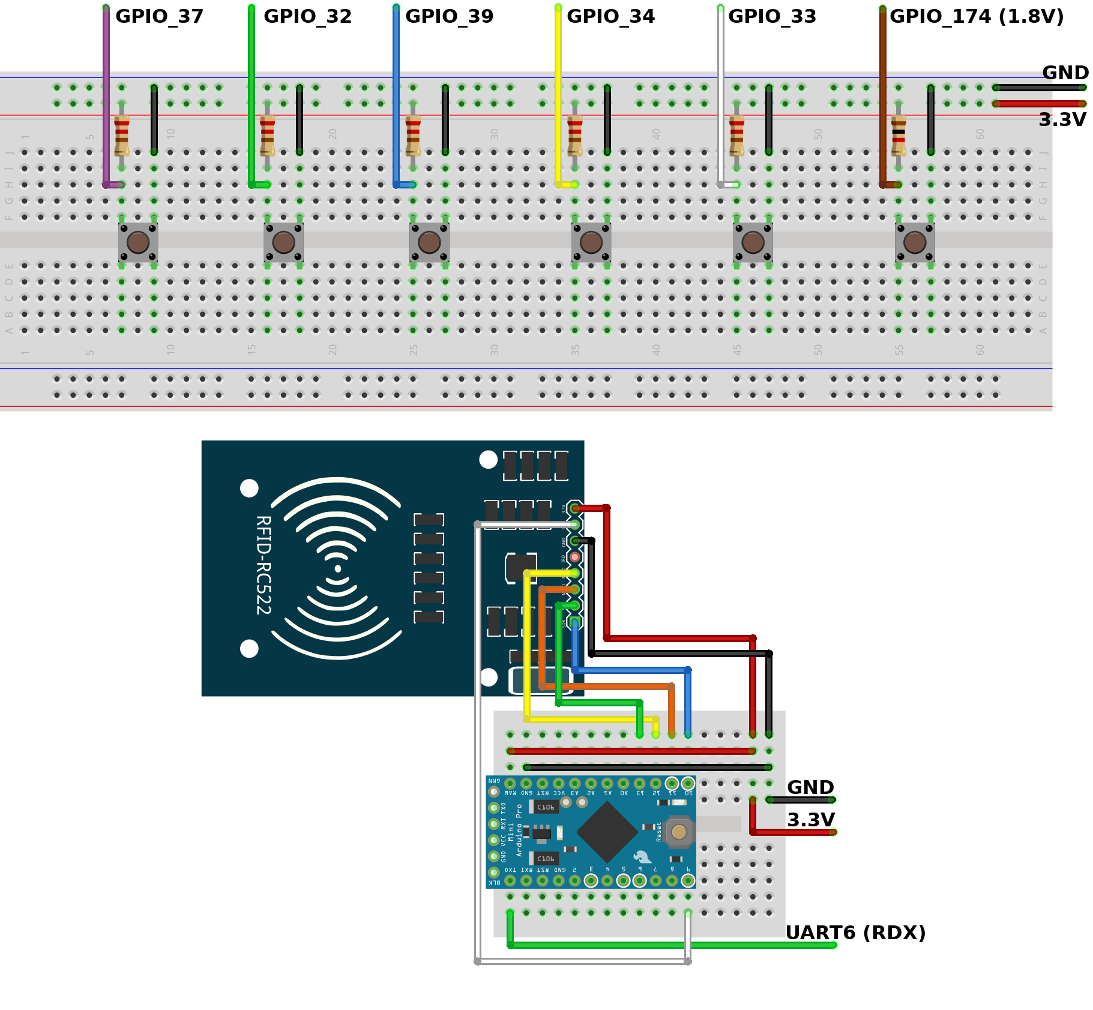
Handling RFID devicesTo simplify using the RC522 RFID Module, we will use an Arduino Pro Mini 3.3V as a proxy.
The Arduino will read RFID devices UIDs, and forward those to the Serial bus, as you can see in the enclosed Arduino sketch (in the "Code" section below).
To receive UIDs from the RC522 module to the Android Things project, a LiveData (from the Android Architecture Components) wrapper will listen to the UART serial, and emit received data (see the enclosed Rc522LiveData file in the "Code" section below).
Now, when a device is detected, the Android Things project will know the ID. When pressed, buttons will have different actions, depending on the last emitted RFID UID.
Handling buttons eventsThe device has 6 buttons: red, green, blue, yellow, white and black.
We will therefore need 6 buttons and 6 (pull-up) resistors, and again create a LiveData wrapper, so that when a button is pressed, an event is emitted to the observer (our MainActivity)
(See the ButtonsLiveData in the "Code" section below)
Now, in our MainActivity, we can observe the ButtonsLiveData and execute an action depending on the last emitted RC522LiveData UID, and the last emitted ButtonsLiveData value:
viewModel.buttonsLiveData.observe({ lifecycle }) { buttonData ->
    Log.i(TAG, "Button pressed: $buttonData")
    val button = buttonData!!.first
    val isPressed = buttonData.second

    viewModel.rc522LiveData.value?.let { rfid ->
        val rfidDevice = RfidDevice.getFromRfidId(rfid)

        // Perform actions here depending on button and rfidDevice variables
    }
}
Children can also be able to talk to the Google Assistant, if parents allow them to providing them an RFID device to trigger Google Assistant actions.
That way, their fun device turns into a real Google Home device.
To setup the Google Assistant, you have to:
- Enable the Google Assistant API and create an OAuth Client ID (name=
androidthings-googleassistant) (Read here for help)
- Download the
client_secret_NNNN.jsonfile from the credentials section of the Console
- Use the
google-oauthlib-toolto generate credentials:
pip install google-auth-oauthlib[tool]
google-oauthlib-tool --client-secrets client_secret_NNNN.json \
  --credentials ./google-assistant/src/main/res/raw/credentials.json \
  --scope https://www.googleapis.com/auth/assistant-sdk-prototype \
  --save
- Make sure to set the Activity Controls for the Google Account using the application.
As you have noticed, button actions (e.g. setting the lights to blue) are hard coded in the project and depend on specific hardware.
But since the device is connected to the Google Assistant, parents could be able to record predefined sentences (such as "Set the lights to red in the kid's room") for each RFID device and button. Those sentences will be persisted in the Android Things device, and forwarded to the Google Assistant when a button is pressed. That way, it makes the kids' assistant compatible with any devices in the market (as long as they support the Google Assistant). To add support to a new device, you won't have to write specific code for this project, but instead, use the Actions on Google SDK, to make your new device compatible with both the Google Home, and the Kids' Room Automation device.
Prettify the deviceA tissue-box and RFID cards look boring, so my kid personalized everything with some drawings and stickers. We also used real "toys-to-life" figurine available in any video games store.
Here's what our own device looks like. Each device will be different depending on your children's tastes.
Cloning the repository:Full project is available on GitHub (see the Code section below).
We would love to see your own kids assistant too!
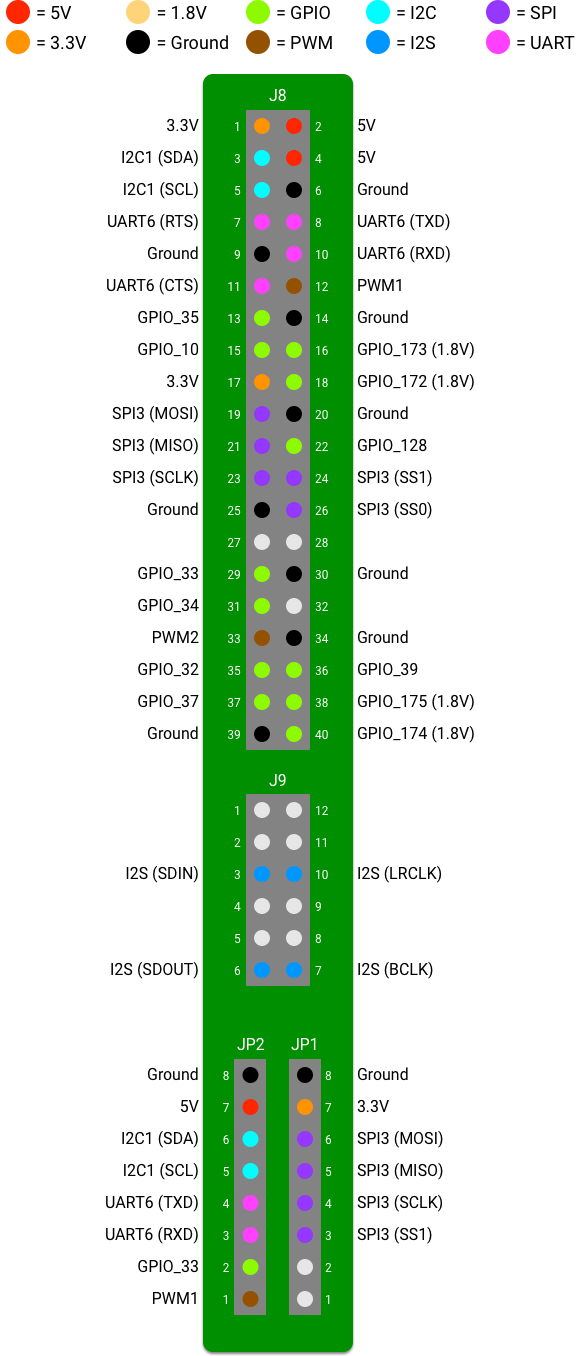
Schematics below are for the NXP.iMX7D. You can, of course use any Android Things compatible board.


_3u05Tpwasz.png?auto=compress%2Cformat&w=40&h=40&fit=fillmax&bg=fff&dpr=2)

Comments
Please log in or sign up to comment.